
Cory was channel surfing one night and happen to catch the last scene of the Ghostbusters. To no surprise, the boys were completely captivated and loved hearing the theme song at the end. When trying to come up with Halloween costumes, I decided to pitch the idea of being the Ghostbusters. I thought I would have to do some convincing, but Jacob and Evan immediately got excited, saying they couldn’t wait to “Toast the Stay Puft Marshmallow Man!!”… My inner child-of-the-80’s could not be more thrilled.
I ordered kids flight coveralls for their costume (UPDATE: Amazon NOW OFFERS KHAKI COVERALLS!!!) I then purchased Ghostbusters patches from Amazon. They sell individual name kits (Venkman, Spengler, Stantz, and Zeddemore), a pack of 4, as well as personalized name tags you can purchase with just the logo patch.
To make the proton pack, I used the following on-hand supplies:
-
- Shipping Box, 13.5 x 10.5 x 5″
- Black Spray Paint (Flat Black Paint+Primer)
- Black Duct Tape
- Industrial Strength Glue
- Grey Craft Paint
- Multi-colored Striped Ribbon
- Black Strap Material
- Printable Sticker Paper (or shipping label paper)
- Red Sharpie
- Glow Stick
And purchased the following items from the Dollar Store:
-
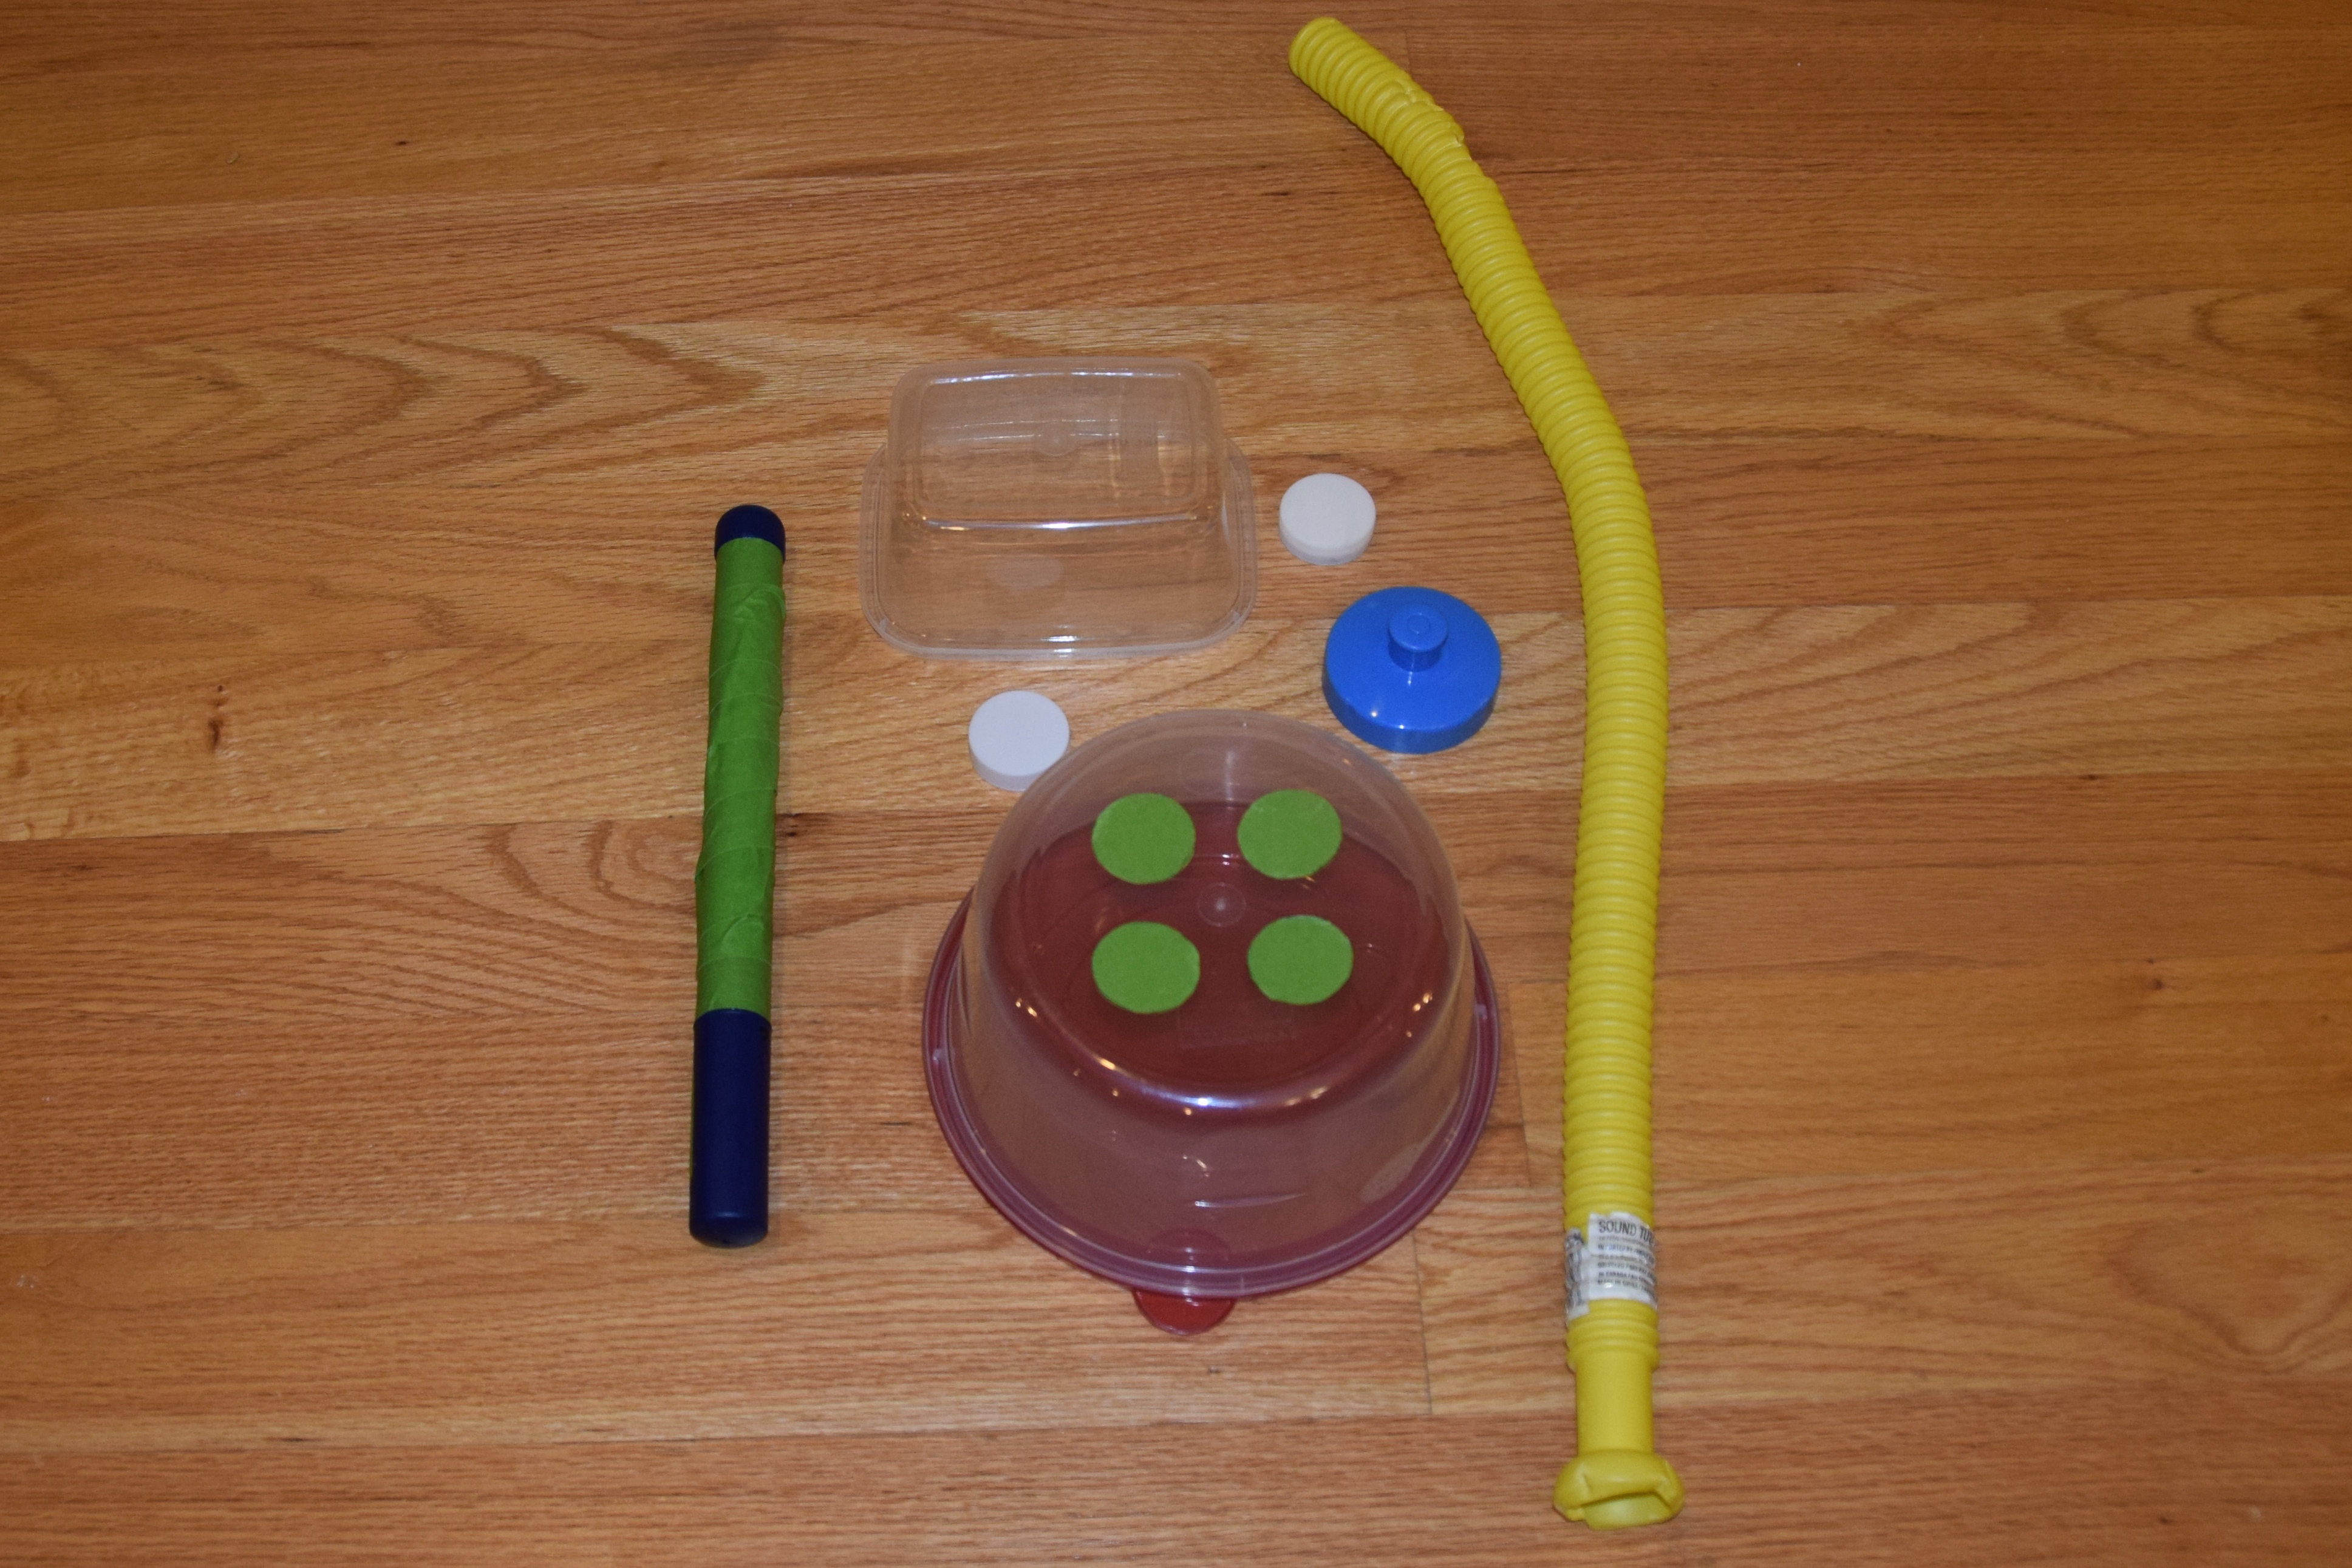
- 7.5″ Round Plastic Container

- 6.25 x 4.5″ Rectangular Plastic Container

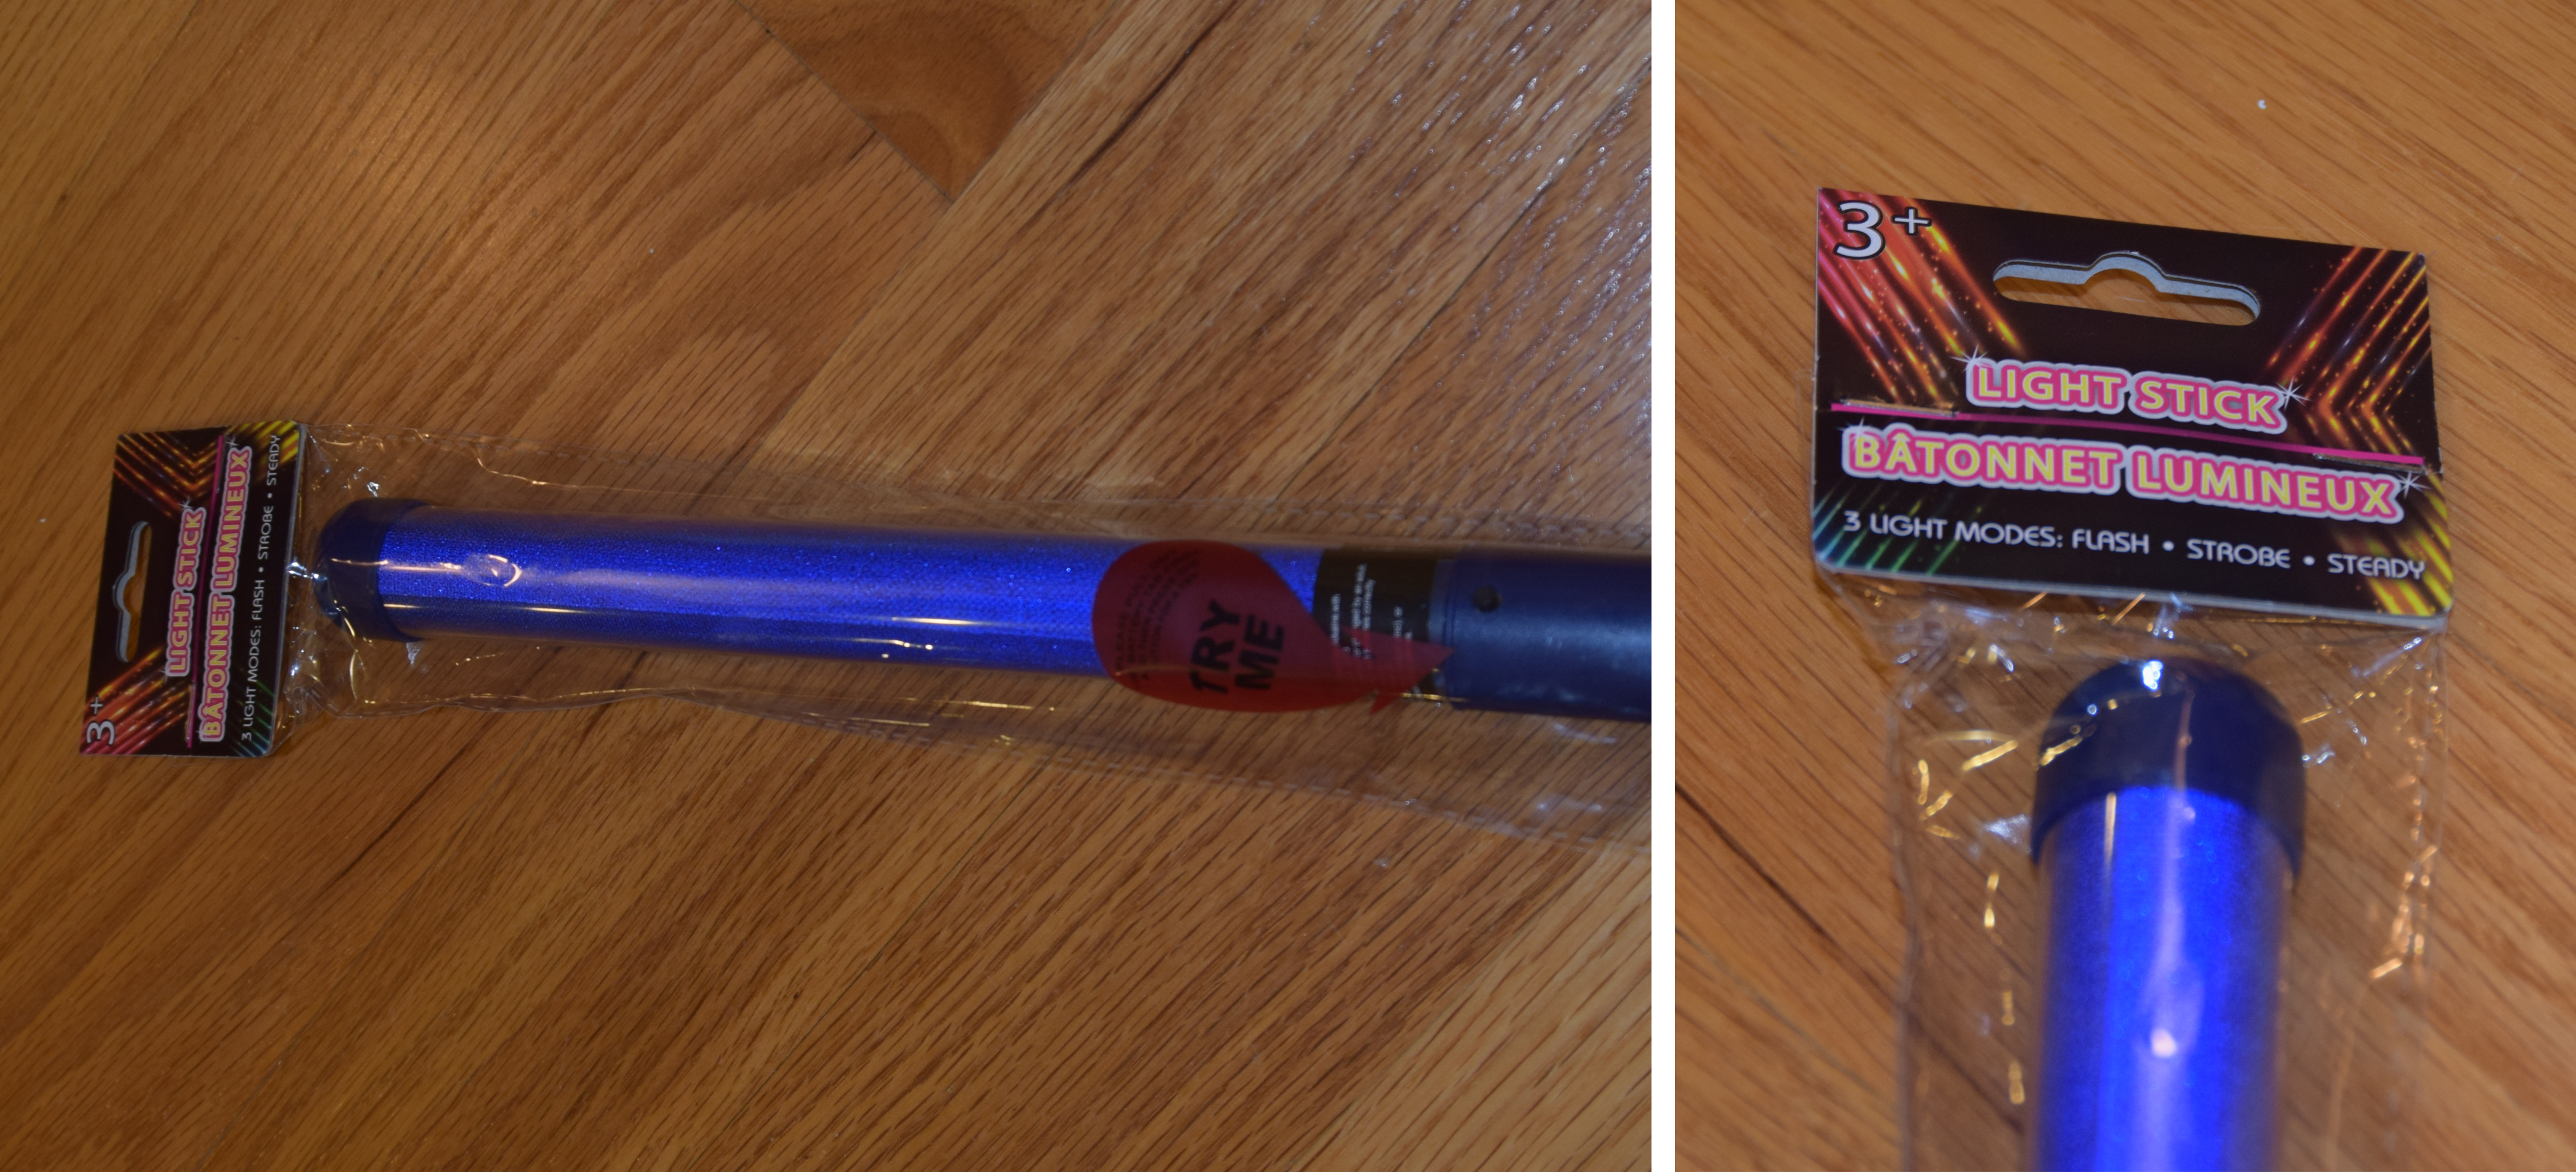
- Blue Light Stick (or Similar)

- Yellow and Red Jump Ropes


- 3-Pack of Bubbles

- Sound Tube

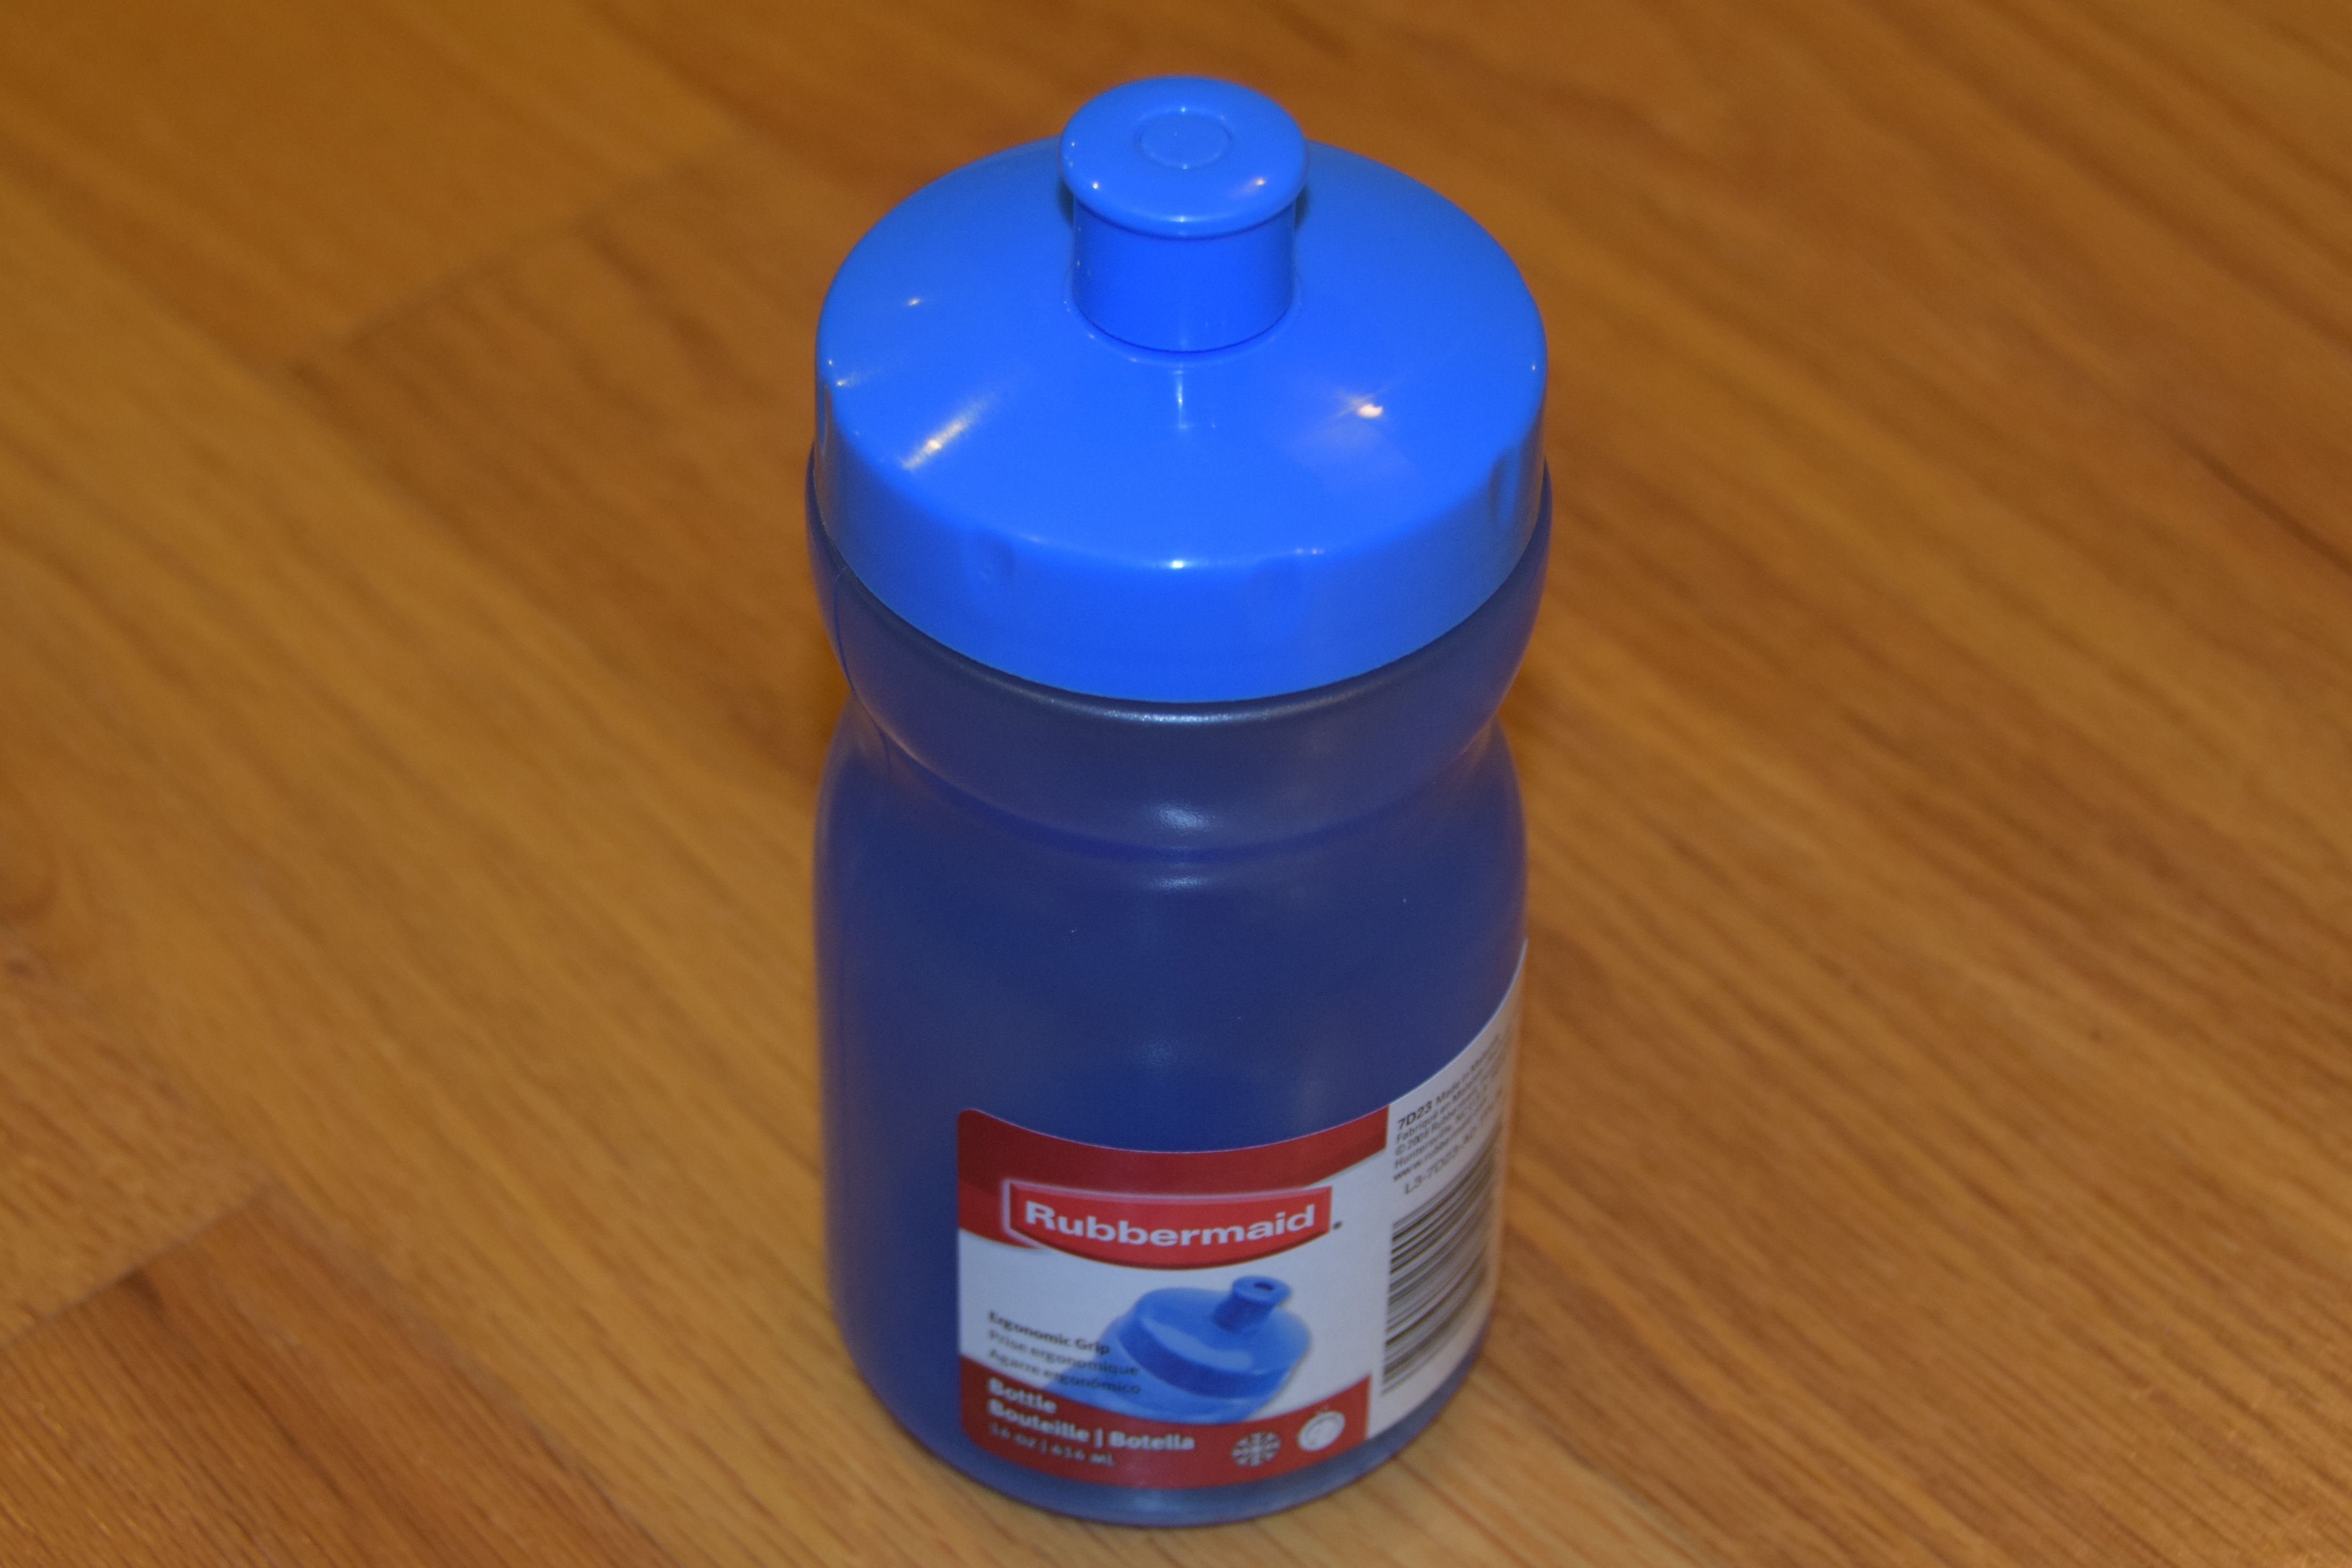
- Water Bottle

- Flashing Multi-Colored Light Stick

- Oversized Pen

- 7.5″ Round Plastic Container


…Lots of lights and things that glow – Toddler approved!!
STEP ONE:
- Cut 4 circles from painter’s tape (I prefer Frog Tape) and stick them on the round plastic container.
- Cover the light-up section of the blue light stick with painter’s tape.
- Spray paint the following items:
– Shipping Box (IMPORTANT: If you would like the red circles to light up, leave one side of box open so a glow stick can be inserted into the round container on day of use.)
– Round Container (lid not needed)
– Rectangular Container (lid not needed)
– 2 bubble Caps
– Water Bottle Top
– Blue Light Stick
– Sound Wand
STEP TWO:

- Take apart the oversized pen.
- Connect the tip of the pen to the flashing multi-colored light stick.
- Insert the bottom of the flashing multi-colored light stick into the middle section of the oversized pen.
- Wrap black Duct Tape around the bottom, to connect the wand with the pen and cover any non-black print.
STEP THREE:

- Paint the tip of the water bottle grey (I used craft paint)
STEP FOUR:

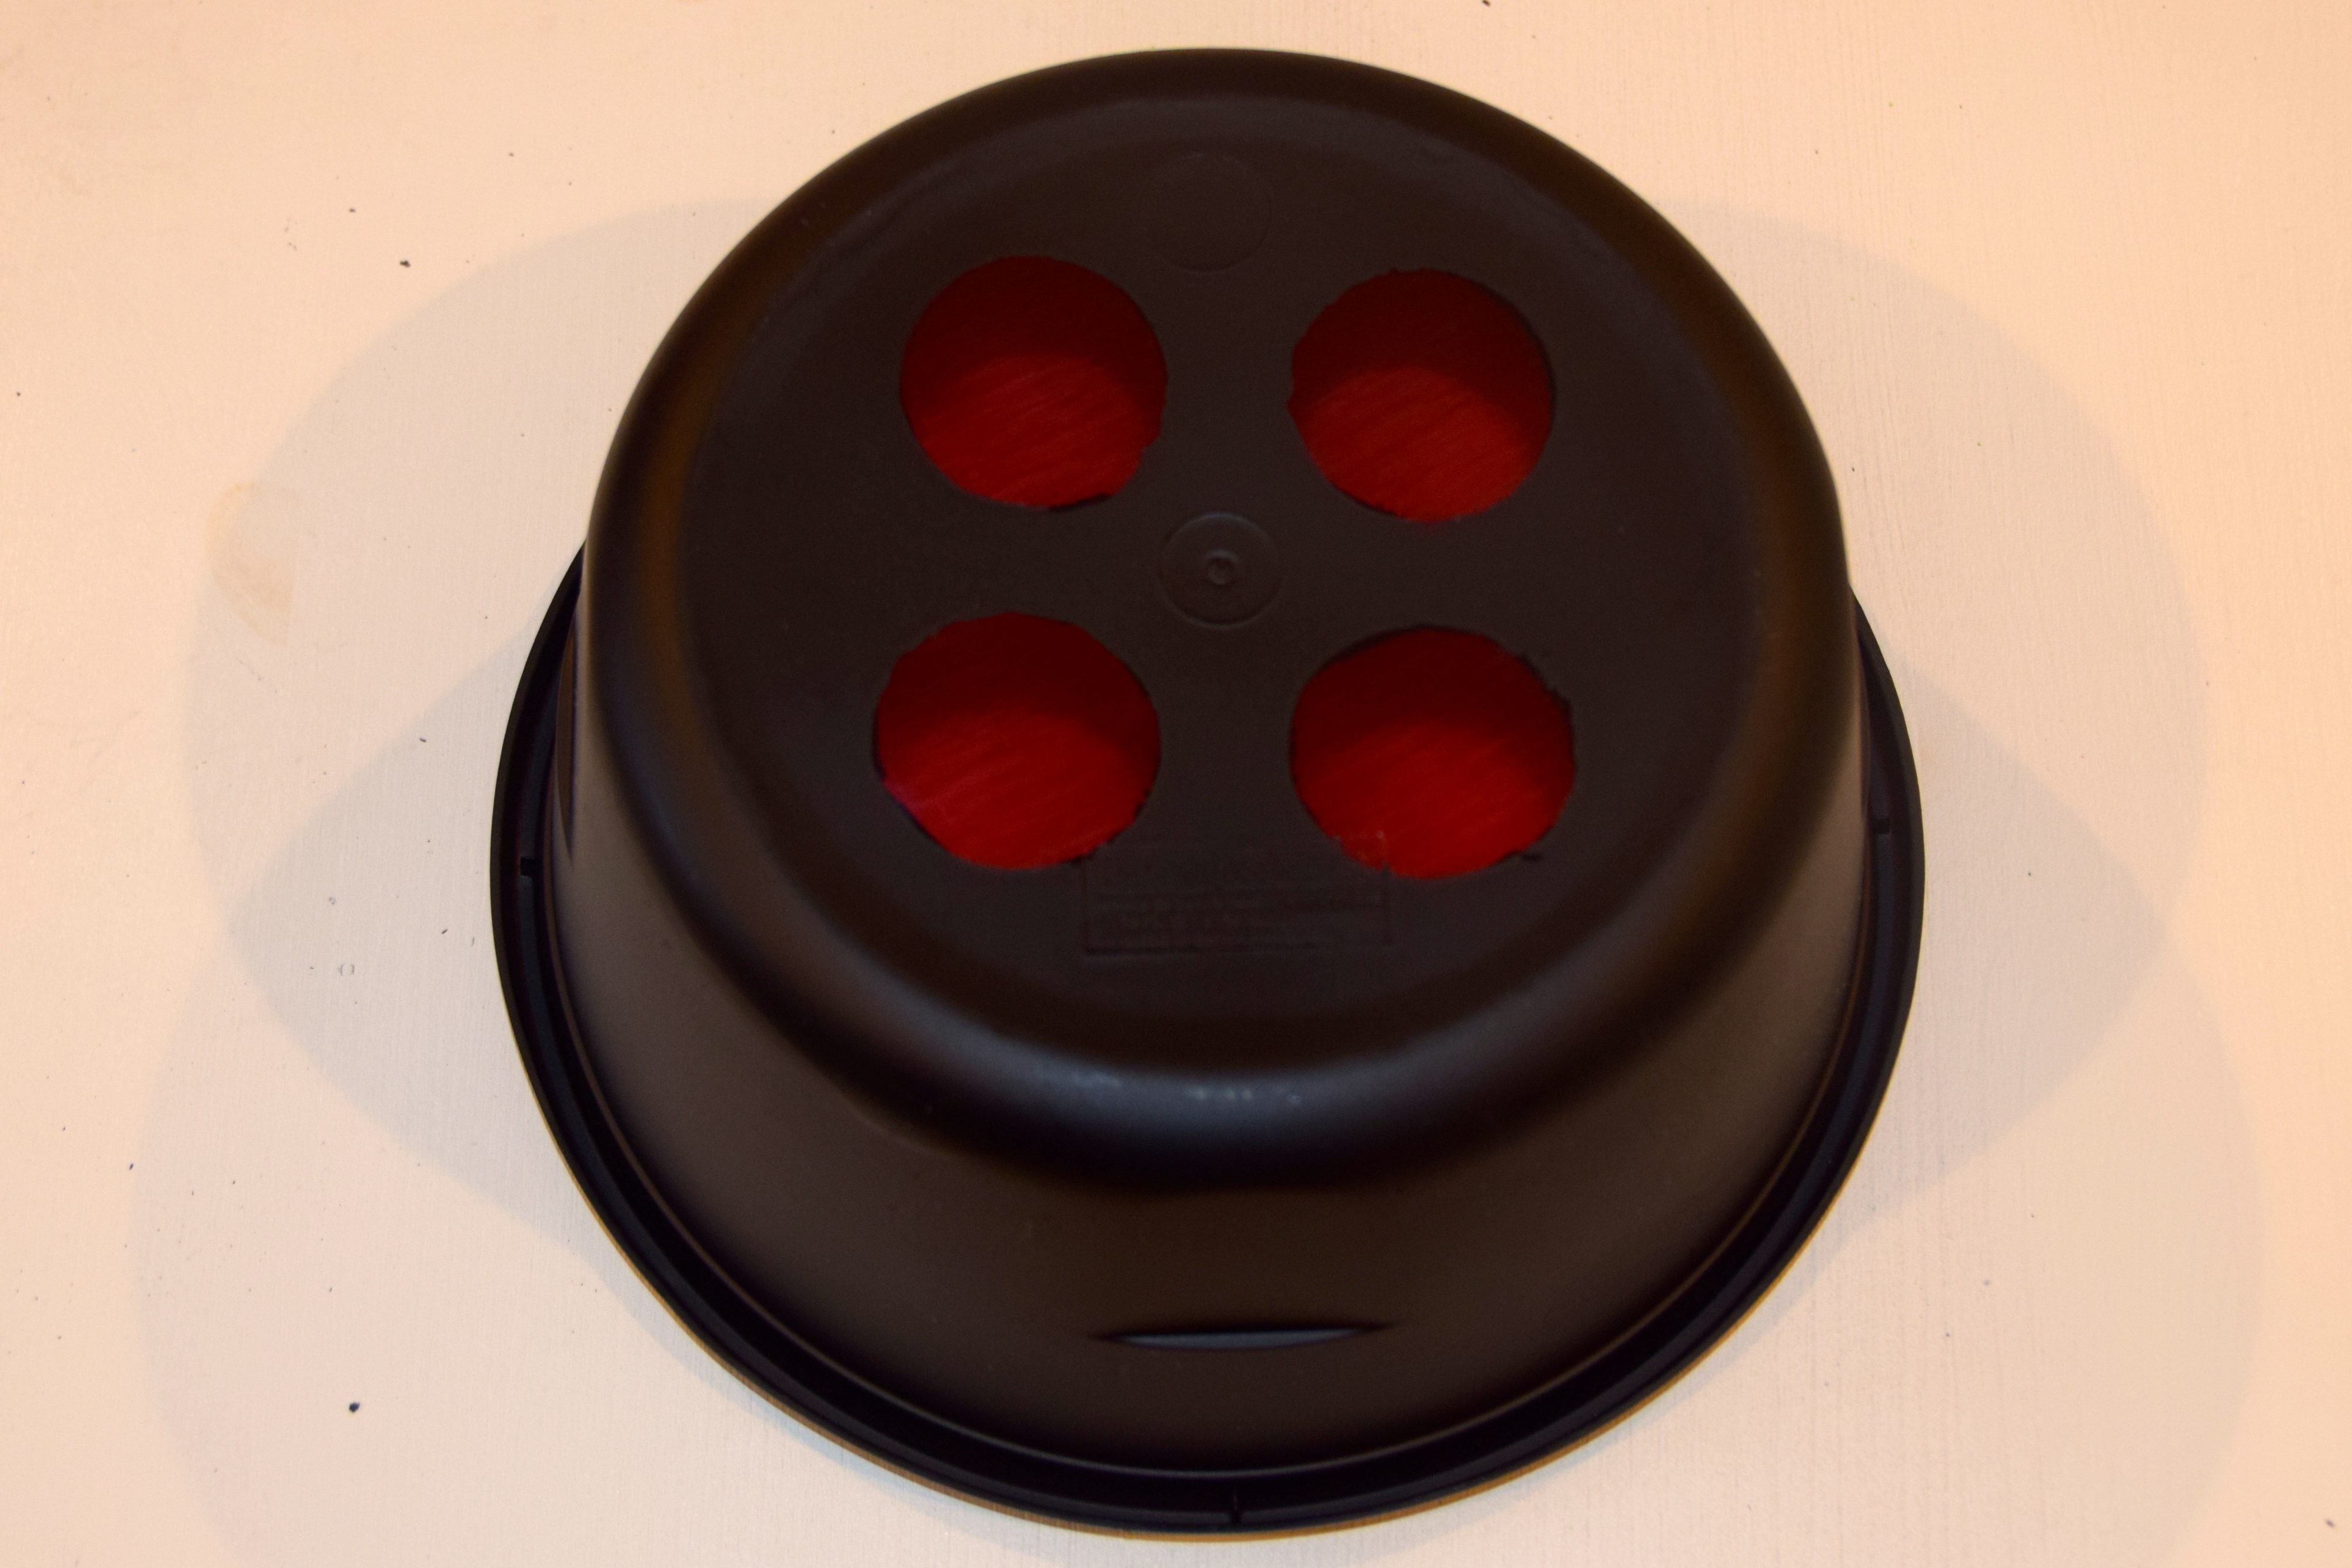
- Remove painter’s tape VERY CAREFULLY from the round container (the paint around it peels up easily).
- Color clear sections with red Sharpie (a thick Sharpie works best)
STEP FIVE:

- Drill 2 holes into ONE of the bubble caps.
- Cut a section of red jump rope.
- Insert one end of the jump rope into the top of the cap, and feed it back through the other hole.
STEP SIX:

- Cut a section of red and yellow jump rope.
- Duct Tape rope pieces to the blue light stick (similar light stick found HERE).
STEP SEVEN:


- Attach blue light stick to the front, left side of the box with Duct Tape.
- Cut section of striped, multi-colored ribbon.
- Duct Tape ribbon to inside of rectangular container, twist the ribbon and attach other end of ribbon to the box with Duct Tape.
STEP EIGHT:
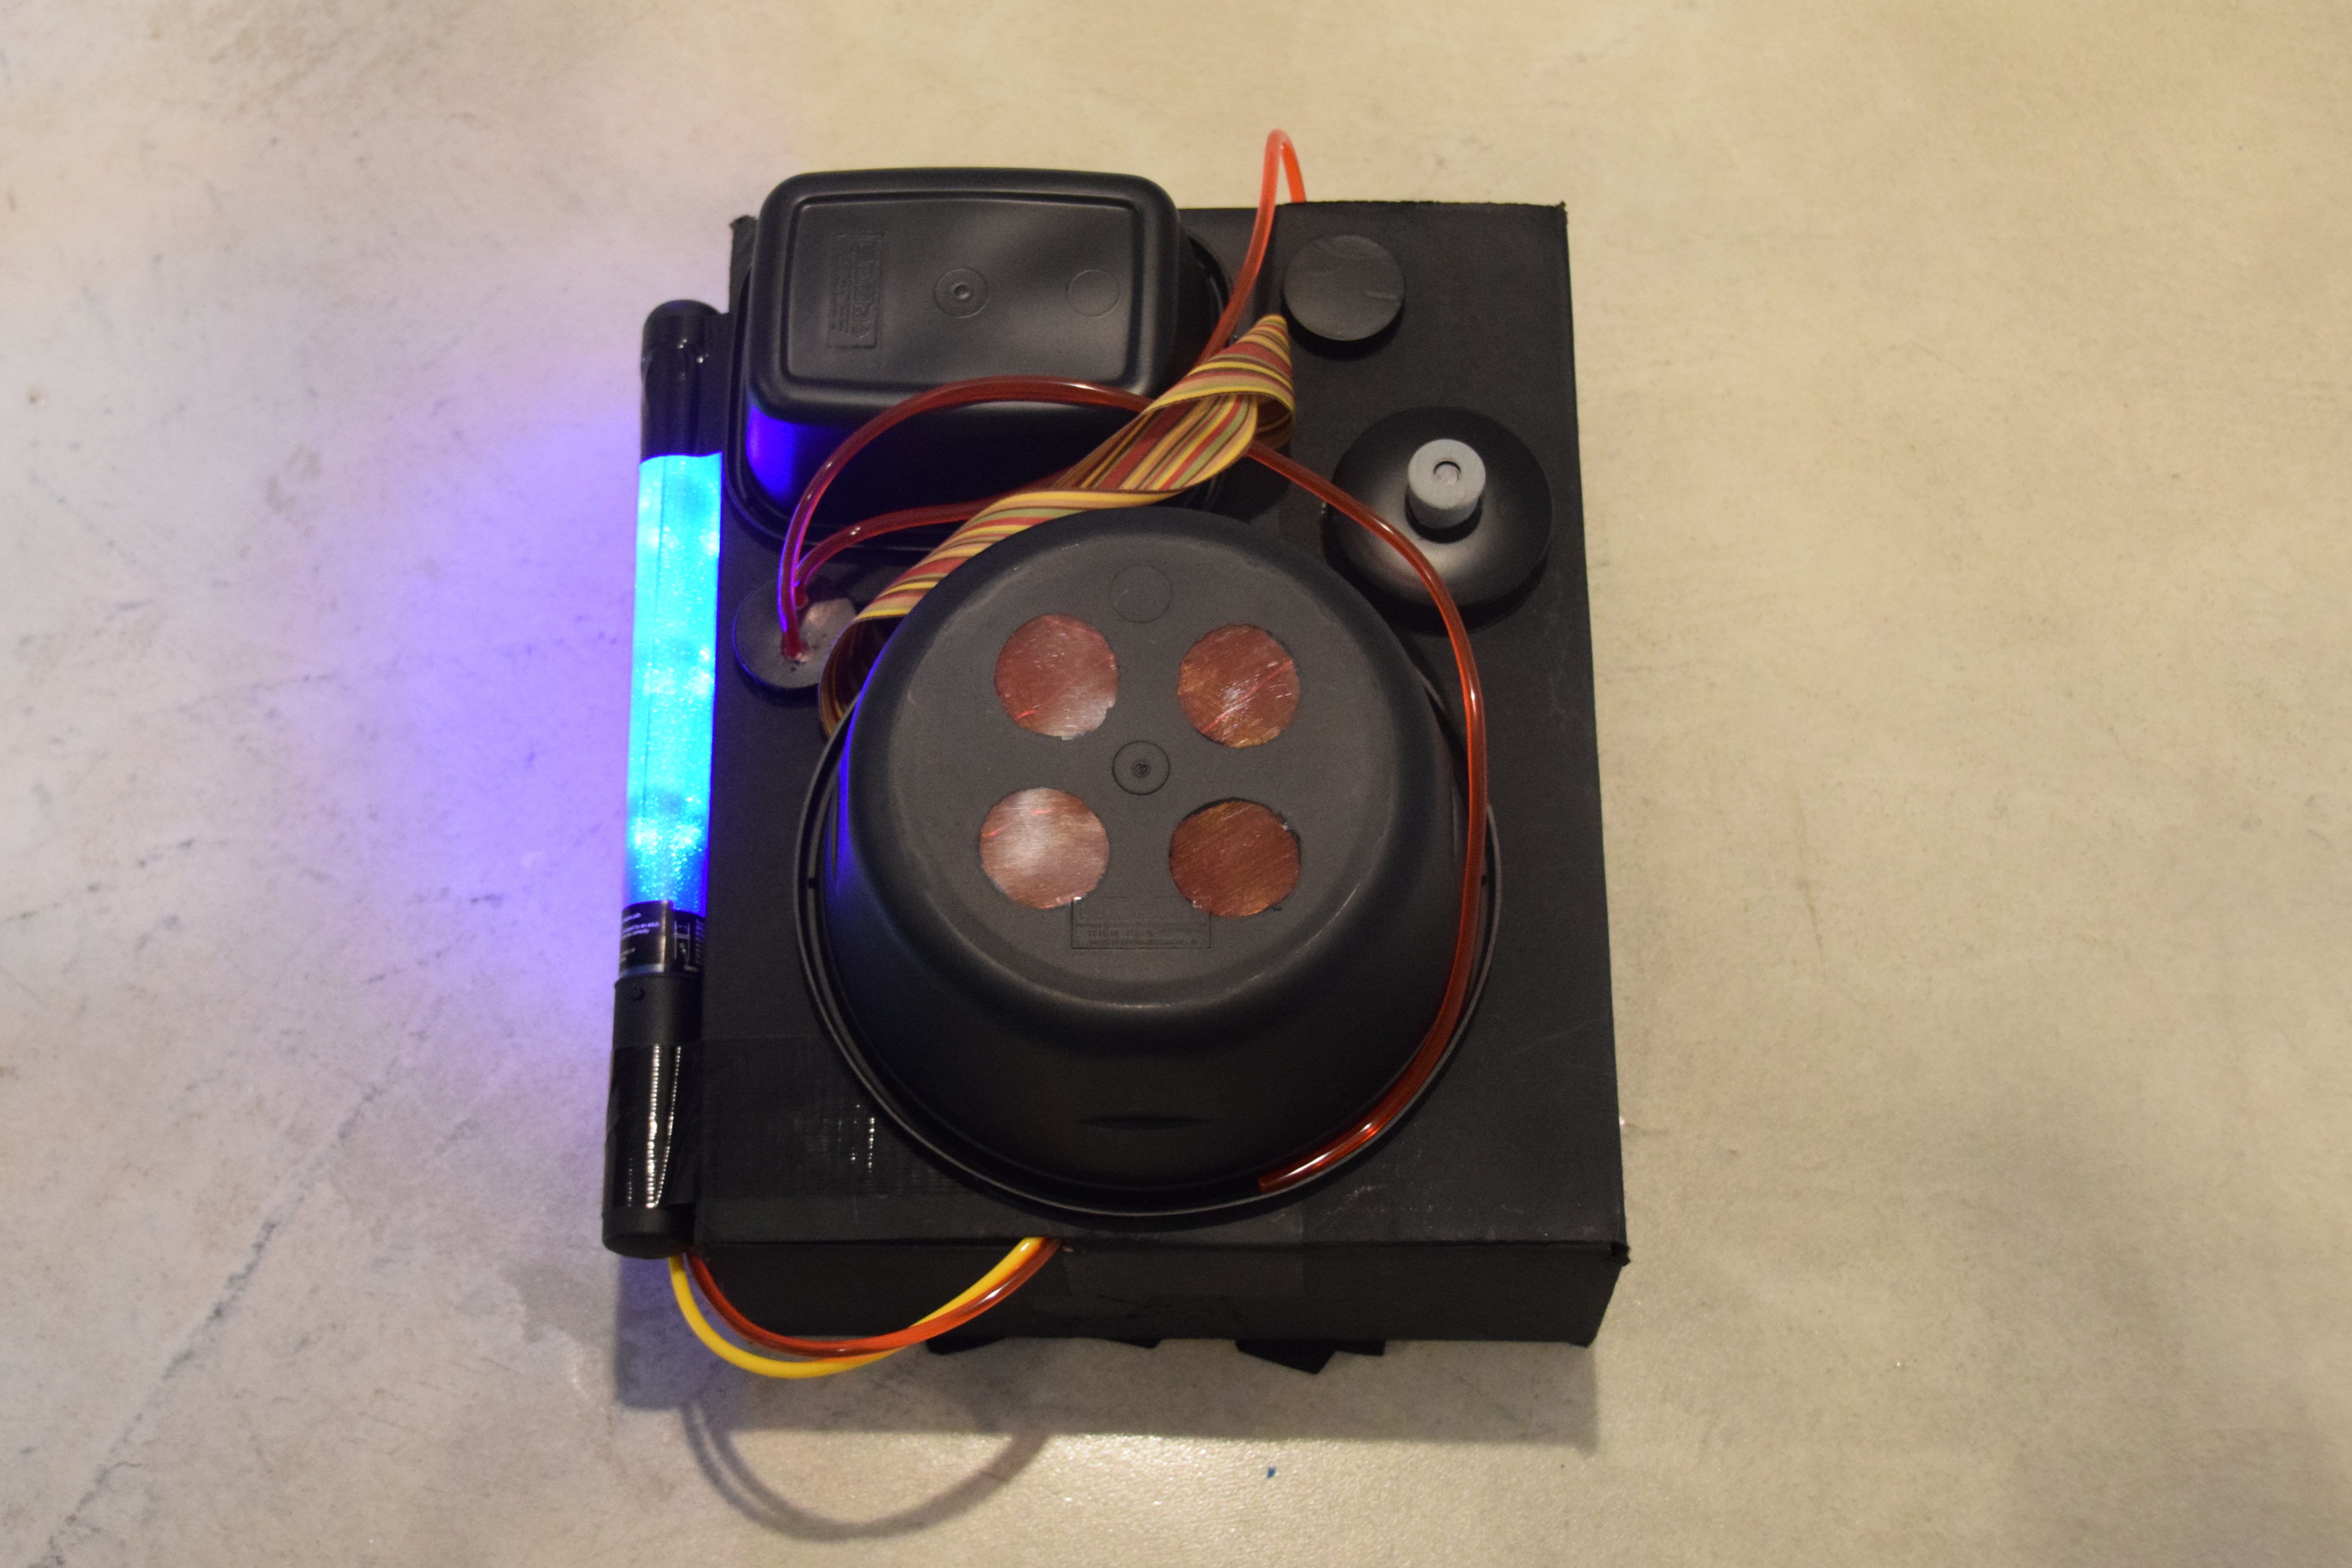
- Glue all front proton pack pieces in place (round container, rectangular container, 2 bubble caps, and water bottle top). Note: Leave jump rope ends loose, so there is no tension on glued pieces.
- Let glue dry overnight.
- Tuck yellow and red jump rope pieces, from the blue light stick, into the bottom slit in the shipping box.
- Tuck top red jump rope into the slit at top of box, and insert the other red rope into the bottom right curve of the round container.
STEP NINE:


- Cut a hole into the inside of the box, so a glow stick can be inserted into the round container for day of use.
- Staple and/or tape black straps to the open flaps of the back of the box.
- Cut a circle hole in the right side of the box (IMPORTANT: The hole needs to be JUST large enough to fit the sound tube, without allowing the larger end pull through).
- Insert small end of the sound tube into the inside of the box and pull through till the large end catches.
- Cut sound tube to desired length, insert the flashing multi-colored light stick/pen piece into the tube and Duck Tape to hold.
- Insert glow stick into back hole for the round container.
- Tape back of proton pack shut.
- Print proton pack stickers and stick in appropriate locations.

Click HERE to download file with labels to size and scale for this DIY proton pack

Finished product and reversed proton pack for my lefty.


STEP TEN:
- TOAST THE STAY PUFT MARSHMALLOW MAN!!!

DISCLAIMER: These DIY proton packs do not generate actual laser streams. In the event of a ghost problem, please call the Ghostbusters at 555-2368.
“Don’t. Cross. The streams. It would be bad.”
Related Posts: DIY Lion Guard Costumes
DIY Paw Patrol Costumes
Follow me on Pinterest, for more fun ideas!


Pingback: Paw Patrol Family Halloween Costume | Projects In Parenting
How and what did you use for straps so they may be able to put it on?
LikeLike
I used black fabric/nylon strapping, similar to this: https://www.amazon.com/Dritz-Nylon-Strapping-Black-60/dp/B004BP752Q
I stapled and taped the straps to the open flaps of the back of the box, before closing the back. (You can see part of the strap in the image for Step 9).
Hope this helps. Feel free to contact me with any other questions.
Good luck with your project and thank you for visiting my blog!
LikeLike
I stuffed old back packs in the box and made slits for the straps to go in.
LikeLike
That’s a great idea! Love it!!
LikeLike
Love this! Where did you get their outfits?
LikeLike
I’m glad you like it. Thanks for visiting my blog!… I purchased their coveralls from Amazon. I can’t find the seller I got them from, but these appear to be the same ones from a different seller: https://www.amazon.com/Rothco-Kids-Flight-Coverall-Olive/dp/B000UNZMN2?psc=1
The quality is phenominal. It’s almost a year later and my kids still use the costumes to play Ghostbusters. I purchased a size up and glad I did. They still have plenty of room to grow.
LikeLike
Pingback: DIY Lion Guard Costumes | Projects In Parenting
Hi. Any plans to do a Ecto 1 roof rack lol. The only DIY tutorials I can find online are so expensive like the thing is actually gonna work lol.
LikeLike
I do not have plans to do so, sorry. But props to you or anyone else that does so – sounds awesome!
LikeLike
I LOVE THIS!!
What Size overalls did you go with? Im thinking XS for my 4 year old but it does say they run small.
LikeLike
My boys were 3 years old and I purchased a Small. You can see in the pictures that they are slightly baggy on them (which I was totally fine with)… They are 5 now and still play dress up with them. 🙂
LikeLike
This is fantastic! Good job, mama. My son is obsessed with Ghostbusters so we are having a Ghostbusters themed birthday party for him. I would love to do this if I have time. The store bought costumes come with an inflatable proton pack which looks so cheesy. How many hours would you guess you spent making it?
LikeLike
Thanks! It took me a couple of hours, not including spray paint dry time… If you’re looking for a quicker solution, there’s also this toy proton pack from Amazon: https://www.amazon.com/Mattel-Ghostbusters-Electronic-Proton-Projector/dp/B01ARGATBG/ref=mp_s_a_1_1?ie=UTF8&qid=1537758266&sr=8-1&pi=AC_SX236_SY340_QL65&keywords=proton+pack&dpPl=1&dpID=51ckMSo215L&ref=plSrch
LikeLike
Pingback: Costumes From Our 1980s Childhood Are Back This Halloween!
Thnak you for this tuto!! I’ll make a birthday party with “gosth buster” for theme.
LikeLiked by 1 person
Awesome tutorial! I followed as many of your tips as I could (my dollar store didn’t have a few things so I had to improvise). And thank you SO much for the sticker download!
LikeLiked by 1 person
Thank you! Happy to hear you were able to improvise – great way to make it your own!
LikeLike