Thanksgiving Activity Placemat

My son Jacob and I were talking about Thanksgiving coming up and he tells me “I’m looking forward to your activities”. I paused, not understanding what he was talking about and asked “What activities?”. He replies, “Like your Thanksgiving Joke Teller“….. While I was happy he appreciated my efforts last year, I felt bad I hadn’t come up with anything new for this year. Not wanted to let him down, I decided to design a Thanksgiving-themed placemat with fun activities including a maze, word search, how-to-draw and one of their favorites – a secret decoder message to solve!

Click HERE to download the Thanksgiving Activity Placemat Printable from my Etsy Shop.

Advertisement

Toddler Water Activities

Toddler Water Activities

With summer comes water – especially here in Chicago, where the heat and humidity can make a bed of ice cubes sound comfortable. Even with the scorching weather, I like to spend as much time as I can outdoors with the kids – which means LOTS of water activities to keep them cool. We have a ton of fun with sprinklers, water balloons, and the kiddie pool, but sometimes they need a little extra creativity to catch their interest and get them excited to play outside in the heat.

With 3 little ones, I try to stick with activities that have minimal set-up time. I’ve seen a ton of great ideas on Pinterest, and as fun as some of them may be, I simply don’t have the time for things like building an extravagant “car wash” system out of PVC, hoses and hanging sponges…. For me, simple = good. And holding the kids attention for 30+ minutes = WIN!

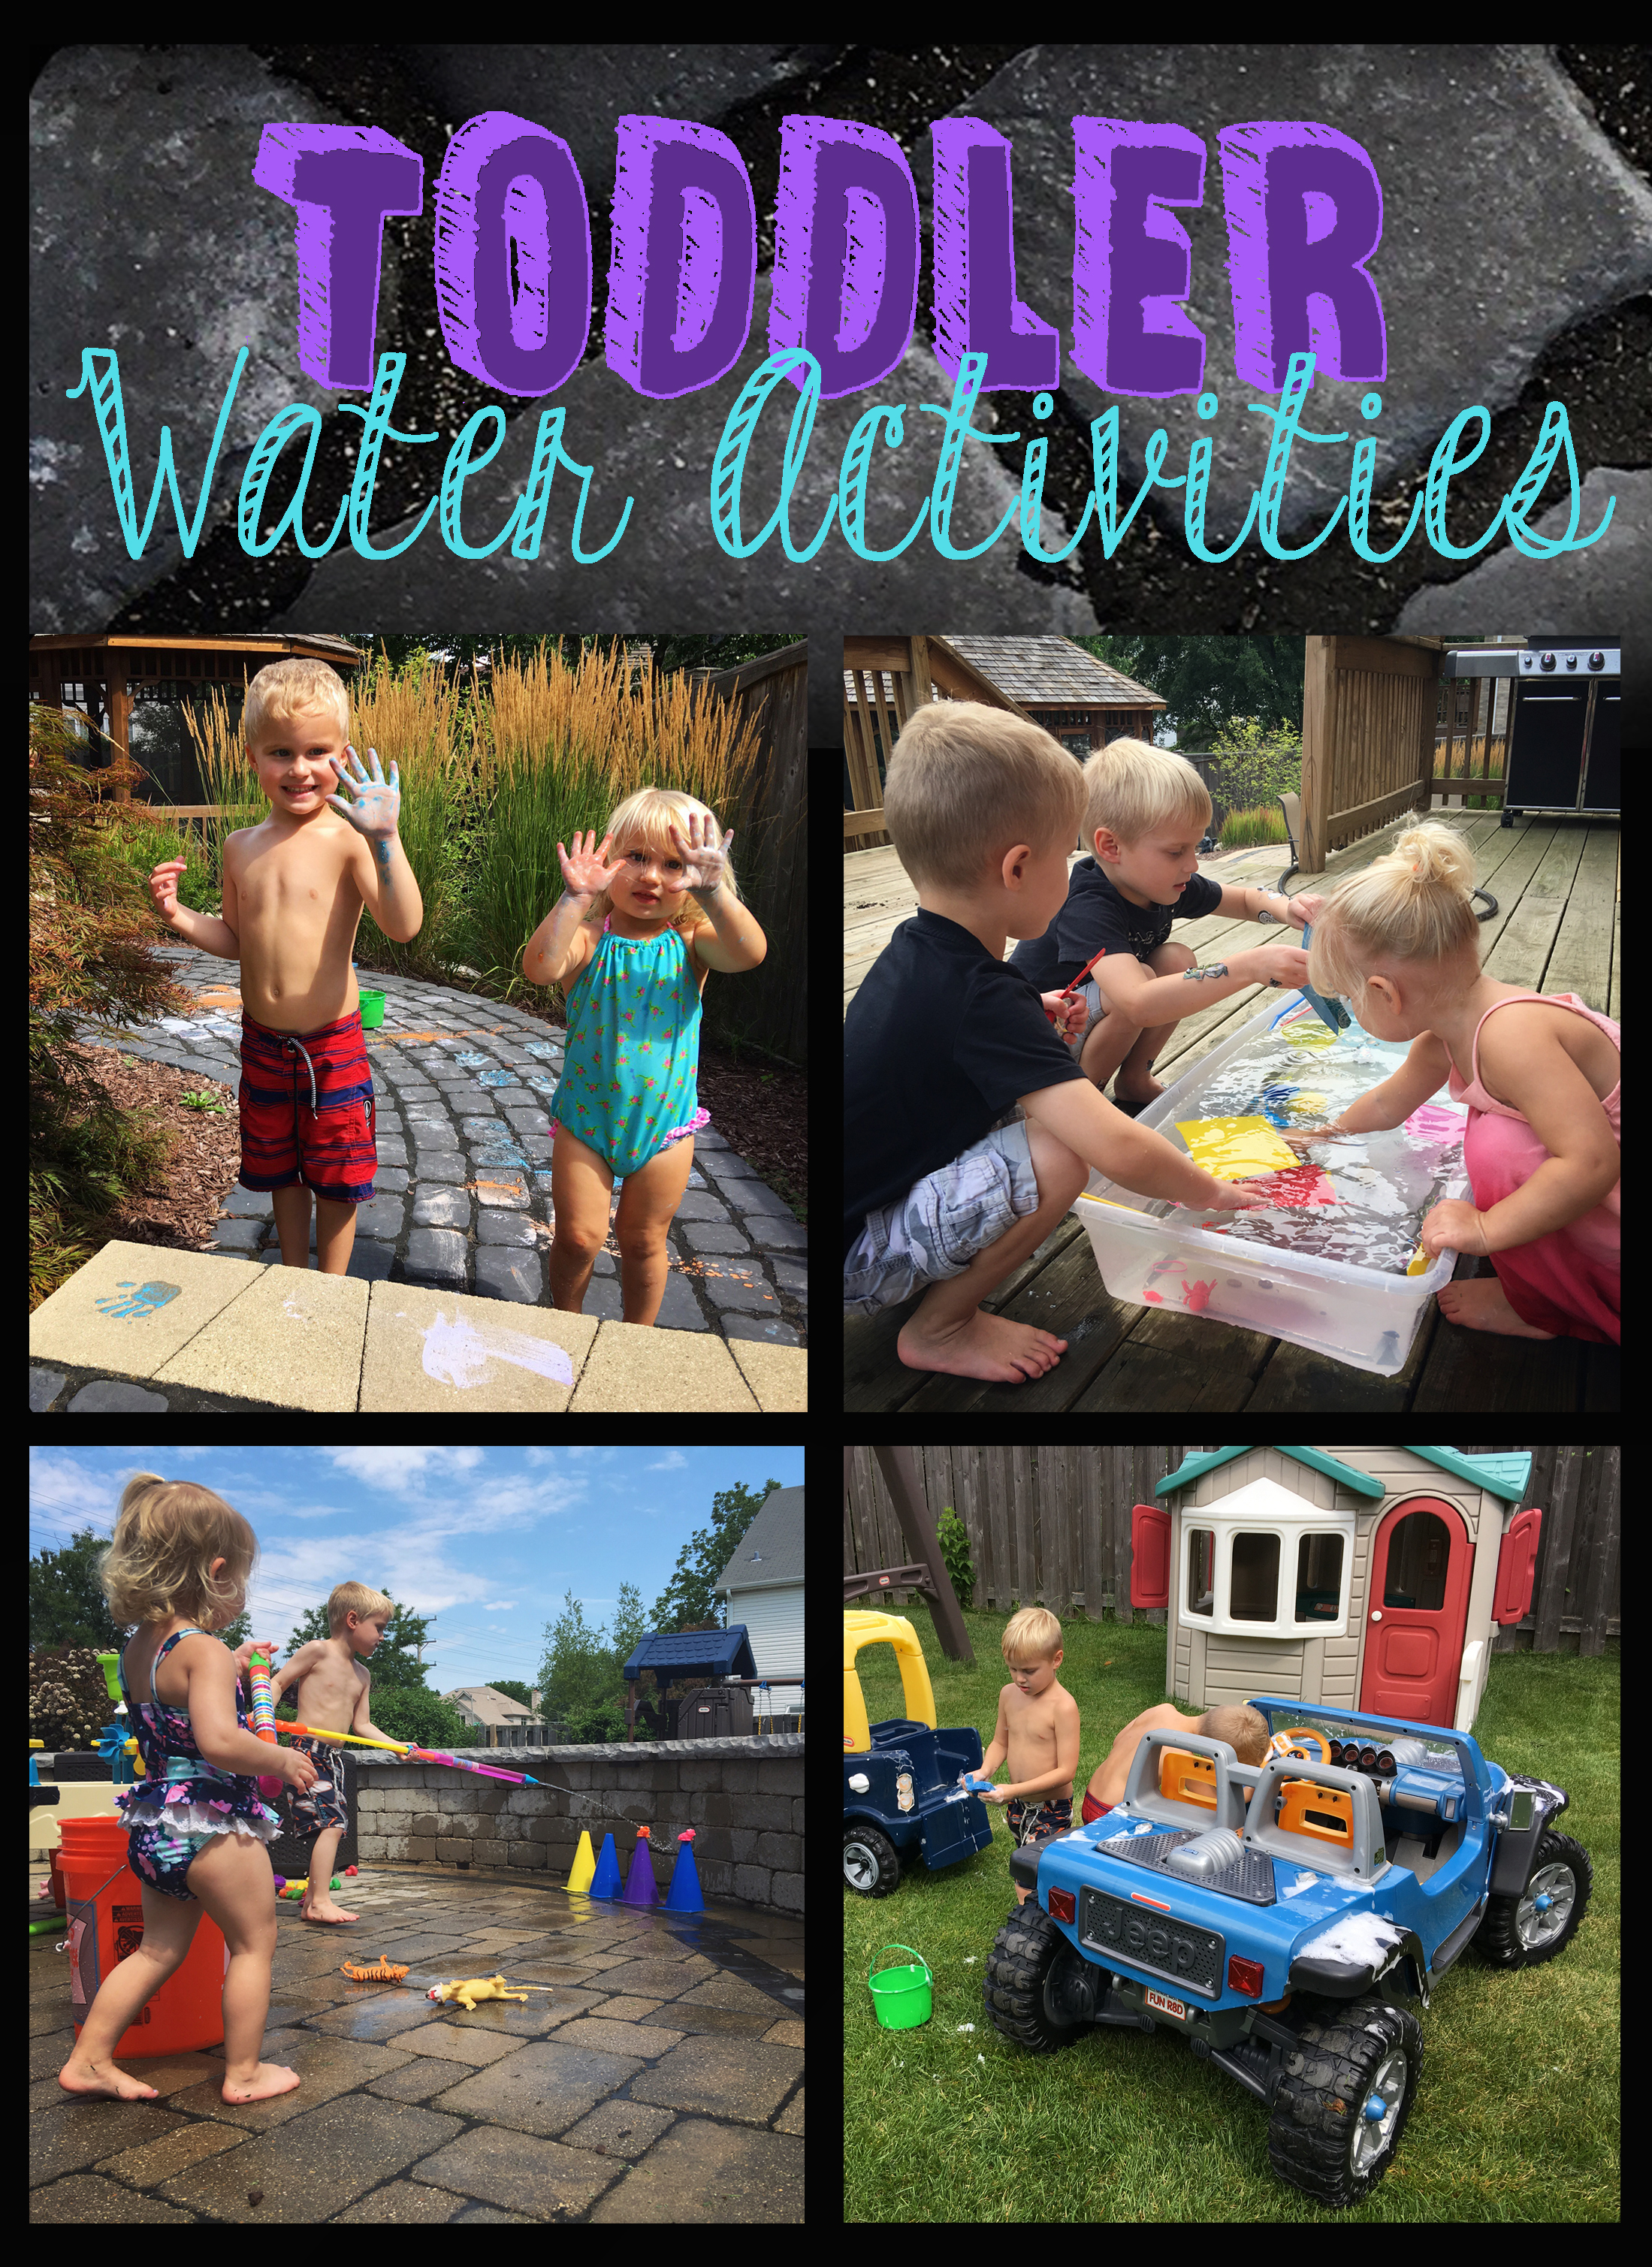
That said, below is a list of our top 10 water activities…

1. Target Practice

Target Practice
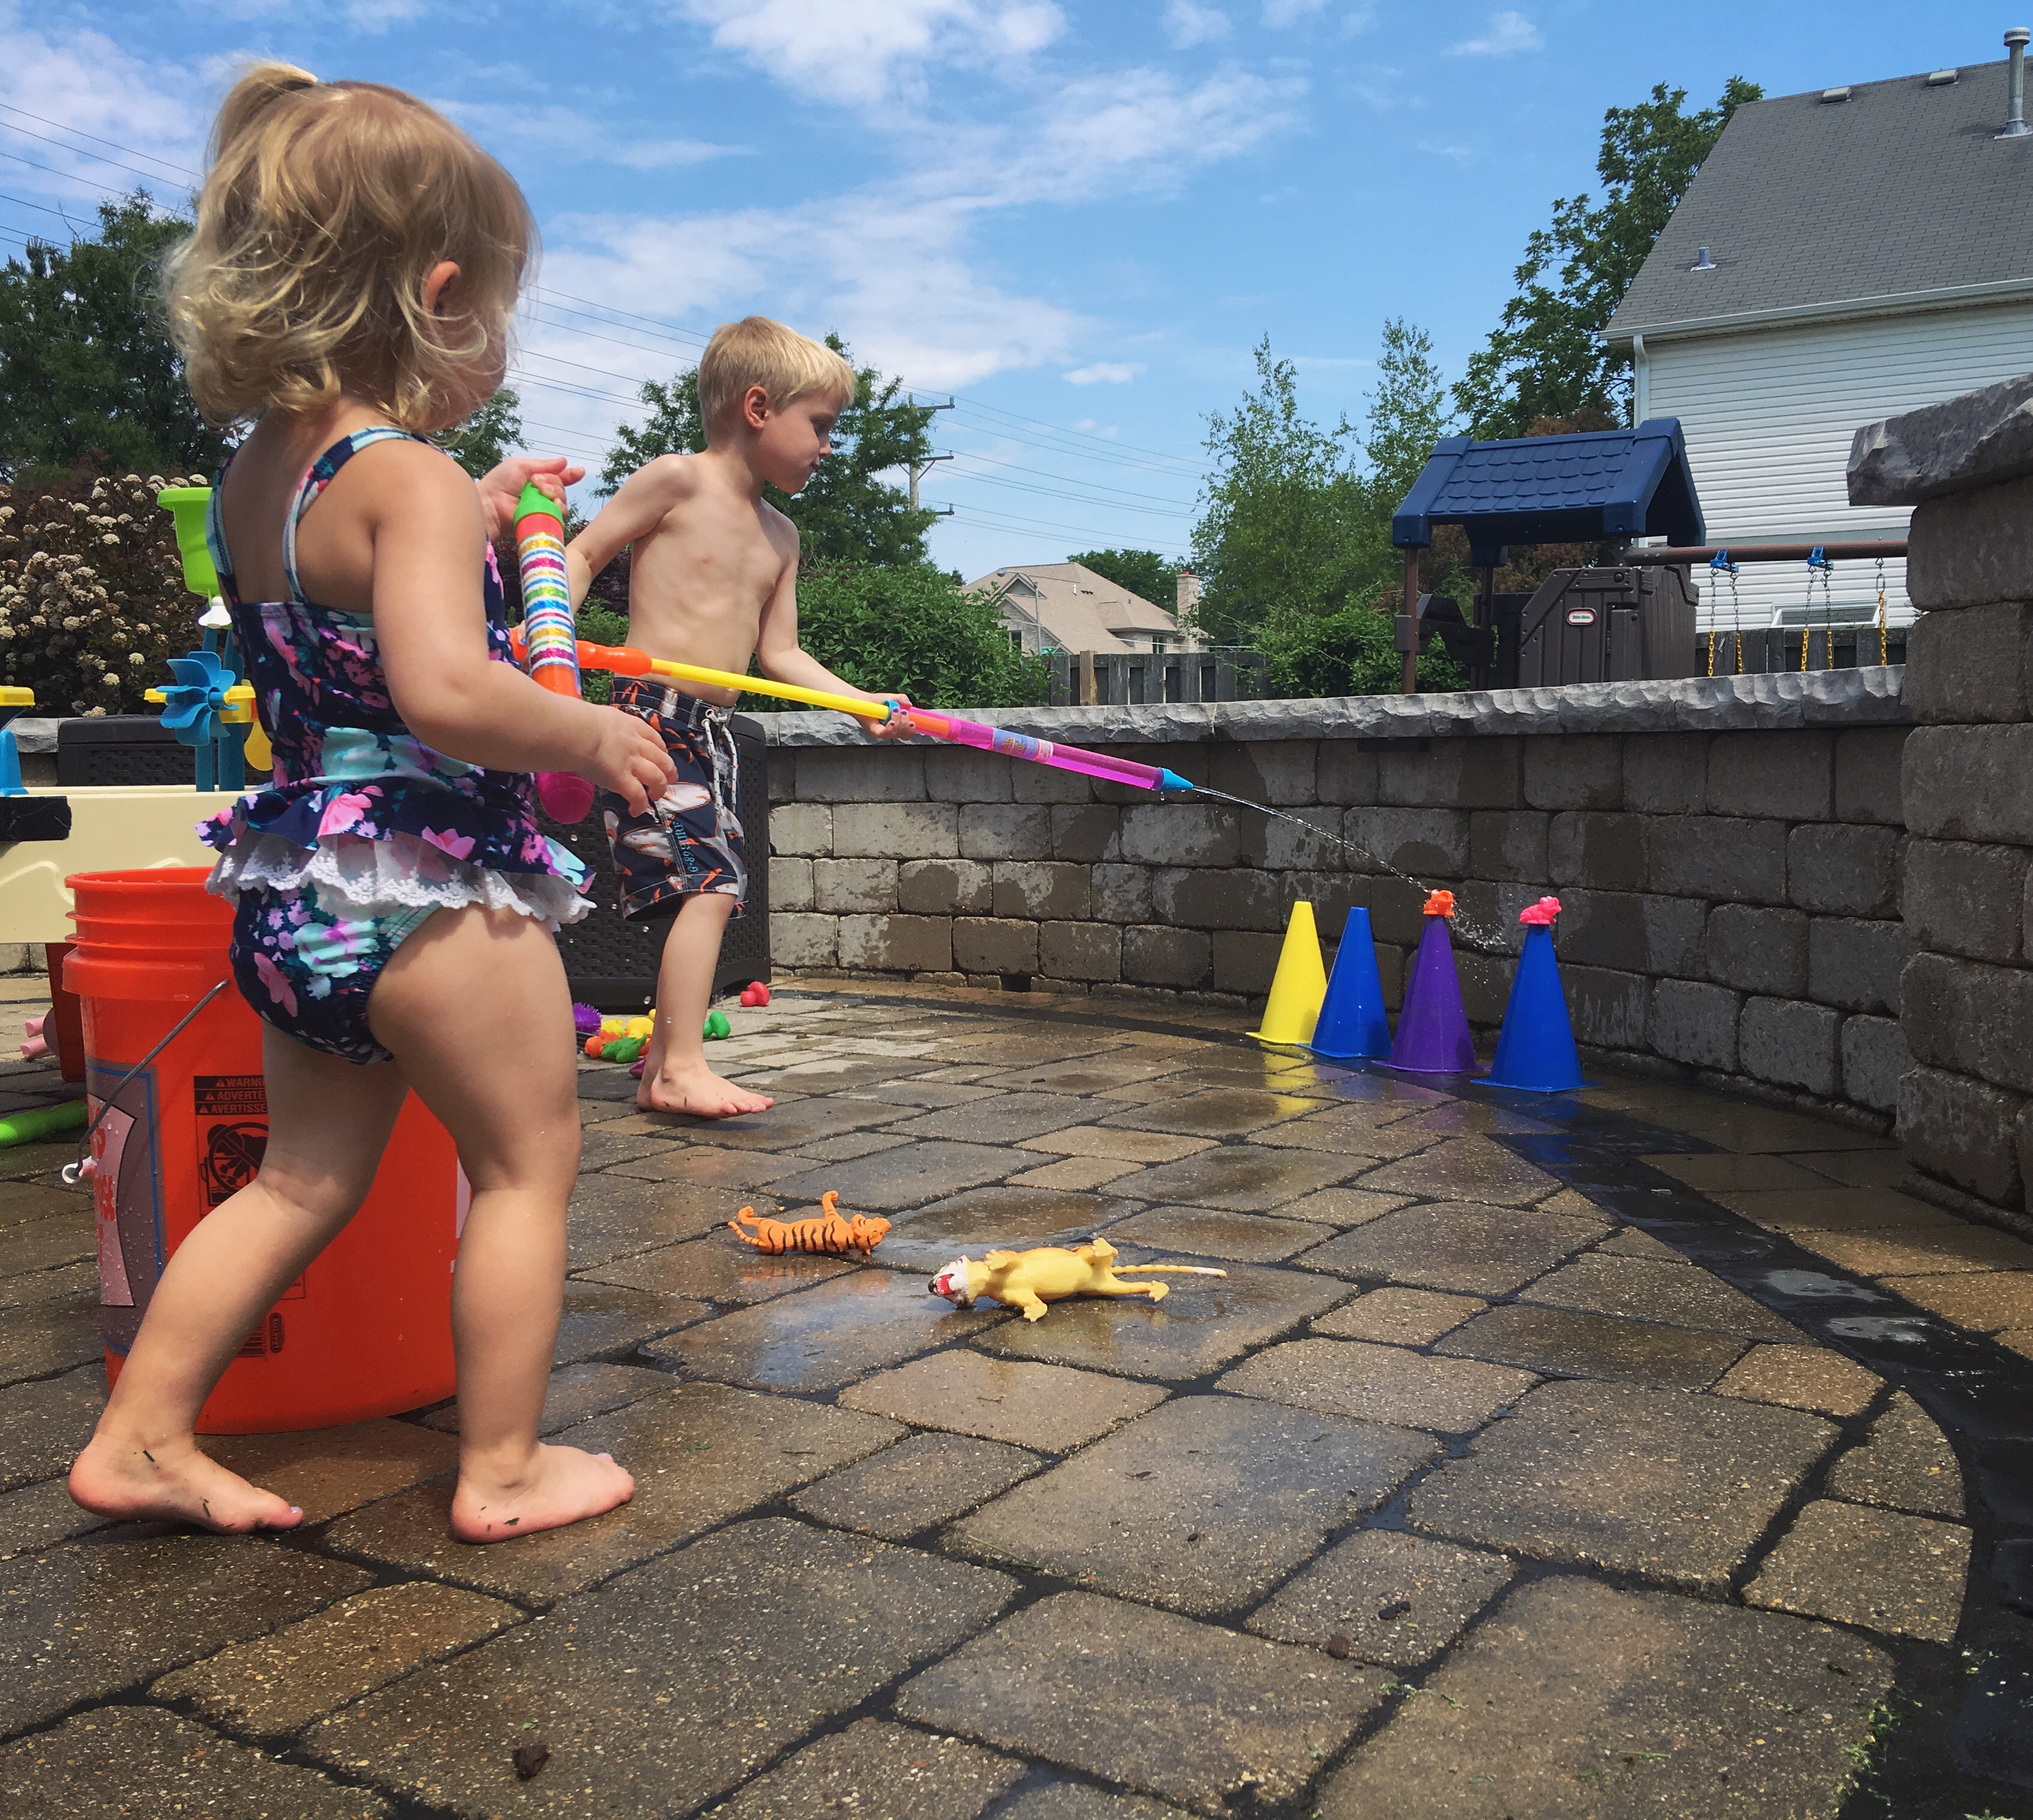
Using water sprayers from our local dollar store, I set up rubber ducks and frogs on top of activity cones and the kids practice their aim by spraying them off.


2. Fishing for Ducks

IMG_7980Fishing for Ducks 2Fishing for Ducks
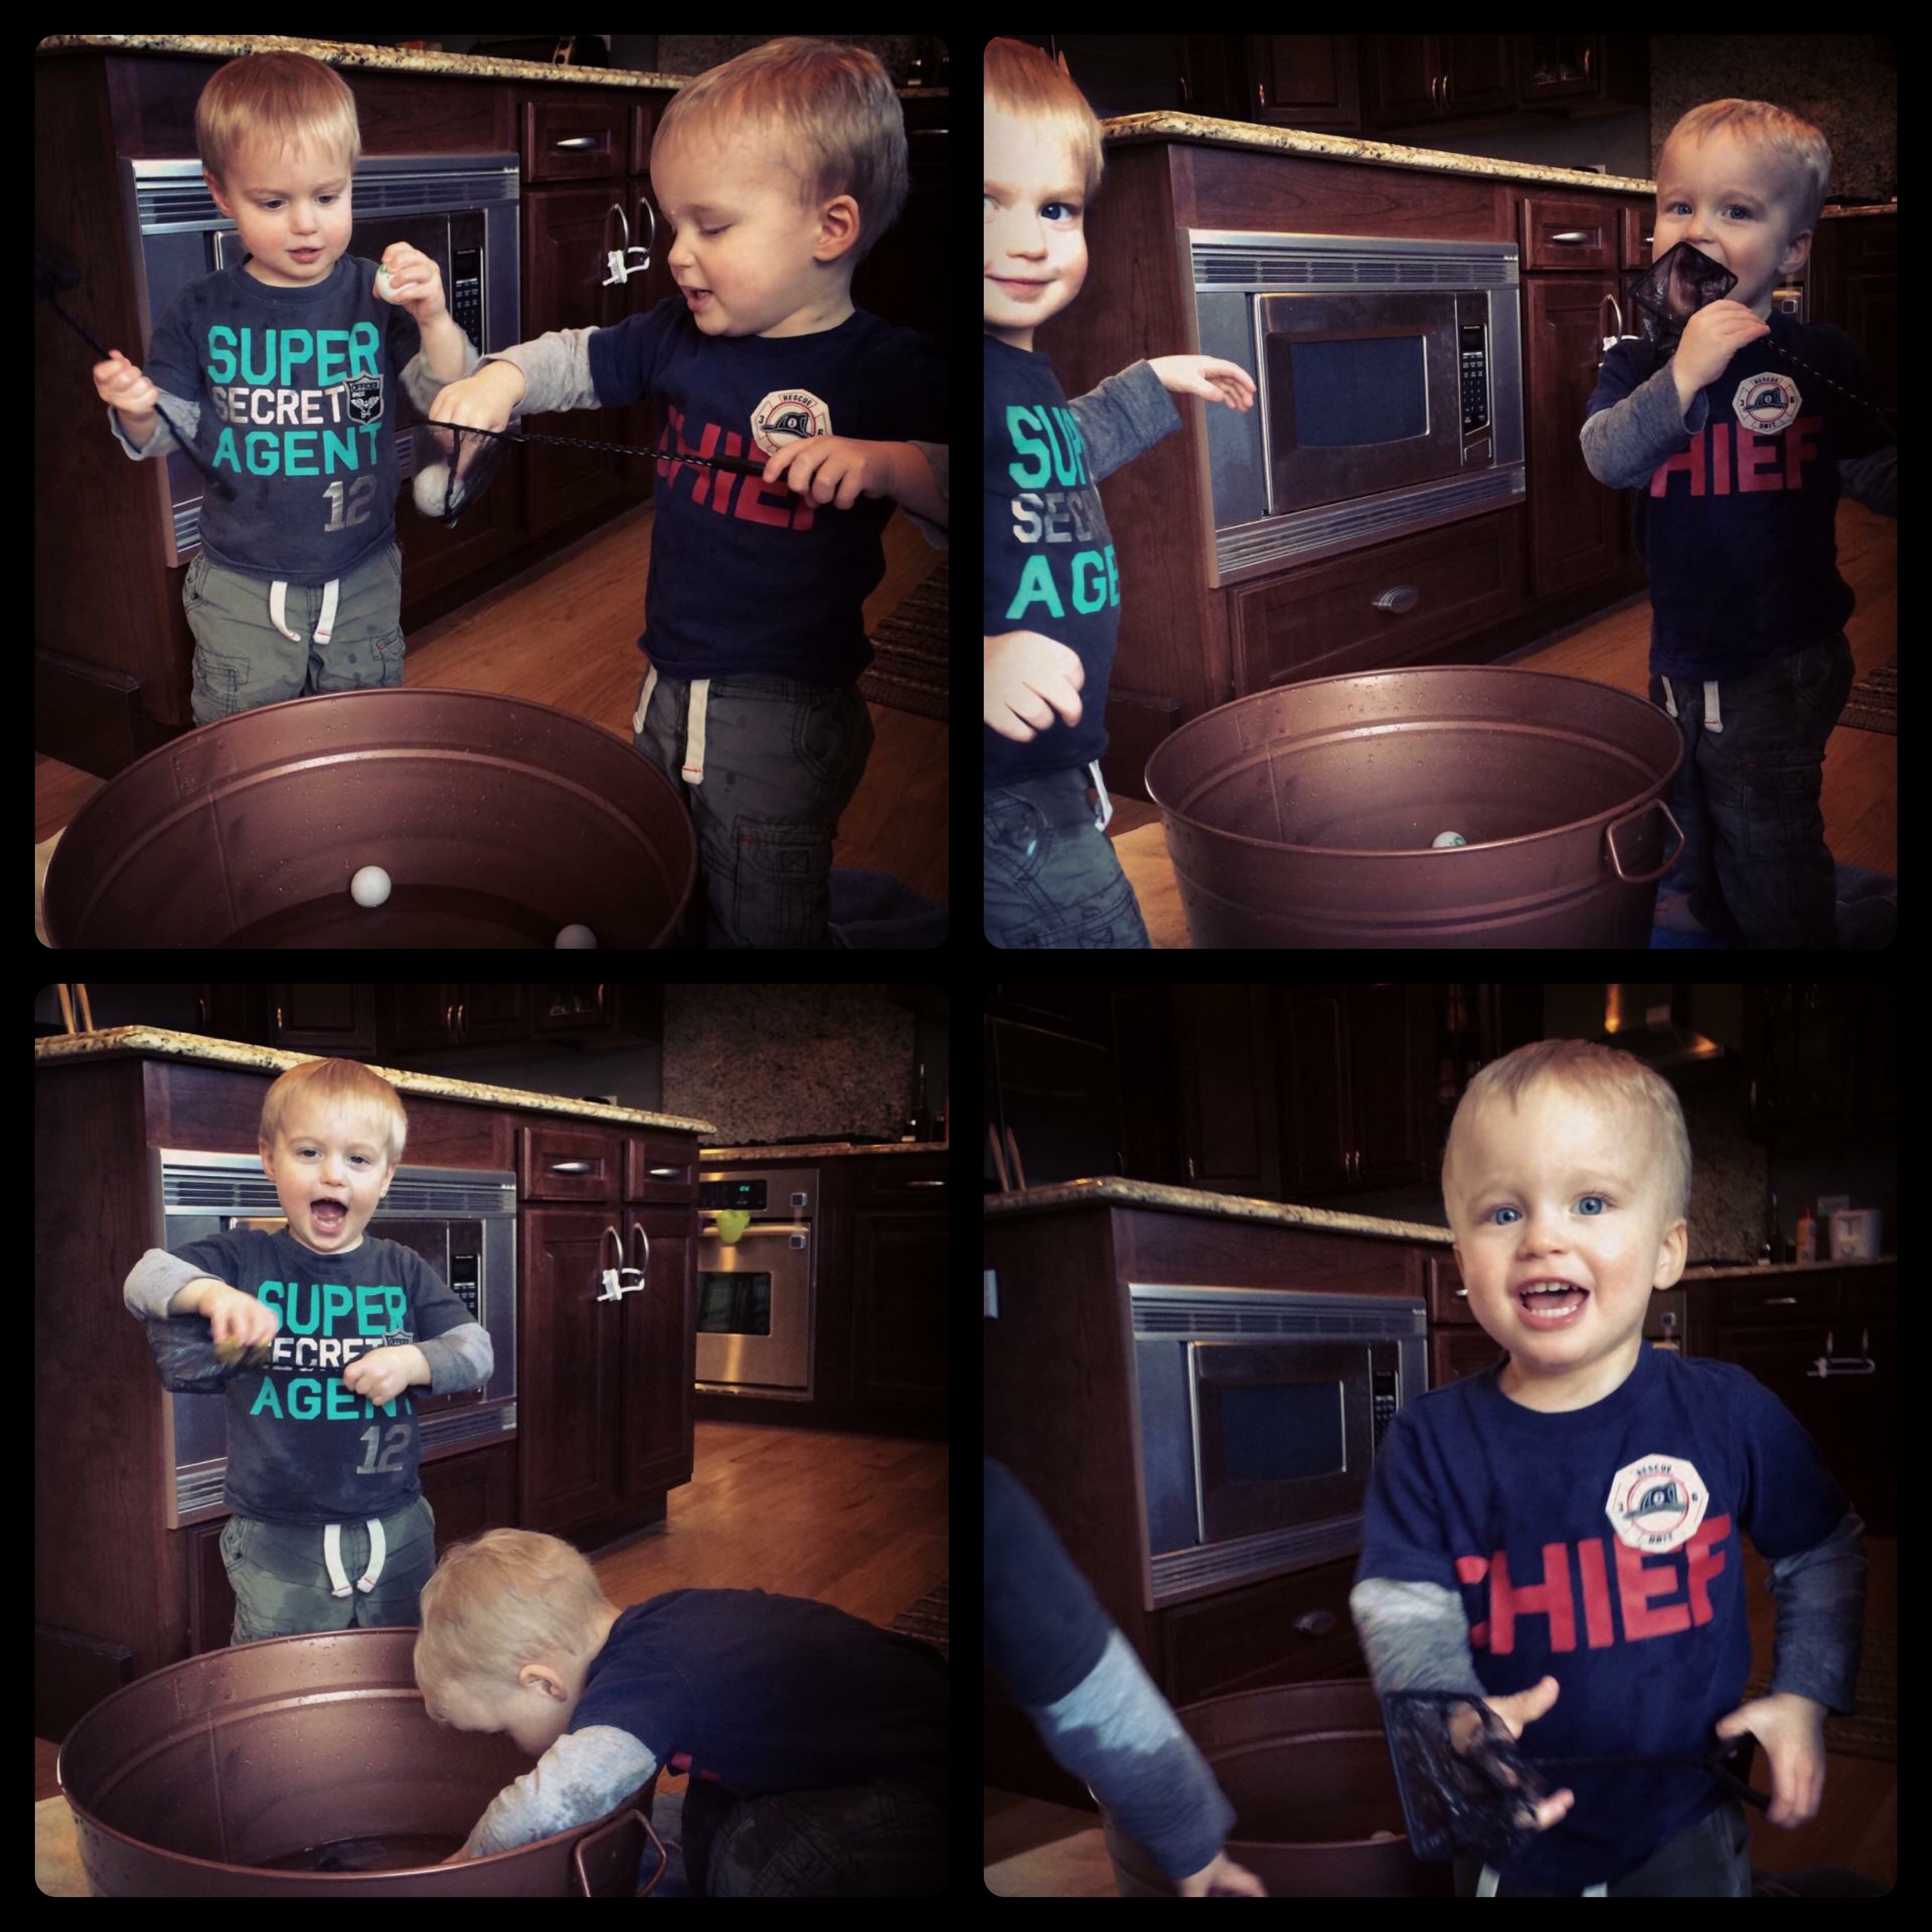
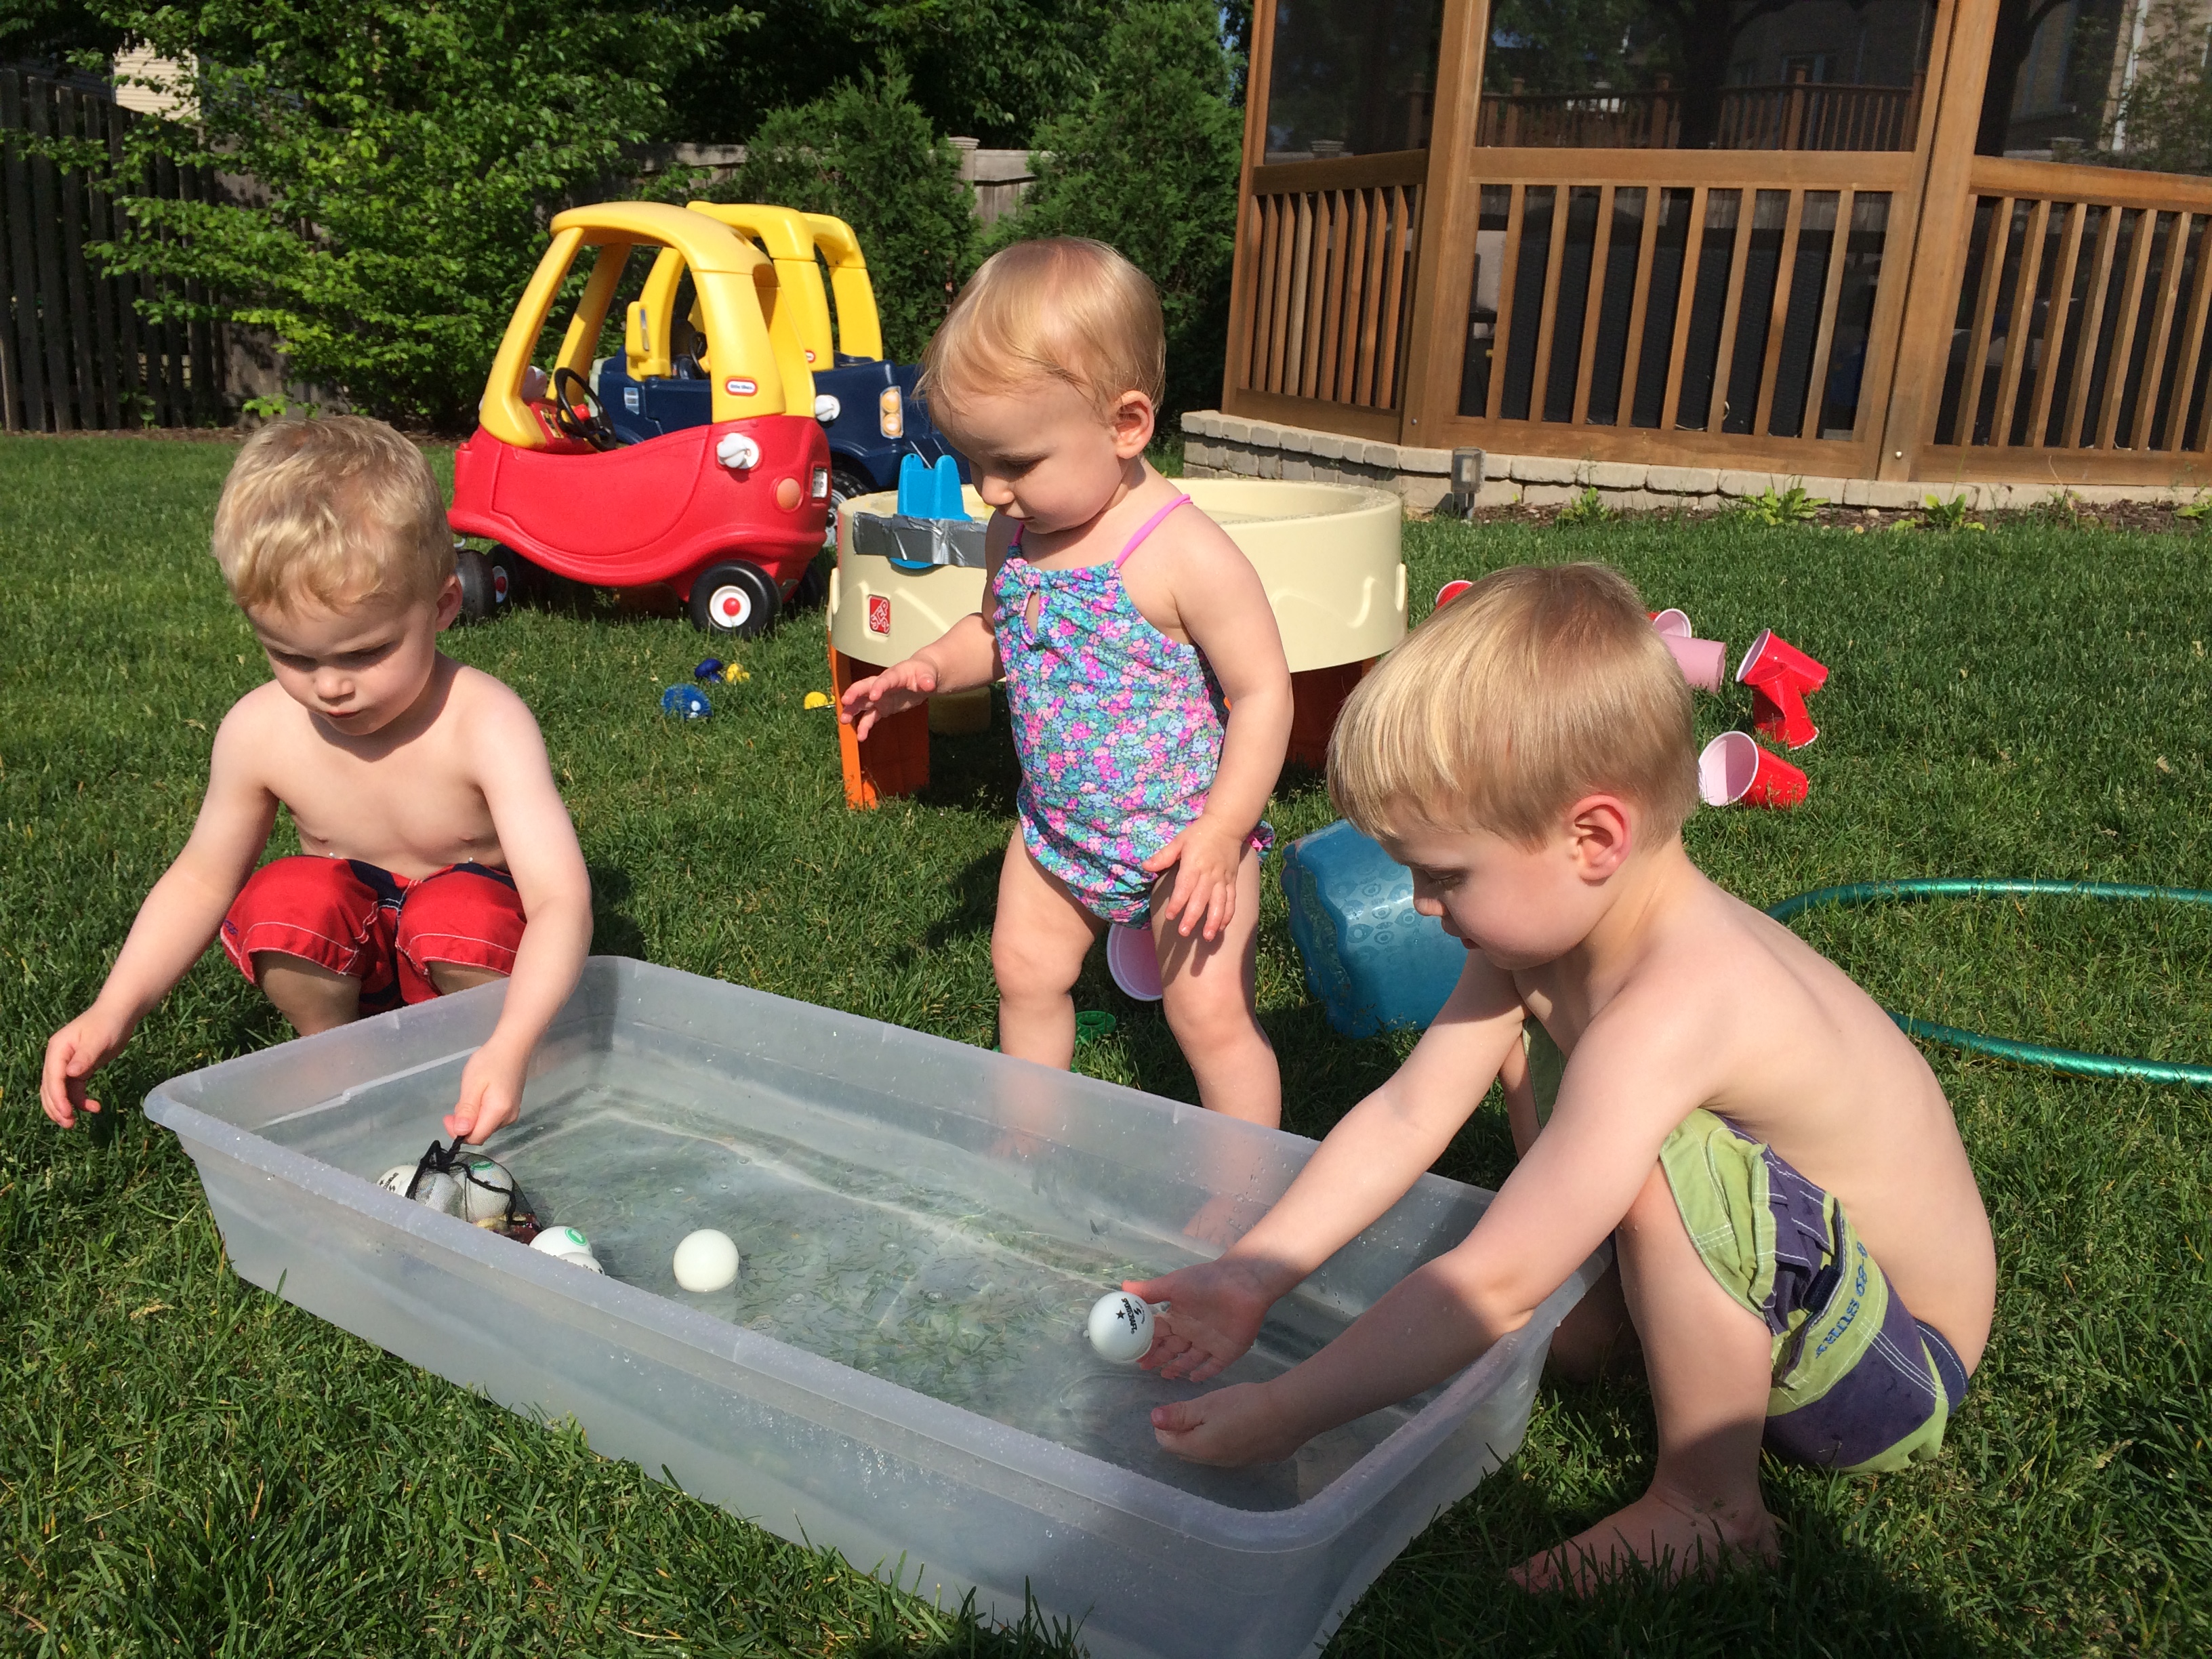
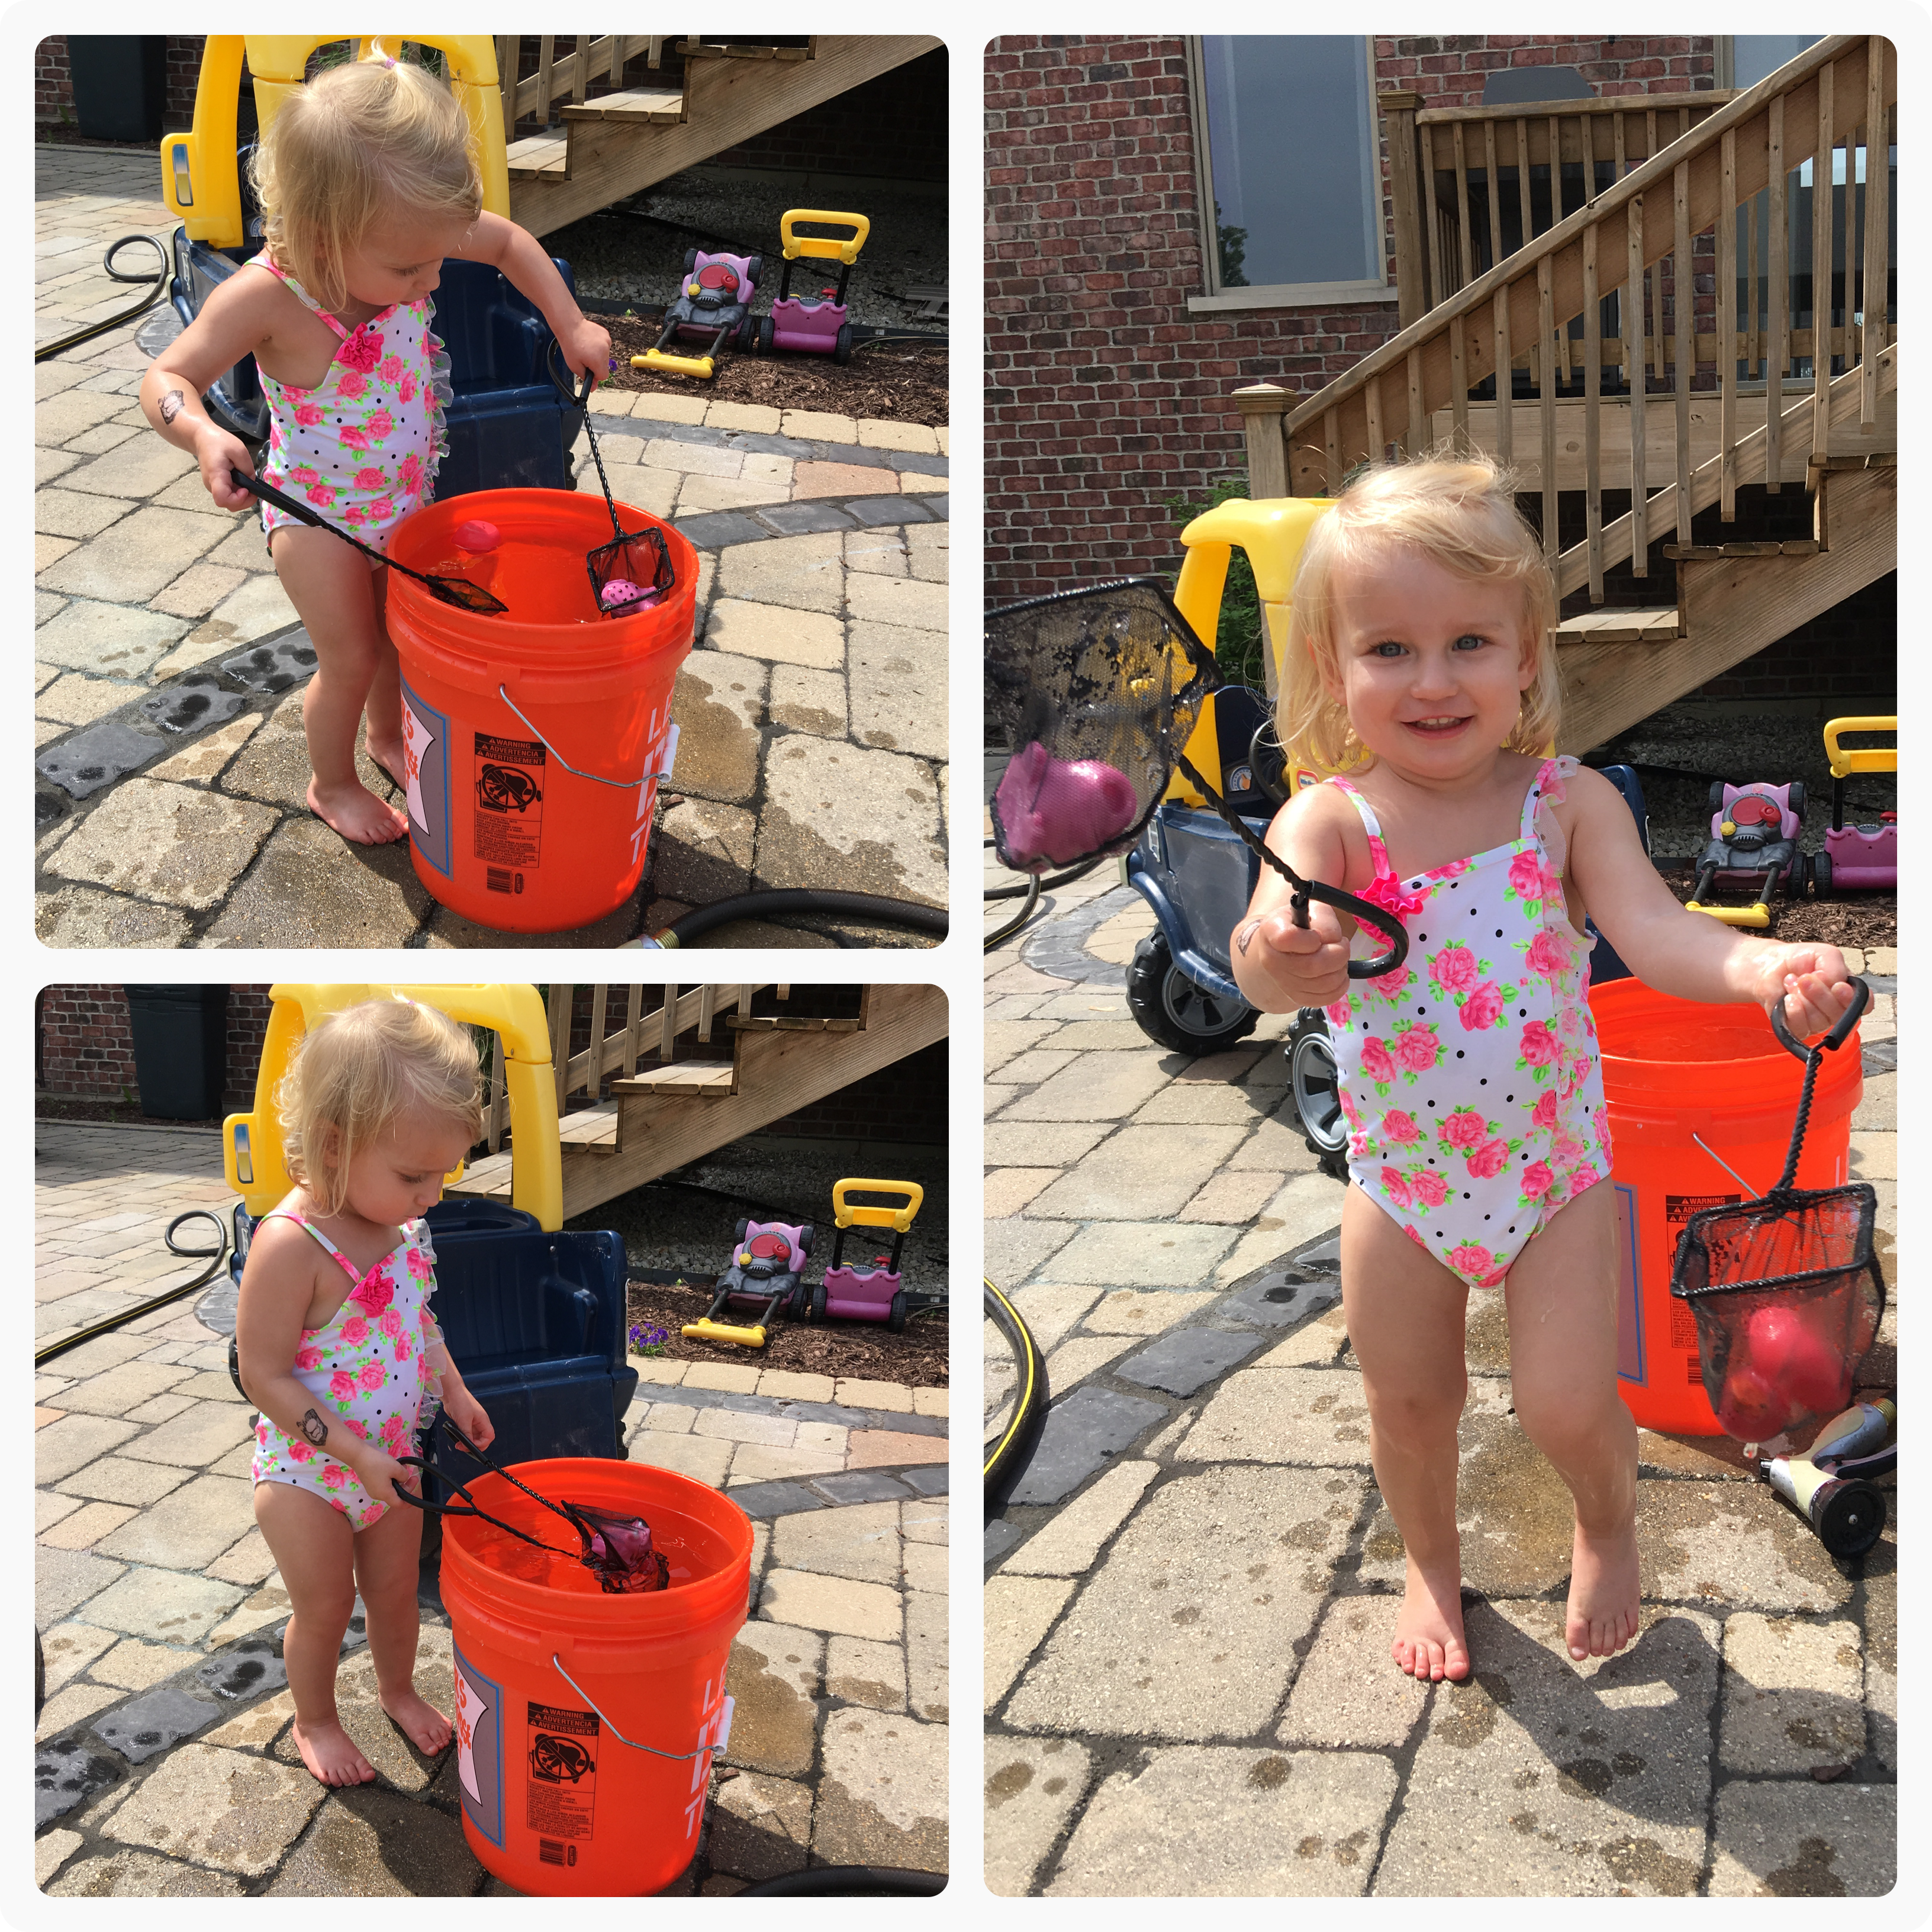
Holding the test of time, this has been a favorite activity since the boys were just short of 2 years old. Using an aquarium net, the kids “fish” for anything from rubber ducks to ping pong balls… After they are done fishing, sometimes the kids like to get out kitchen utensils and make “duck soup”.


3. Animal Baths

Animal Baths
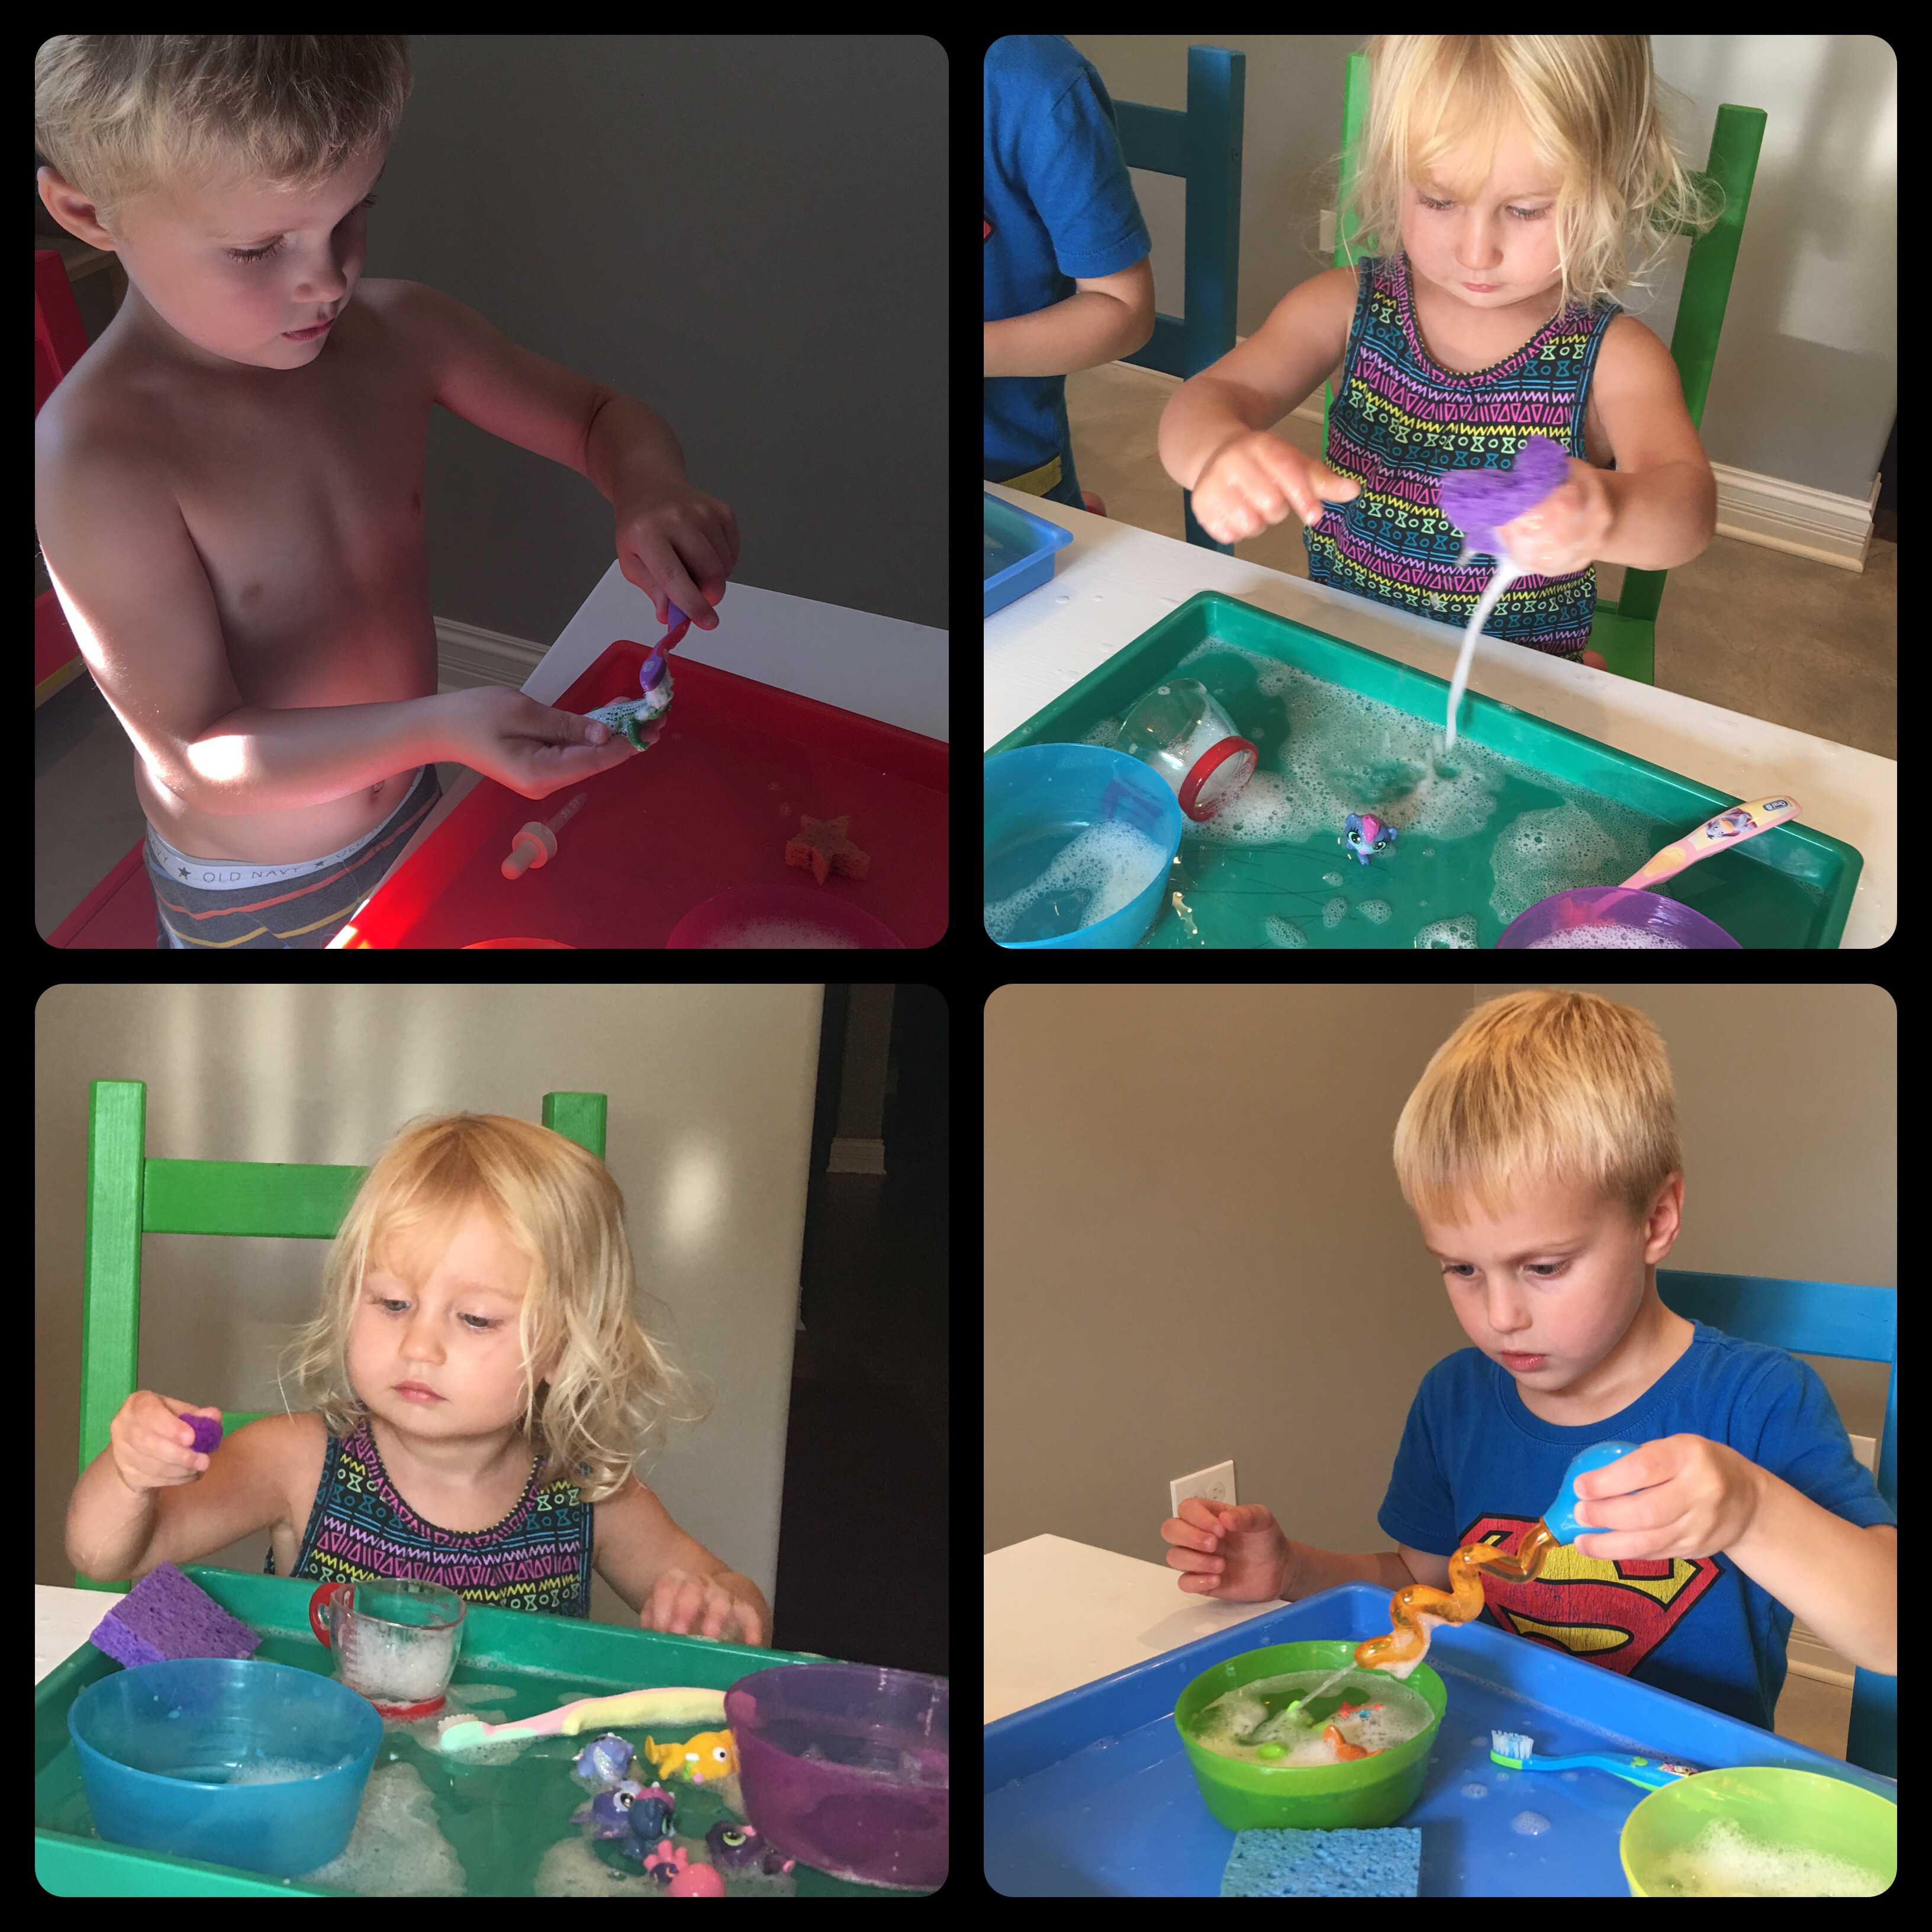
This particular day we were taking a break from the heat, but have done this activity indoors and out… Using an old toothbrush and some soap, the kids enjoy pampering their favorite toy animals with a little spa-day.


4. Sink, Float & Explore

Sink and Float
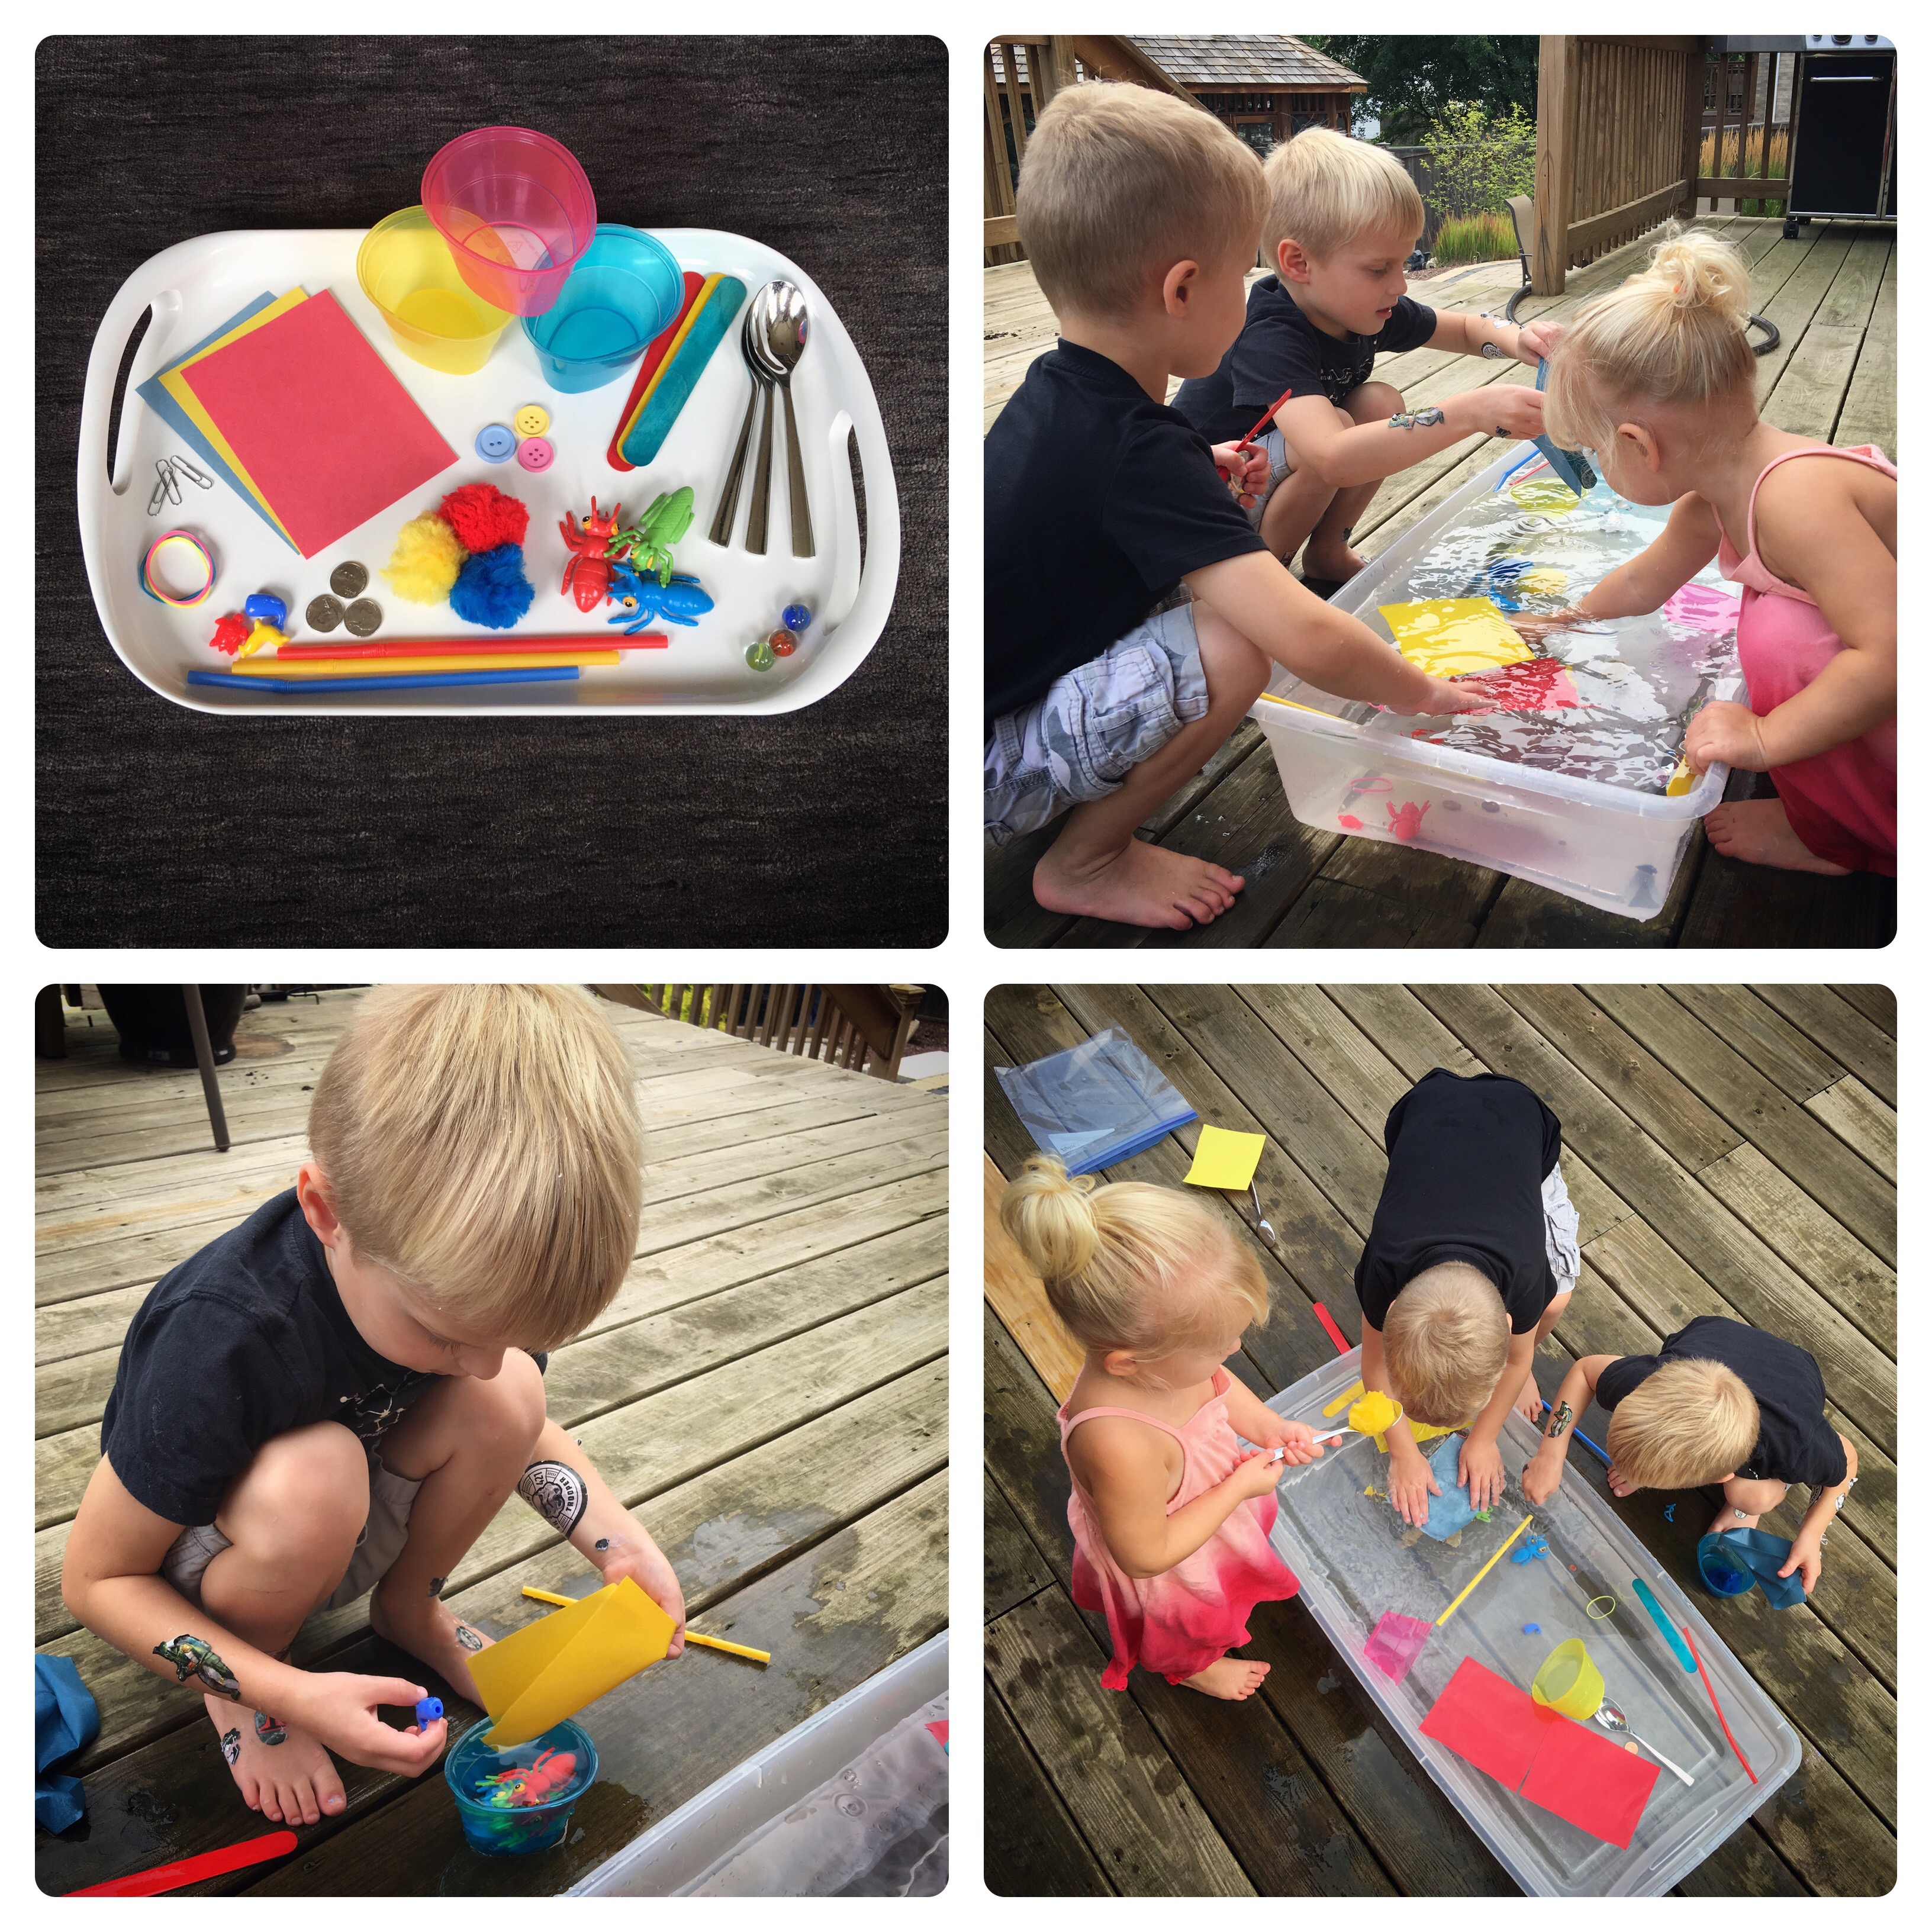
With simple items from around the house, the kids explore what sinks or floats. The activity itself only lasts about 10 minutes, but then they enjoy simply playing with the items in water… (example items: plastic cups, paper, marbles, straws, plastic beads, coins, pom poms, plastic bugs/animals, buttons, wooden sticks, spoons, paper clips and rubber bands)


5. Splash Slo-Mo

Splash-Slo-Mo.gif
Slide-Slo-Mo
IMG_7982.PNG
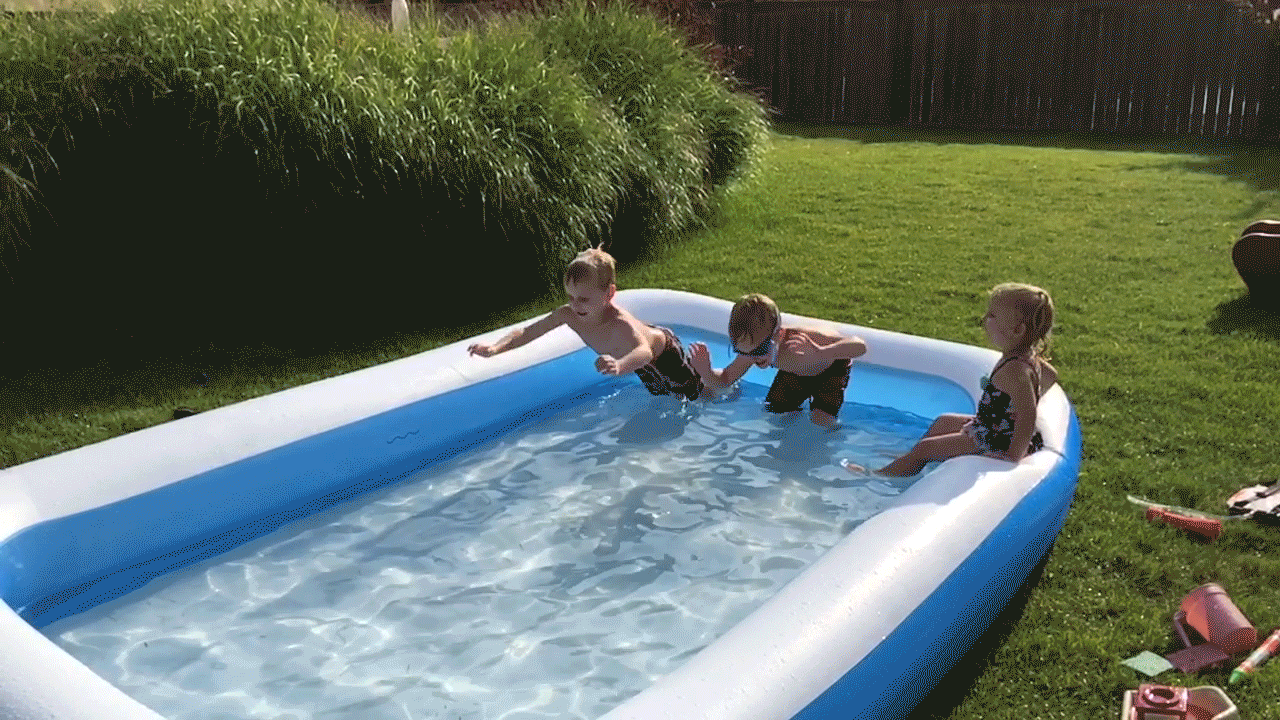
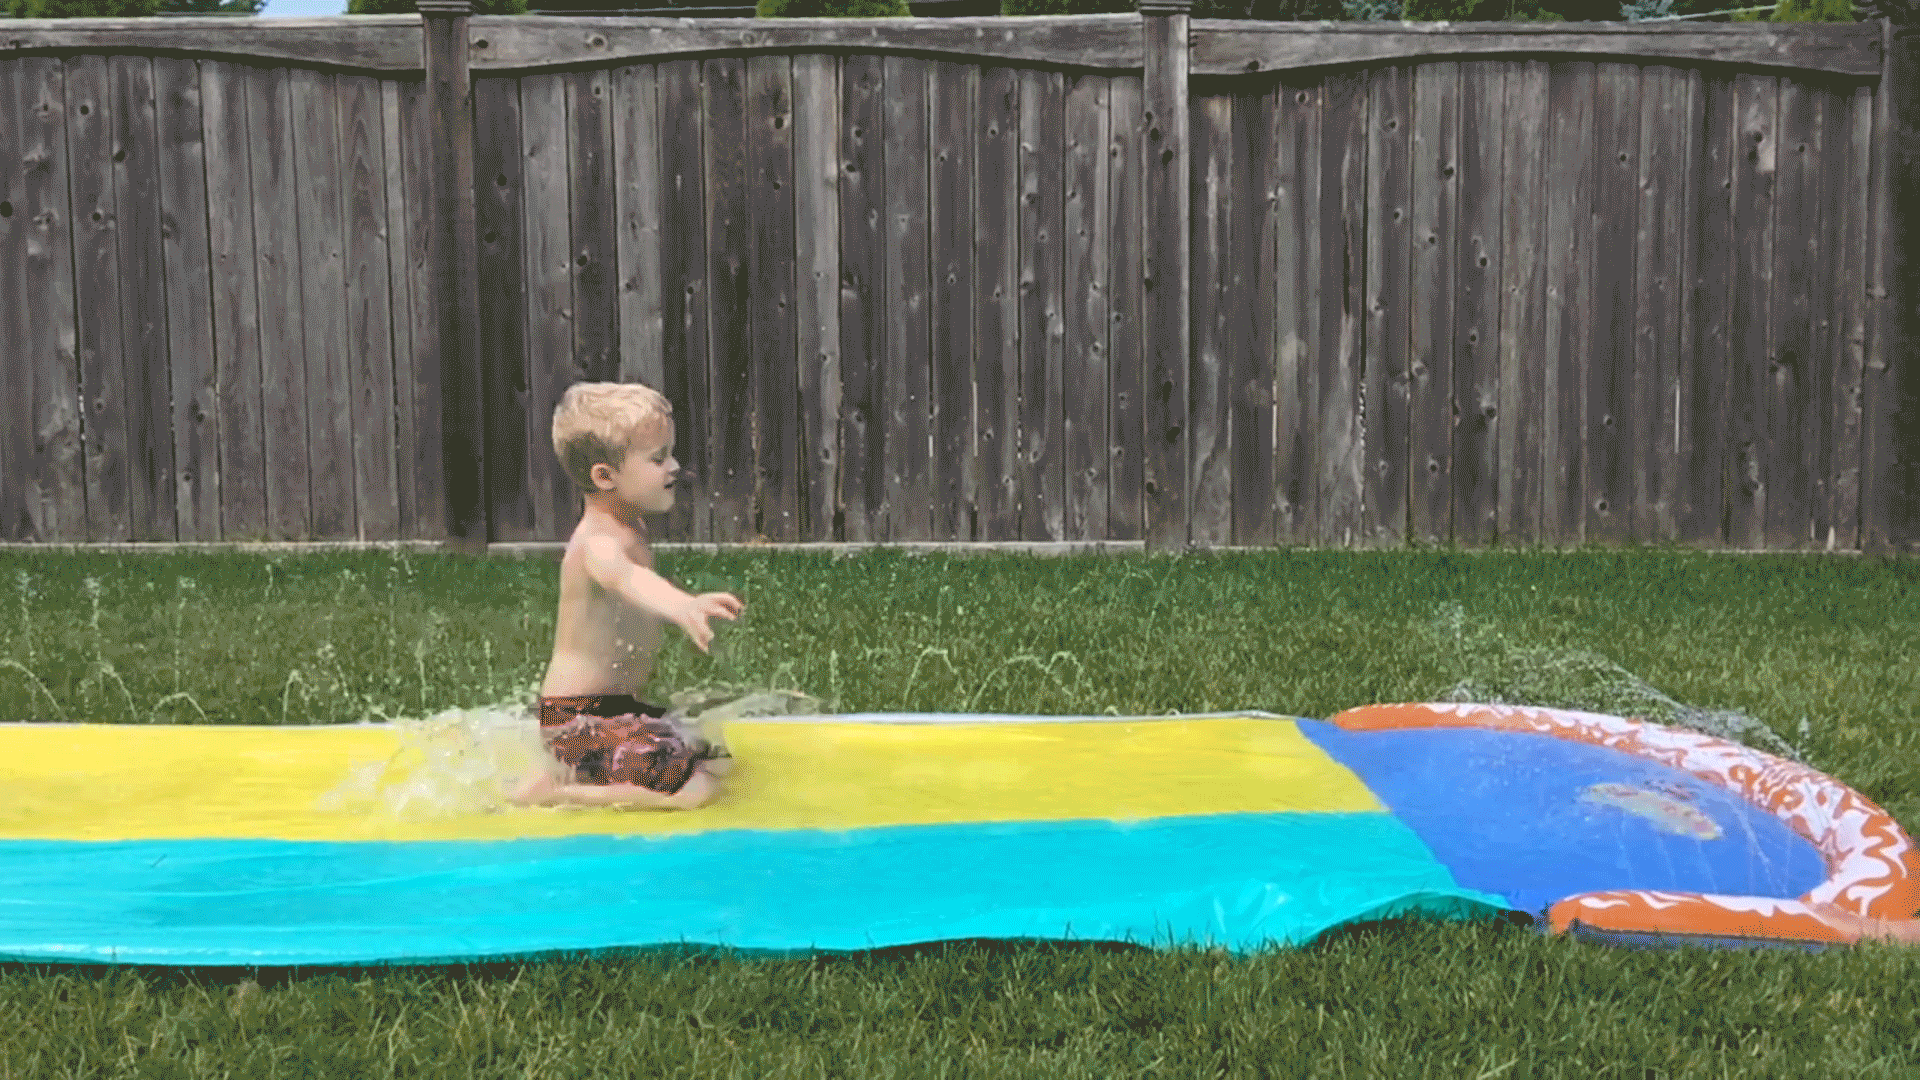
Playing around with the ‘slo-mo’ feature on my iPhone, I decided to take some clips of the kids splashing around in the pool – SO FUN! Now the boys are constantly requesting I take videos so they can watch their playbacks in slo-mo… Summer splashing at it’s best!


6. Chalk Paint

Chalk Paint.JPG
Wet Chalk Jacob
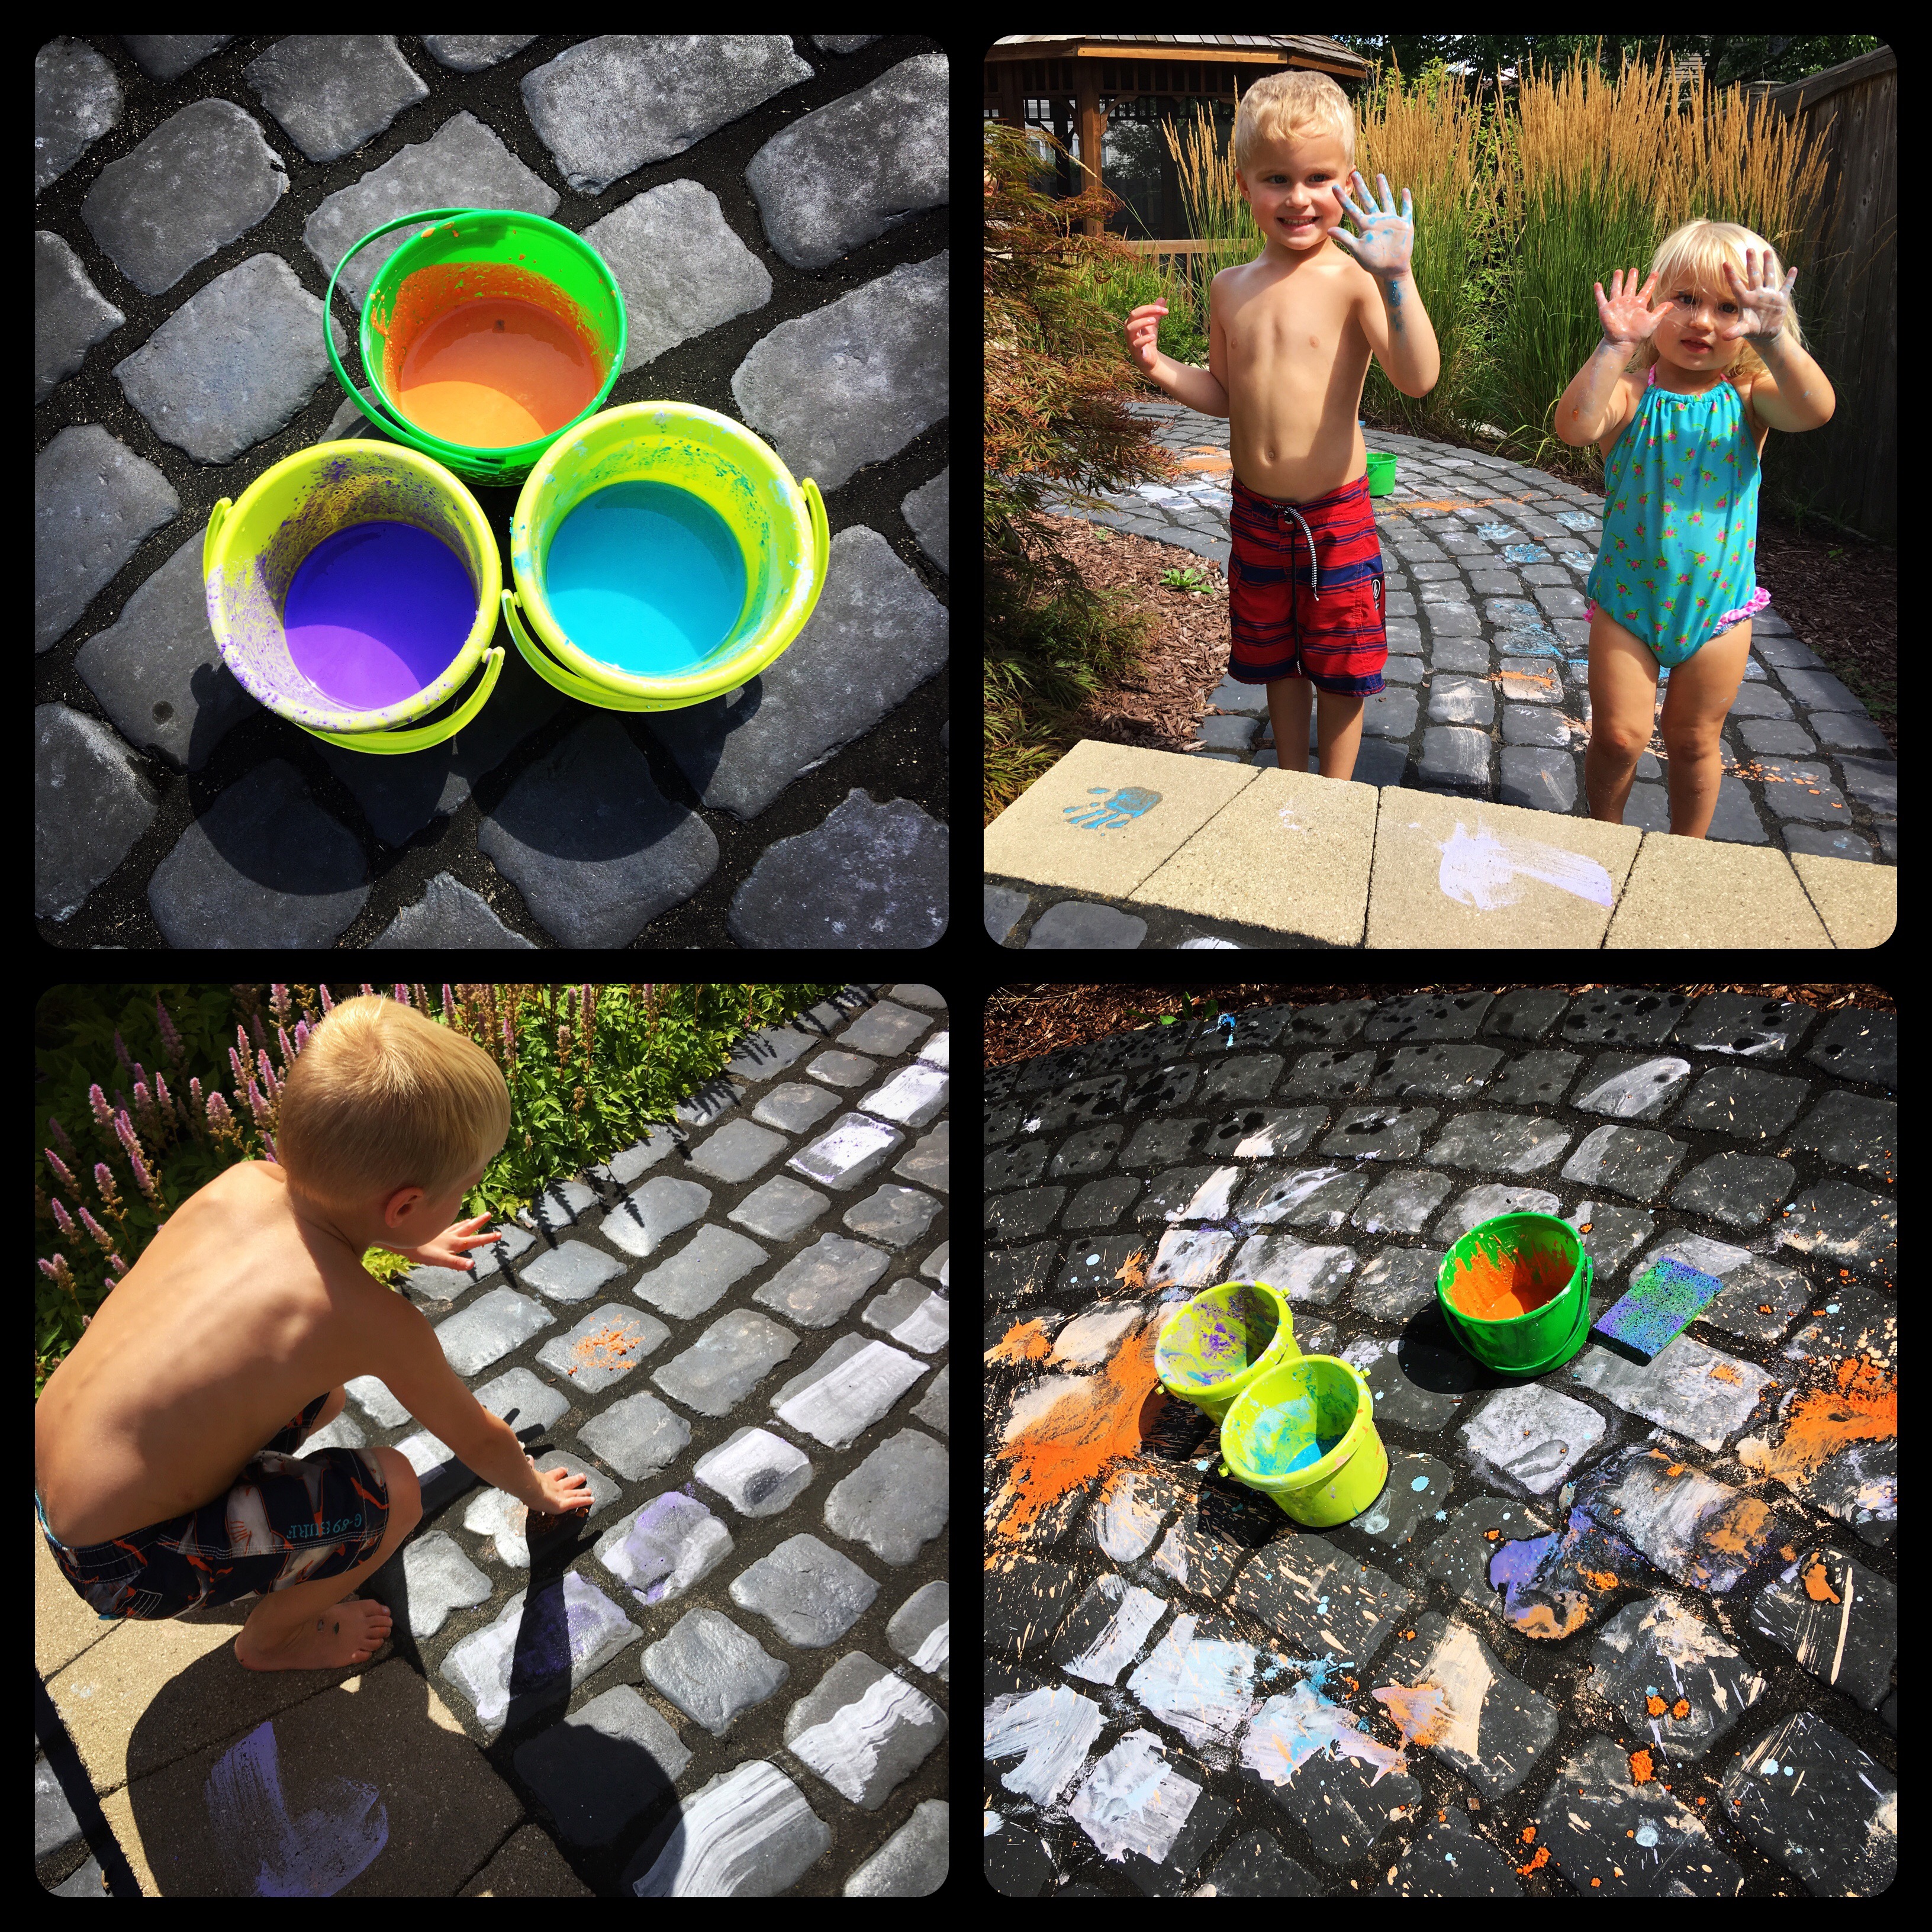
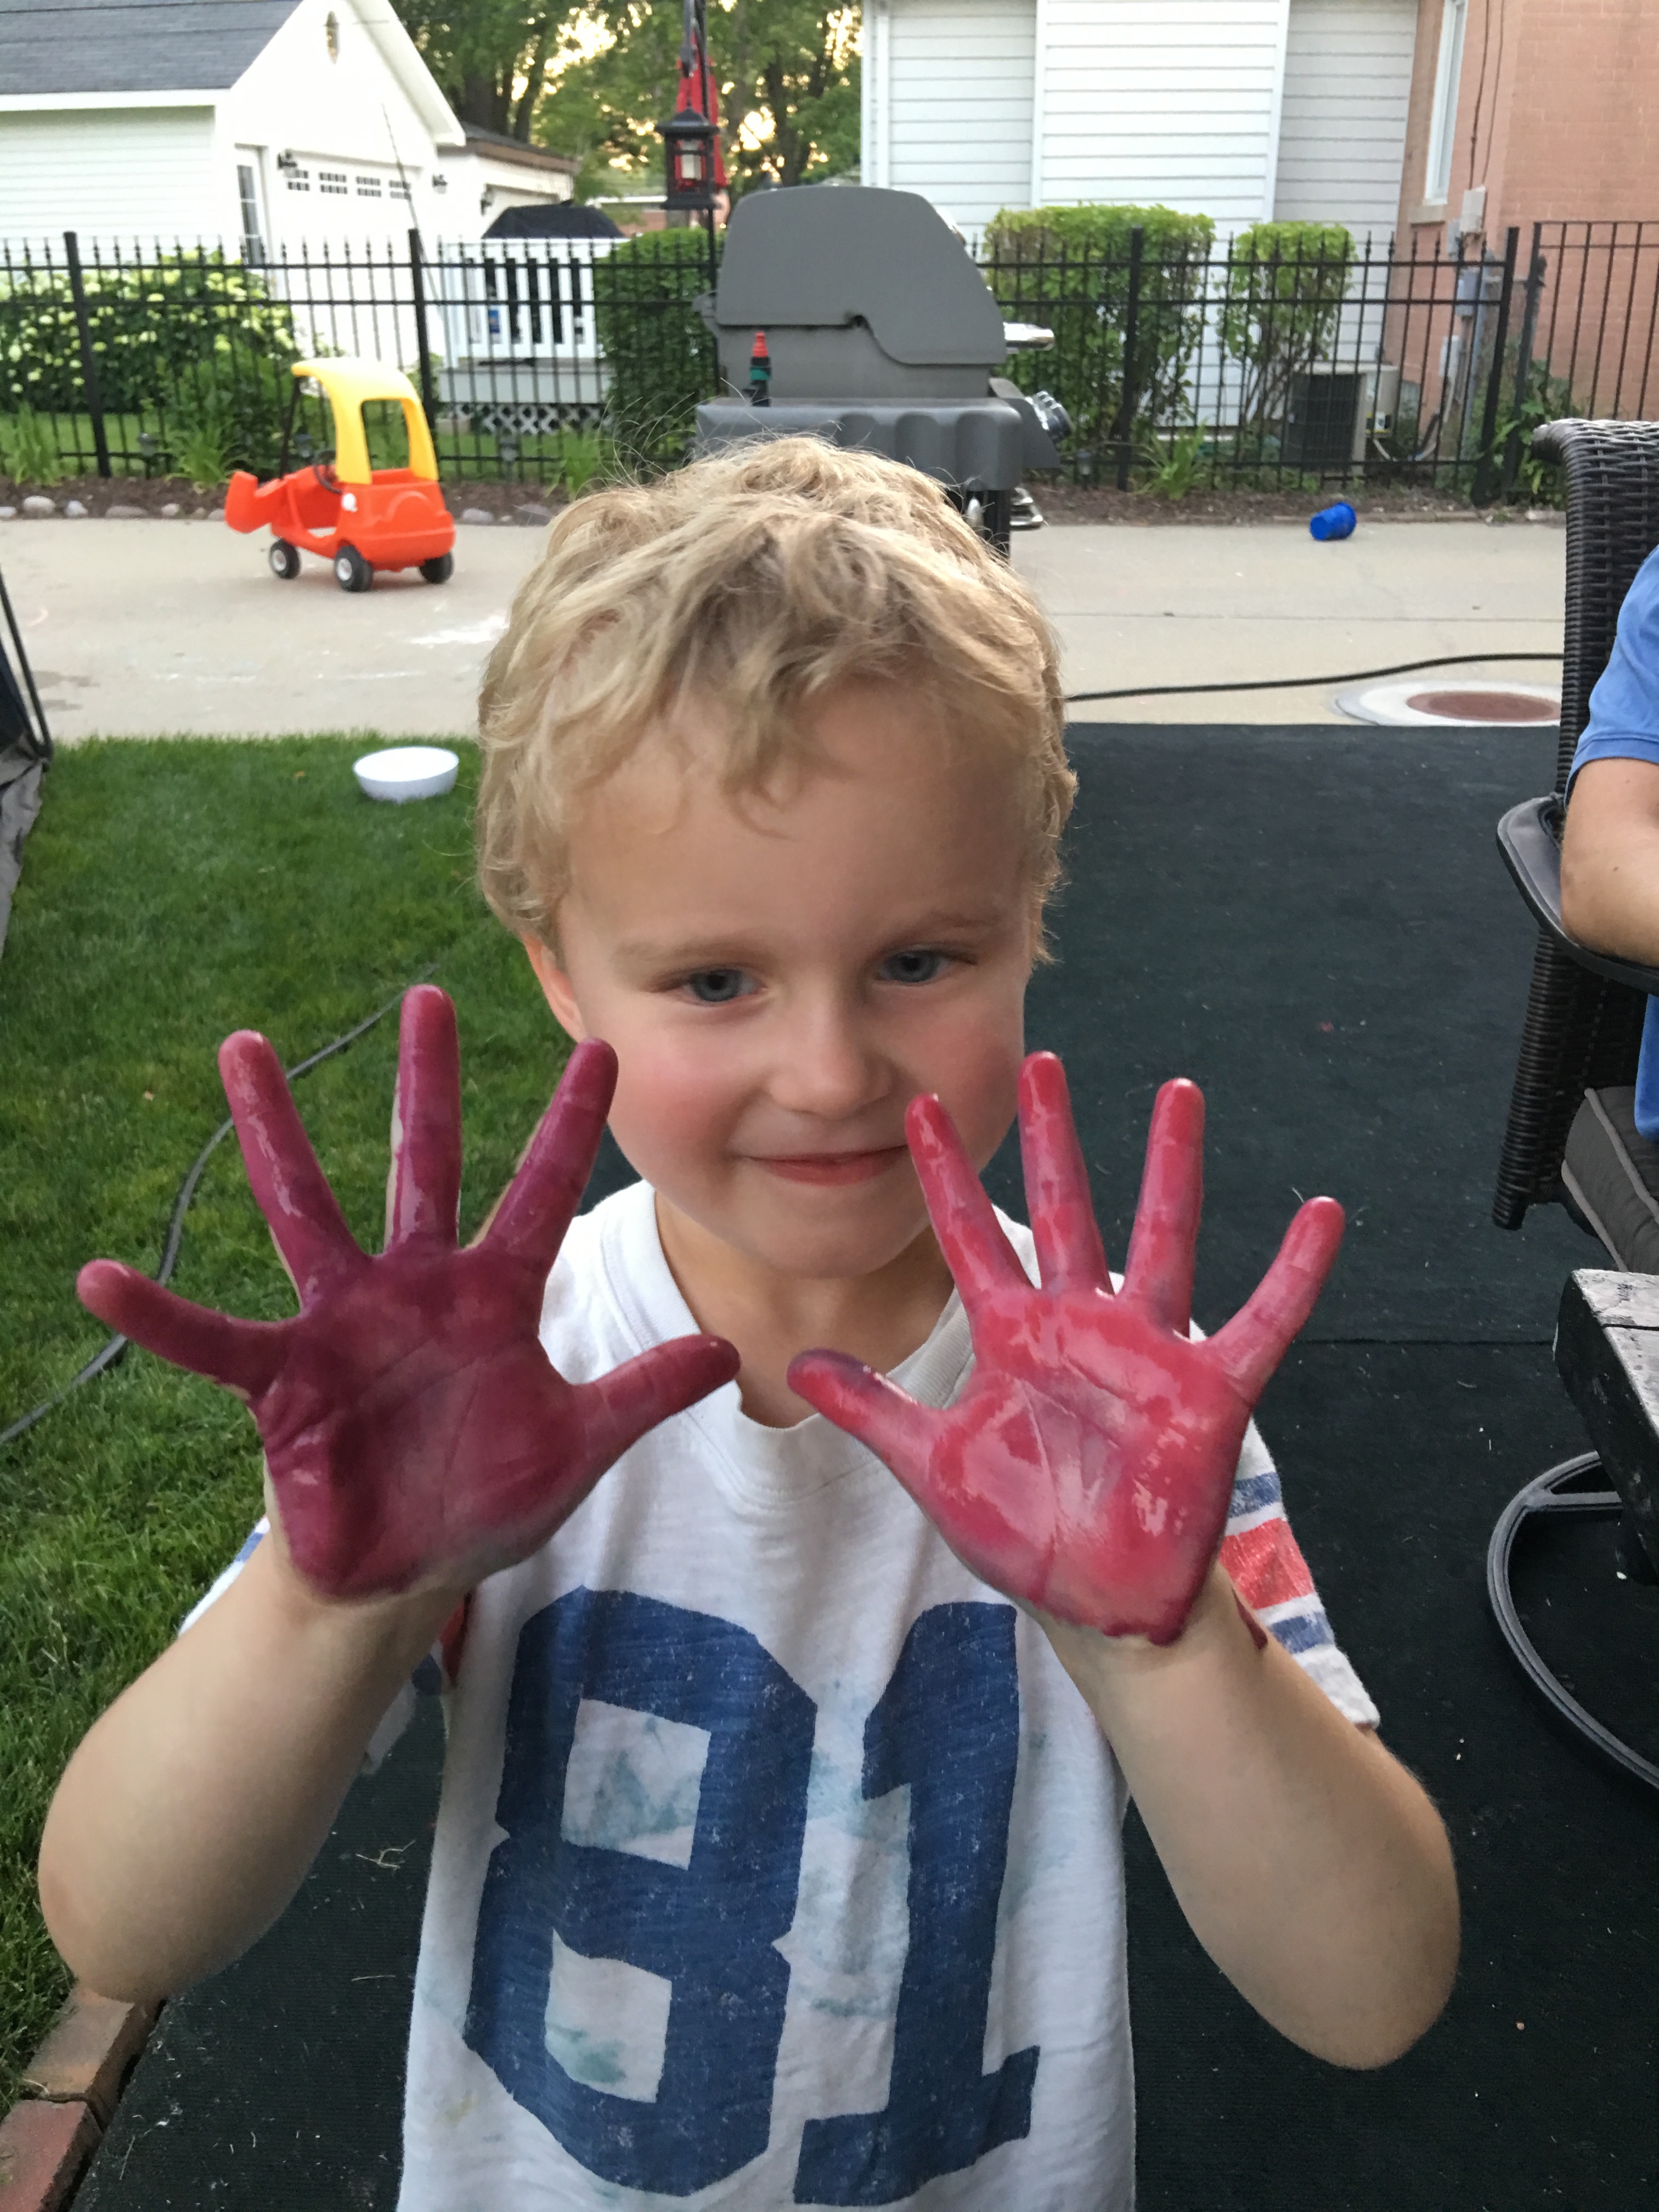
Water + chalk = messy fun!!… Great for using left over small pieces of chalk – Just throw chalk sticks into a baggie, pound with a hammer (or the flat end of a meat tenderizer), pour chalk powder into a bucket, and add a small amount of water to make a thin paste… For less prep: Simply pour water on the ground, color heavily in the puddle with chalk, and mix with hands.


7. Car Wash

Car Wash
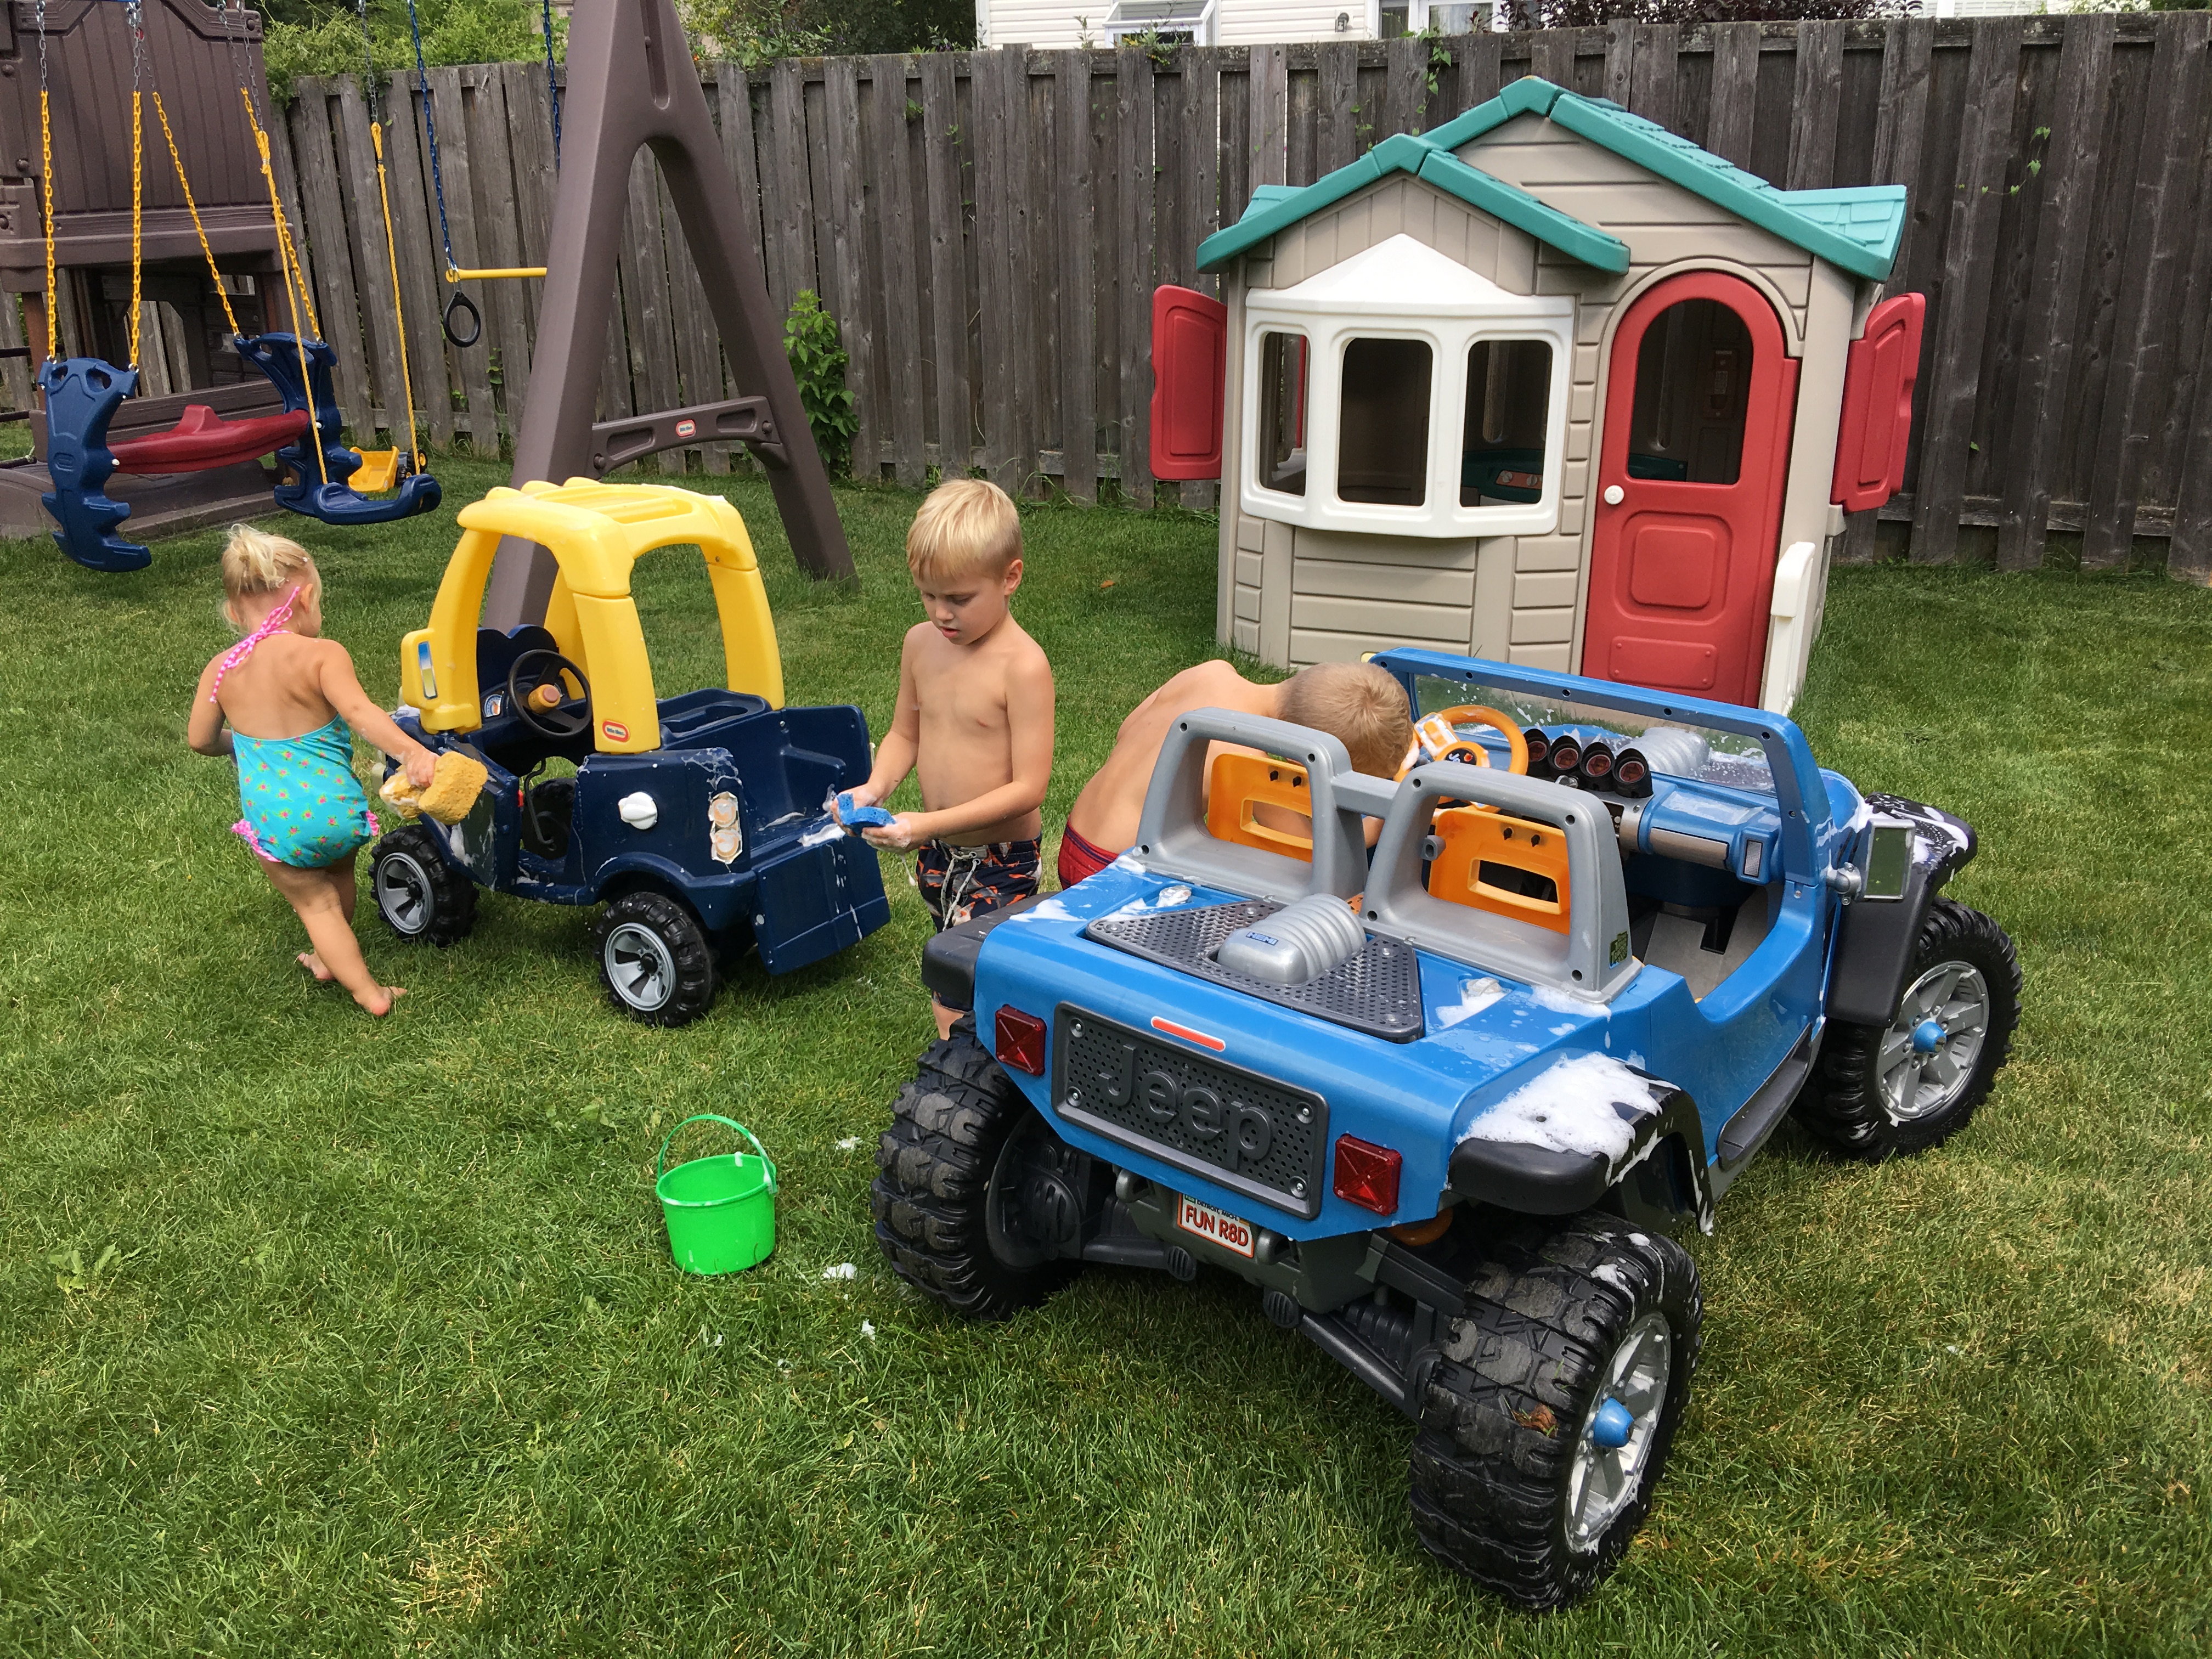
Whether it’s washing their toy trucks or Mom and Dad’s cars, the kids always enjoy a good car wash.

8. Wet Paper


As simple as construction paper in water – Squish it, squeeze it, and tear it. A great sensory experience.


9. Water Transfer

Water Transfer.JPG
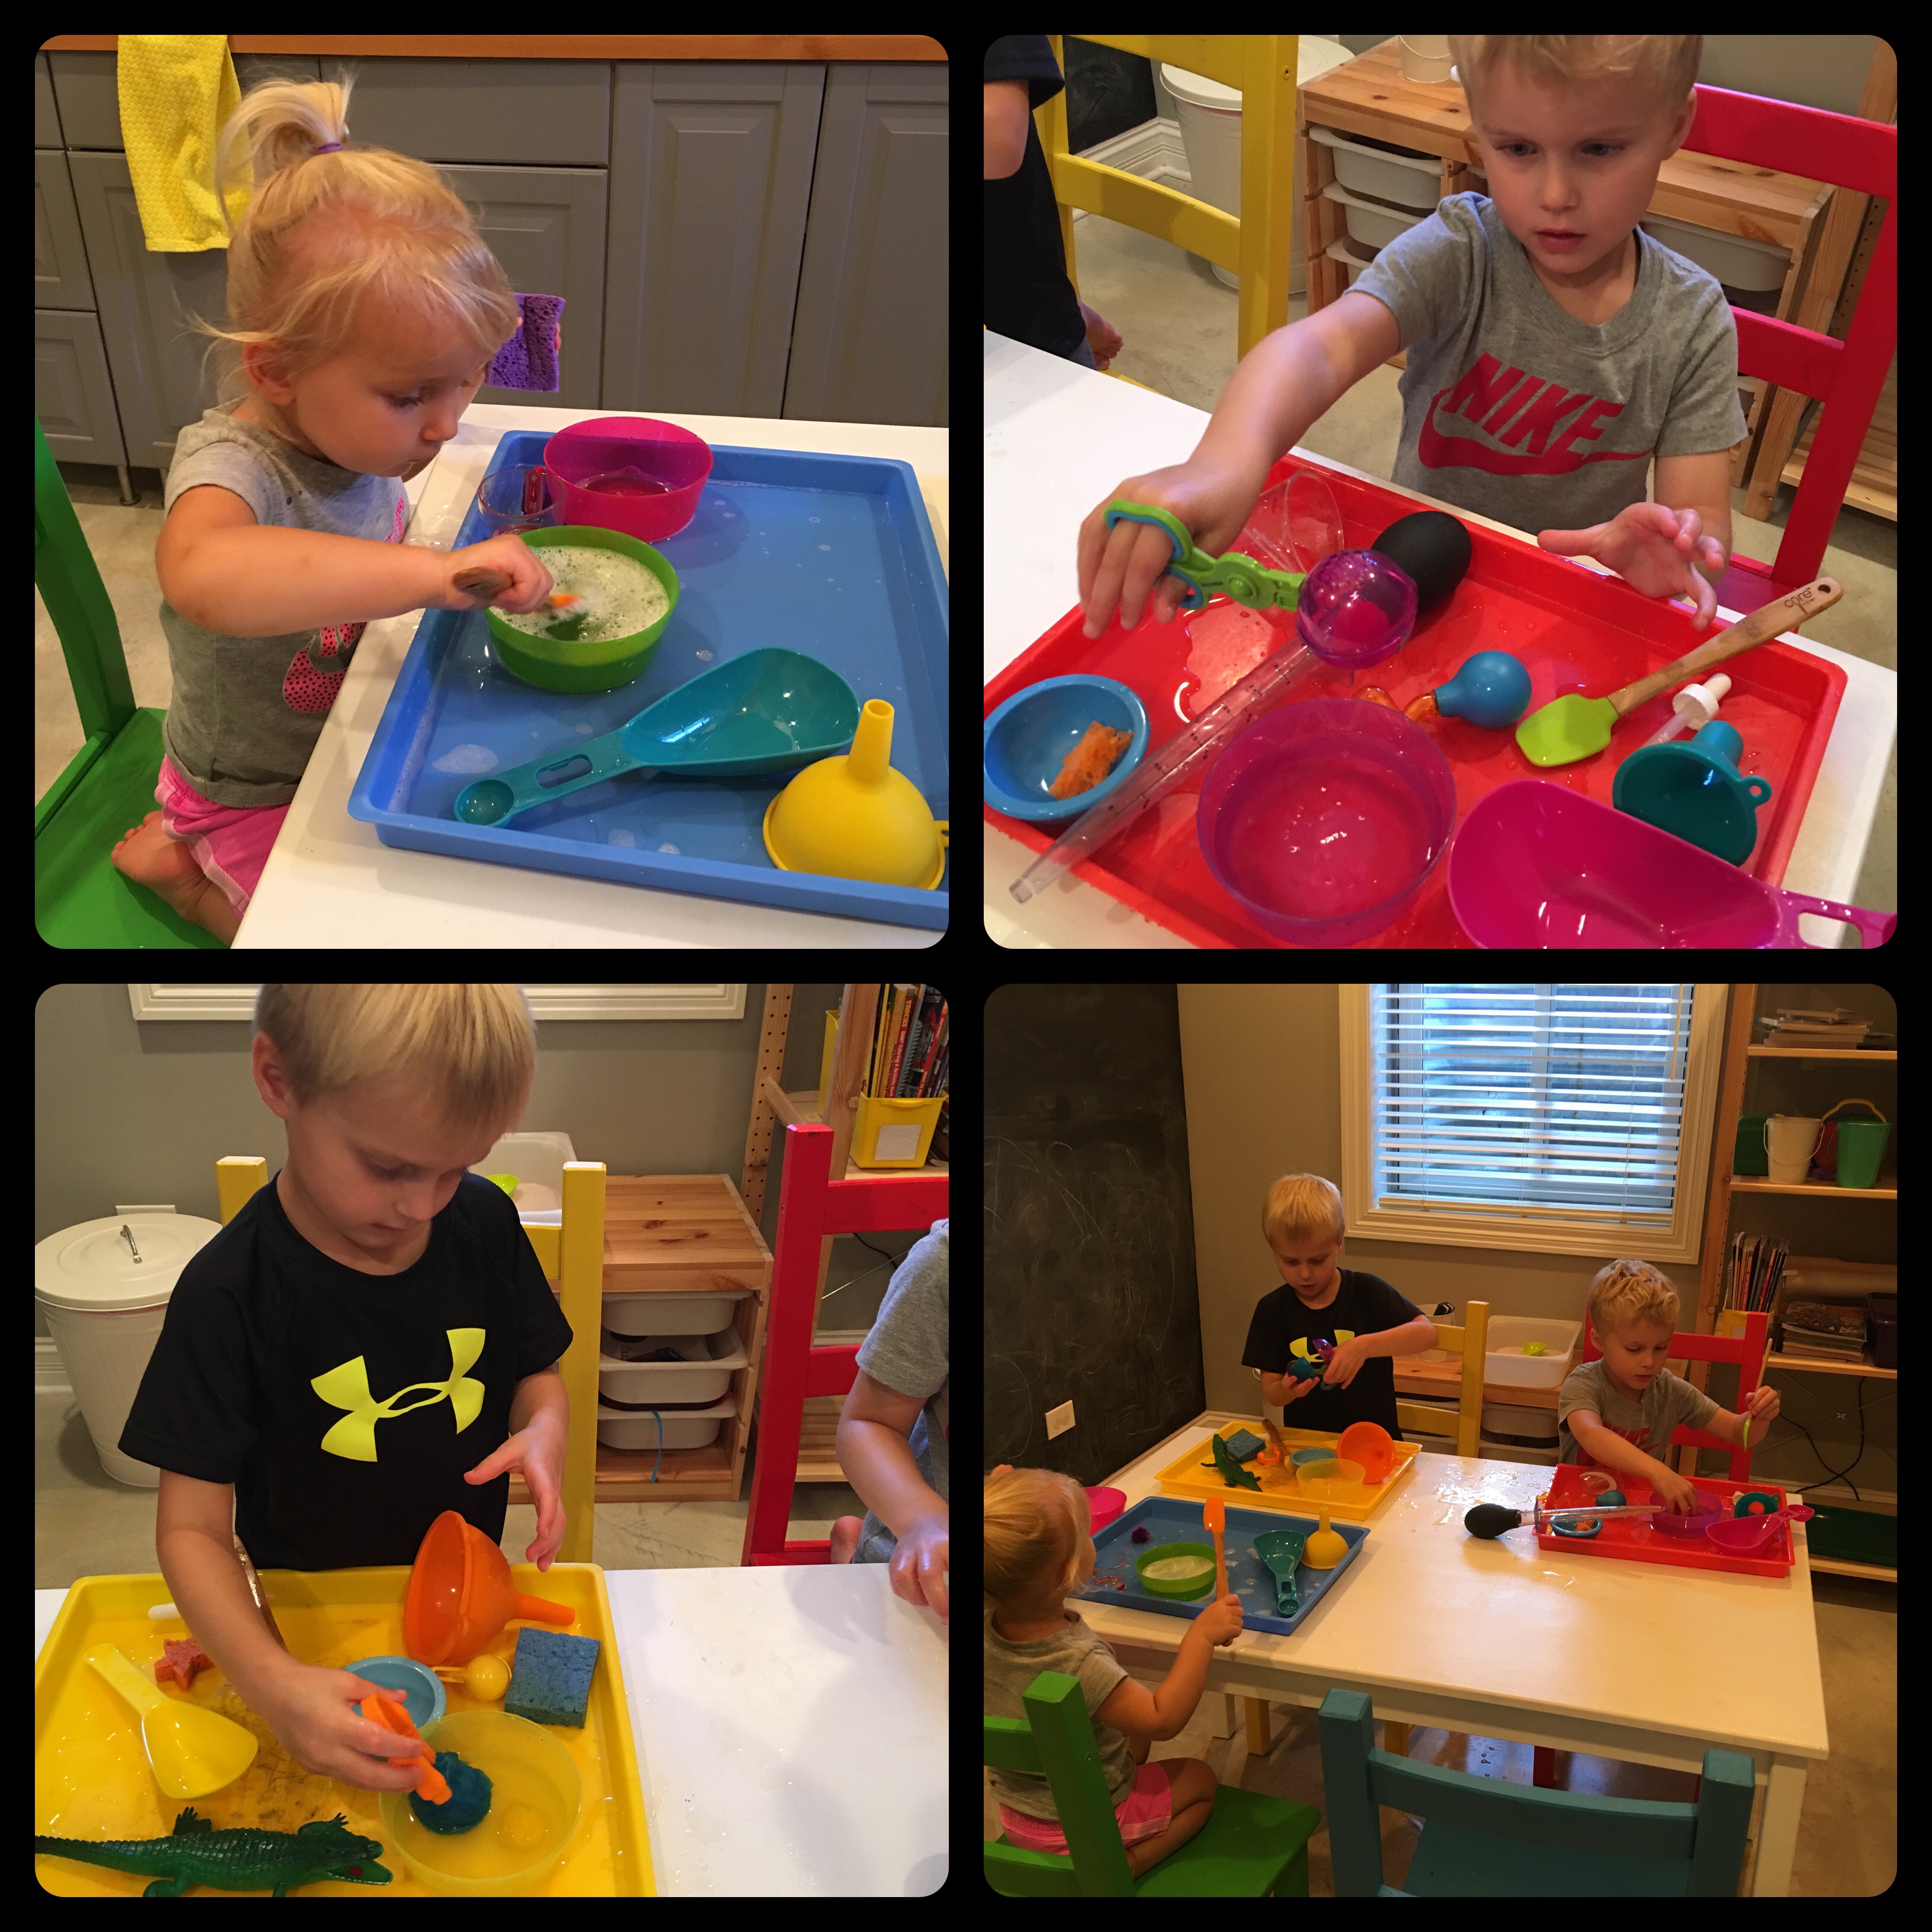
Another go-to activity of mine, indoors or out… Using kitchen utensils, sponges, and a Fine Motor Tools Set, transferring water becomes endless hours of fun.


10. Putting out Fires

Putting out Fires
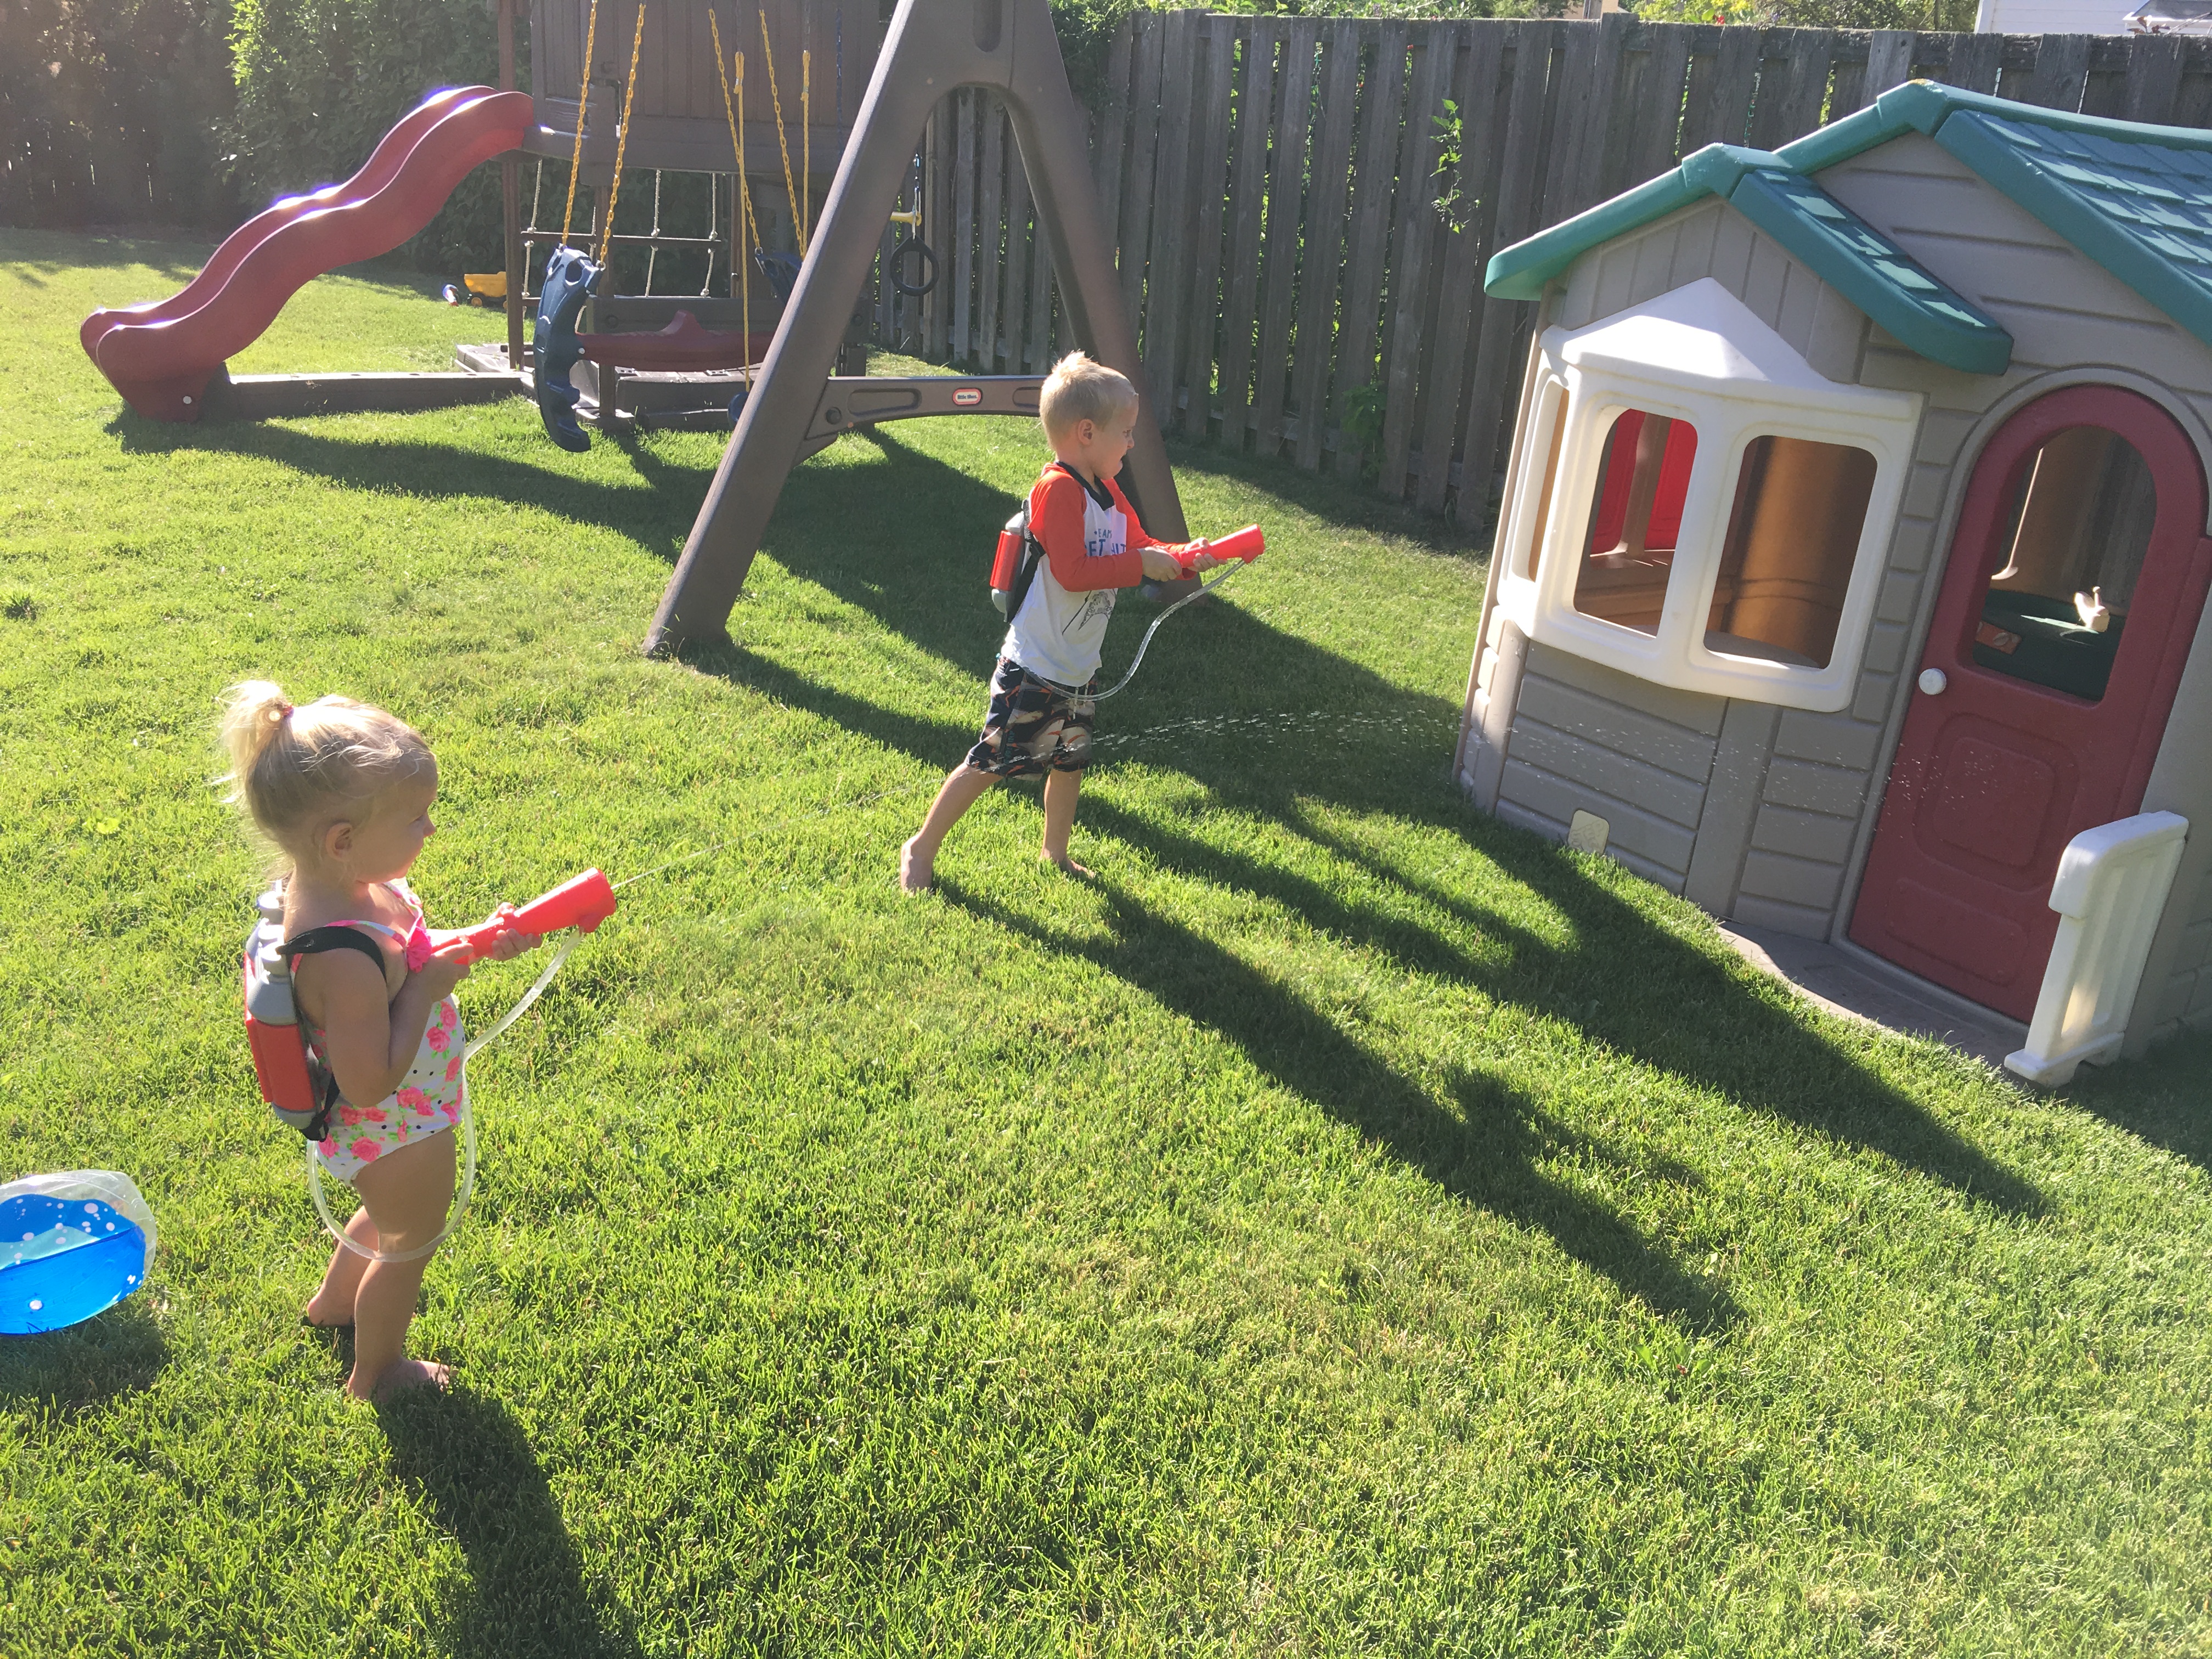
Off in imagination land, the kids love to pretend their toy house in our backyard is on fire and they help put it out with the hose, buckets of water, and/or their Paw Patrol Water Backpack.

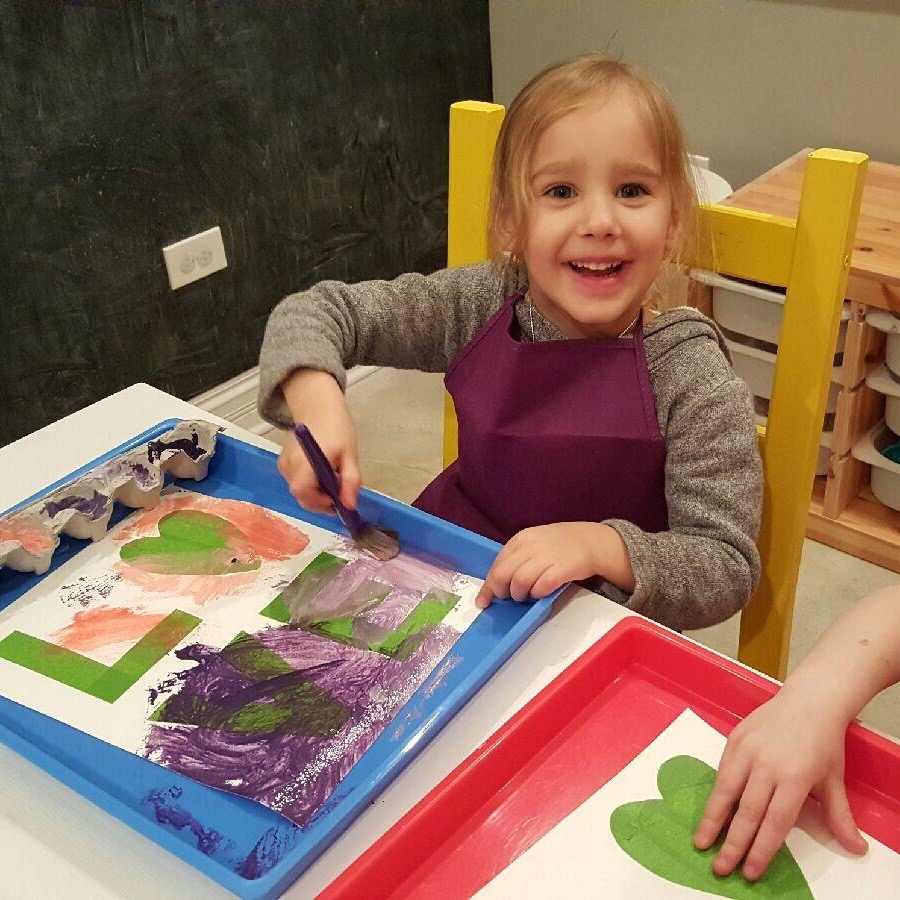
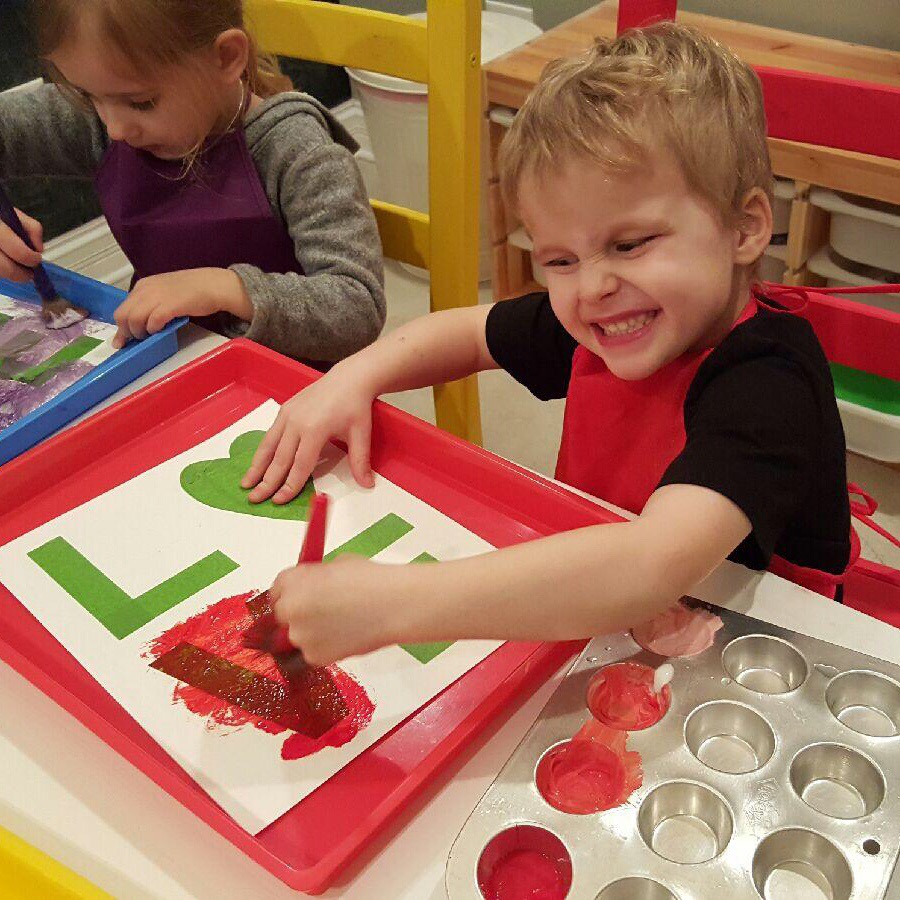
Thanks for visiting my blog! For more fun ideas, follow me on Pinterest and Facebook… and now I’ll leave you with this adorably happy face…

IMG_7385


Save

Bunny Silhouette Painting

Bunny Silhouette Painting

With Easter right around the corner, I decided to create bunny silhouette paintings with the kids. A great way to kick-off spring, and capture the beautiful upcoming season.

I started by printing out a bunny silhouette from Clip Art Queen on card stock, then cut along the edge with an x-acto blade (not including the tail), and taped the stencil to a blank sheet of paper. I mixed pastel pink, blue and yellow onto a tray for the kids, then they painted over the stencil using a sponge and/or their hands.  After removing the stencil, their paintings looked pretty adorable as-is. But for a little extra fun and individuality – we added a tail, eyes, a nose, and mouth… I’m not sure what it is with kids and googly eyes, but they can’t get enough!

The kids enjoyed this craft enough that I’ll definitely try it again with other silhouettes. A fun craft for all ages!

Tape Resistant Valentine Painting 

My niece, Brynn is a huge fan of our art room and loves when I have projects planned. I knew she was coming over so, with Valentine’s Day around the corner, I prepared a craft to be given as a Valentine’s gift for the grandparents (They are in the mail, Papa and Nana!)… We created tape resistant paintings – a great way to let toddlers slosh paint around, channeling their inner artist, while ending up with a beautifully unique masterpiece every time!

STEP ONE: Apply painter’s tape to paper (I highly recommend using Frog Tape – This product has consistently outperformed all other brands I’ve tried).

STEP TWO: Put on a smile.

STEP THREE: Paint to your heart’s content. 

STEP FOUR: Peel off painter’s tape and appreciate the masterpiece!Tape Resistant Valentine Painting

“Love of beauty is taste. The creation of beauty is art.” -Ralph Waldo Emerson

Tape Resistant Valentine Painting - Projects In Parenting

Constellation Sticker Craft

Constellation Sticker Craft - projectsinparenting

All things outer space has been a huge interest of the boys lately. They enjoy star gazing, identifying planets in the sky, and were thrilled to see the Super Blood Moon this past summer.

12032754_10153476110412415_9065535462831191832_o

Although it would be amazing if the moon were really that huge, it’s enlarged for effect  🙂

Jacob’s favorite thing to wear are his constellation pajama pants (as seen above) and he’s always asking us to point out the Big Dipper, especially after reading Touch the Brightest Star – one of his favorite interactive books, where you trace the Big and Little Dipper with your finger as part of the story. (Great book for any toddler’s bed time collection!)

I wanted a fun way to teach them the basic constellations, and ones that are easy to spot in the sky, so I came up with the following craft worksheets…

Big Dipper WorksheetLittle Dipper WorksheetCassiopeia WorksheetCygnus Worksheet

LeoPegasusOrion WorksheetCepheusGemini

Click on individual worksheet above for FREE printable, or HERE for pdf with ALL Worksheets.

First I had the boys place star stickers on the grey dots, then using the picture as reference, draw lines to create each constellation.

image1(2)

image2

After learning the constellations, the boys got creative with their worksheets – connecting the dots without stickers, outlining the constellation in all star stickers, putting other stars in the sky, tracing the letters to spell the constellations, etc. I enjoy watching them explore whatever materials I give them. It’s fun when they think outside the box and come up with new ways to do things… A great hands-on way to learn while using imagination and creativity!

image3.PNG

“Don’t wait for the stars to align. Reach up, rearrange them the way you want them to be. Create your own constellation.” – Pharrell Williams

Save

Save

Save

DIY Milk Bottle Holiday Candy Gift

I’ve always thought Mason jar gifts are super cute, so I wanted to create something similar for the boys’ teachers this year. I decided to steer clear of any gifts that give the gifted a task – such as “here are some ingredients,  now go bake cookies!”… Let’s be real, if a teacher is on “break” that last thing I’d want to do is give her something that requires additional work . That said, I chose the traditional route of candy. Most everyone loves chocolate, right?

I included the following festive assortment:

  • Holiday M&Ms
  • Kit Kat Holiday Assortment
  • Andes Mints
  • Lindor Milk Chocolate Truffles
  • Soft Mint Candy

I found these adorable plastic milk bottles at Jo-Ann Fabric for 1/2 off (Score!). They have since sold out, however you can find similar ones HERE on Amazon. Two of the teachers have preschool aged children as well, so I thought they might be interested in re-using the milk bottles. I bought one for myself as well, and plan on using it for “Santa’s Milk” to be left out on Christmas Eve with the cookies.

DSC_0003

I’m usually not a fan of puns, but I came up with this “sweet” saying for the tag, so decided to run with it…


The boys helped me fill the milk bottles with candy, and signed the back of the tags with their name (Note: Leaving the straw in the bottle while stuffing the candy in, avoids you from having to stab through the candy pile later)… Hopefully their teachers enjoy the candy as much as we enjoyed the pieces we taste-tested (for quality purposes of course).

DSC_0005

Follow me on Pinterest, for more fun ideas!

“Chocolate comes from cocoa… which is a tree.

That makes it a plant.

Chocolate is salad.”

Stained Glass Sun Catcher Ornament

‘Tis the season for Christmas crafts!

Stained Glass Ornament 2

We decided to make these beautiful sun catcher ornaments, to look like stained glass. They make great window decorations and help set the mood for the season. A super-easy, no-mess craft, perfect for all ages!

1st a little prep-work to get the project ready…

Microsoft Word - Document3

Click HERE for free printable.

Print this ornament shape (provided above), ideally on card stock, and cut out the CENTER of the ornament frame with an X-Acto knife or scissors.

DSC_0003

Prepare colored tissue paper by cutting them into squares, strips and/or shapes. For toddlers, squares are perfect. For older kids, shapes would give them the opportunity to experiment with more complex designs (Example: A star in the center with stripes in the background, etc.)… NOTE: I separated the tissue paper squares into coordinating cup colors for easy selection. I’m not pointing this out to show how overly organized I can be, I’m sharing this to display one of the MANY ways I’ve re-purposed the cups provided in our Easter egg dying kit. Great items to save and reuse!

DSC_0009

Adhere a piece of contact paper to the FRONT of your pre-cut ornament print-out, covering the entire ornament frame. Lay the paper down, sticky side up, onto a table.  (I ran out of contact paper and discovered that clear packaging tape works as a wonderful substitute!) Now it’s time for your little artist(s) to decorate their ornaments. Have them select their tissue paper pieces, and press them down onto the contact paper.

DSC_0024

When your ornament decorating is complete, seal the back with another piece of clear contact paper. Trim around the outside of your ornament frame and tape or hang your masterpiece in a window to enjoy the beautiful stained glass colors!
Stained Glass Ornament
Follow me on Pinterest, for more fun ideas!
“People are like stained glass windows. They sparkle and shine when the sun is out, but when the darkness sets in, their true beauty is revealed only if there is a light from within.” – Elisabeth Kubler Ross

Fall Leaf Lantern

While it can be difficult saying goodbye to long sunny days of summer, there are several things that help me embrace fall with open arms: sweater weather, boots, apple picking, Halloween, pumpkin spice, and of course the beautiful foliage. Thank you autumn, for one of nature’s best free kid toys – leaves! To bring some of these enchanting colors indoors, I decided to create fall leaf lanterns with the kids.

DIY Fall Leaf Lantern Kids Craft - projectsinparenting.com

SUPPLIES:
– Cardboard Goldfish Carton (or 1/2 Gallon Milk Carton)
– Box Cutter and/or Scissors
– Flameless Candle
– Contact Paper
– Hole Puncher
– String
– White Duct Tape (Optional)

INSTRUCTIONS:

Step 1: Collect leaves.Fall Leaf Lantern - projectsinparenting.com

Step 2: Using a box cutter, cut 4 rectangular sections out of each side of the carton.Fall Leaf Lantern - projectsinparenting.com

Step 3: (Optional) Use white Duct Tape to cover print on the carton.Fall Leaf Lantern - projectsinparenting.com

Step 4: Using scissors, cut contact paper into 8 rectangles that are just larger than the sections cut out of the cartons (my rectangles were 10×15 squares).Fall Leaf Lantern - projectsinparenting.com

Step 5: Adhere contact paper rectangle, sticky side out, onto the inside of each side of the carton and reinforce sections by taping each inside edge and corner.Fall Leaf Lantern - projectsinparenting.com

Step 7: Gently press leaves on each side of the carton’s contact paper sections.Fall Leaf Lantern - projectsinparenting.com

Step 8: Use remaining 4 sections of contact paper to cover each side of the carton, holding leaves onto the lantern.Fall Leaf Lantern - projectsinparenting.com

Step 9: Hole punch top of carton and tie string as a handle for the lantern. Create Duct Tape tab to hold lantern top closed.Fall Leaf Lantern - projectsinparenting.com

Step 10: Insert flameless candle.Fall Leaf Lantern - projectsinparenting.com

DIY Fall Leaf Lantern Kids Craft - projectsinparenting.com

Follow me on Pinterest, for more fun ideas!

Room on the Broom Inspired Scavenger Hunt

Room on the Broom Inspired Scavenger Hunt

A family friend bought us a copy of Room on the Broom last year and the boys could not get enough. They wanted to read it over and over again – for MONTHS!! And they still love to read it. The book is extremely clever with captivating illustrations and super catchy rhymes. Since they loved the book so much, I also purchased the DVD (which is AMAZING as well – and great for bringing imagination to life). If you don’t own this book, I highly recommend adding it to your personal library.

room-on-the-broom

As we read the story or watch the DVD, the boys love pretending to throw items into the cauldron (lily, cone, stick, bone). Sometimes they come up with their own ingredients (acorns, leaves, etc.). I was looking at our Halloween candy bowl (which happens to be a witches cauldron) and came up with the idea for an activity to engage them in the story even more…

I created scavenger hunt cards with cauldron ingredients, printed them on card stock, and cut them out.

Download FREE Printable HERE.

Note: I chose the strength of card stock and reinforcement of laminating them with contact paper because Avery crumpled up the 1st set I printed on regular paper (which the boys were not very happy about) . I’m sure older children would handle regular paper or card stock just fine.

I then placed the scavenger hunt cards face down, onto a table, next to the witches cauldron. The boys took turns selecting a card, then running off to gather their ingredients (which were scattered on the ground or hidden in a separate room)… Great for burning off the incessant toddler energy!

DSC_0052

They tossed their ingredients into the cauldron and stirred them well…

Room on the Broom inspired scavenger hunt - Stir Cauldron

Room on the Broom inspired scavenger hunt - Stir Cauldron

For a fun twist on the game, I gave them each a glow stick wand (found at the dollar store)…

DSC_0092

…and had them find their items in the dark using the wand.

Room on the Broom inspired scavenger hunt - in the dark

Room on the Broom inspired scavenger hunt - in the dark

IGGITY, ZIGGITY, ZAGGITY, ZOOM!!!… Out rose 3 happy toddlers, entertained for hours!

Room on the Broom inspired scavenger hunt - Iggity Ziggity Zaggity Zoom

Follow me on Pinterest, for more fun ideas!

Project: 1st Blog Post

Meet the Goofballs:

Meet Jacob Avery & Evan

Jacob (left) – Enthusiastic and strong willed 3-year-old who’s favorite activity is making coffee for mom and dad.

Avery (center) – Sweet and silly firecracker of a 1-year-old who loves to play with rocks.

Evan (right) – Playfully clever and caring 3-year-old who has the memory of an elephant.

Lucky Parents of These Adorable Children:

166417_479089897414_4819274_n

Cory (aka Dad – although the boys sometimes like to call him “Lex Luthor” when they want to be chased down by an evil villain) and myself (aka Julie/Mom).

Realistic Family Portrait:

11134038_10153091378237415_3938401930556693602_o

Pretty much sums up my experience of being a parent.

A little about me and why I decided to start a blog:

I exited Corporate America three years ago to take on the self-appointed assignment of raising my kids full-time. I’m not a fan of calling myself a “stay-at-home mom”, as I feel it discredits my regular expeditions with 3 kids in tow, so I’ll call myself an “occupational mom”.

Walking away from my career was a huge adjustment for me. I found myself managing motherhood similar to a job – goal driven, ambitious, organized and detail oriented. This may sound rigorous, but I guess it’s a little (or a lot) of my Type A personality coming through. Thankfully I have a creative and adaptable nature that seems to balance me out a bit. In the end, I’m glad I decided to stop working because I love being able to experience every little moment of my children’s lives with them – the good, the bad and the unbelievably chaotic.

As if raising three kids isn’t time consuming enough, I tend to keep myself extra busy with little things I like to call “projects” (going back to my business roots, it seems like a natural term to use). Whether it’s homemade Halloween costumes, photo books, seasonal crafts, organizing fundraisers, or remodeling our basement. We also just started the process of building a new home to be closer to our family – because the current 15 minute commute just isn’t close enough! 😉

I wanted to start this blog as a creative outlet to post some of my artsy projects. I thought it would be a great way to keep friends and family up to date on some of our adventures, as well as share fun ideas for kid crafts/activities, creative ways to document life with photography, and general DIY projects. I should also mention that, by no means do I consider myself a writer, so please excuse any incorrect punctuation or lack for brilliant and witty literature. Either way, I hope you enjoy my blog and maybe even find some inspiration for a parenting project of your own!

“Creativity is contagious, pass it on.” – Albert Einstein